<= Back to previous section "Create a Branch"
When last we left Paul, he was working in the branch p1test. Now he is going to close his branch, open the Trunk and merge his changed files down to the Trunk. If you were playing Paul before, you may still have his branch open. If not, skip to this step.
Continue reading below break...
Ads by Google
Posted by ellen at October 15, 2009 06:16 PM
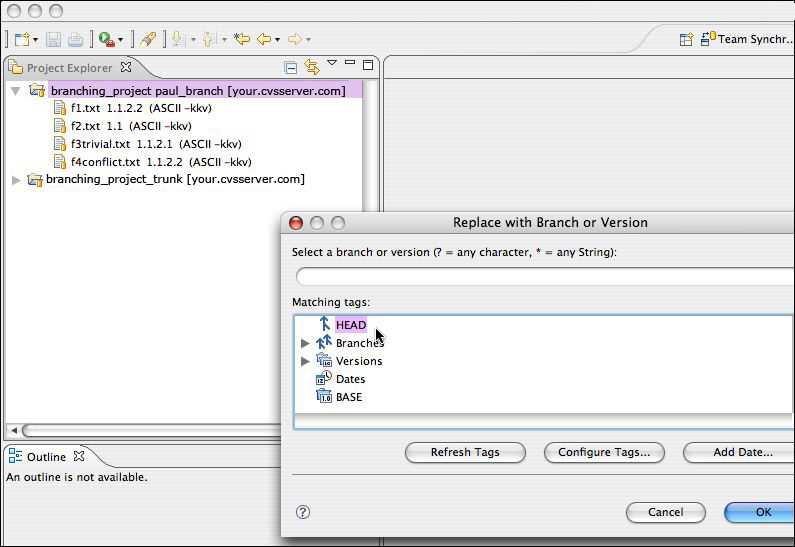
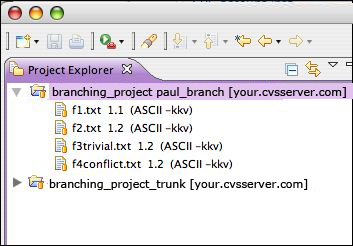
- Expand the folder containing this branch. The changes Paul made in this folder have all been committed to CVS under the branch so they are completely backed up. So we can replace them with the Trunk version of the files and start merging Paul's changes back in to the Trunk.
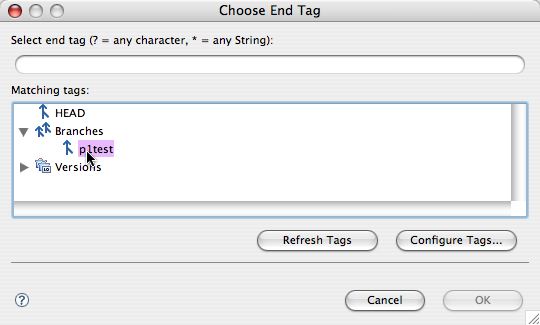
- Right-click the folder containing p1test and select Replace with Another Branch or Version...
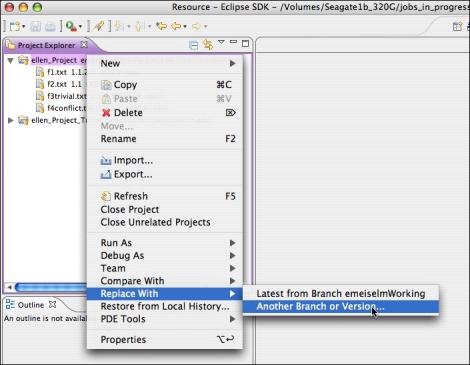
- Select HEAD and click OK.
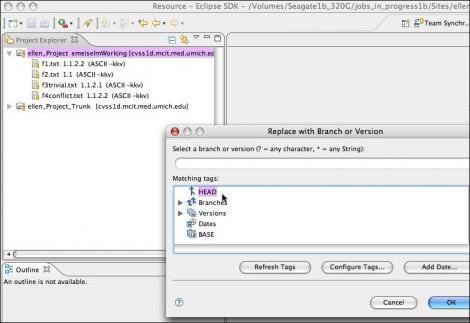
- The branch name should no longer appear to the right of the project name.
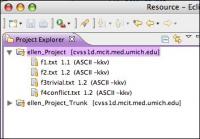
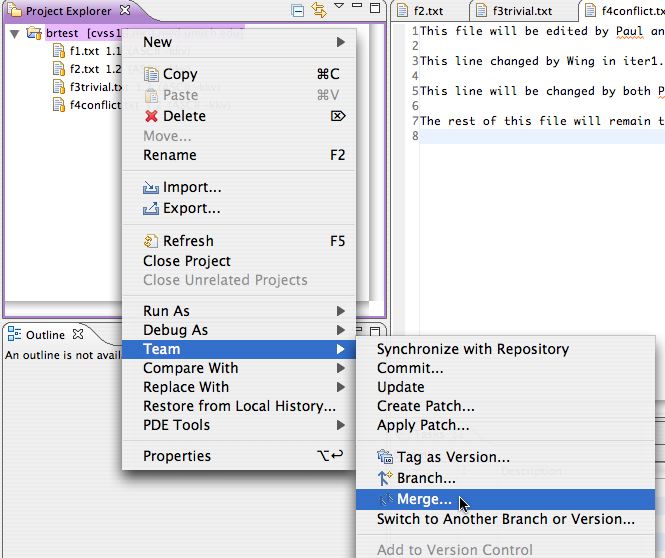
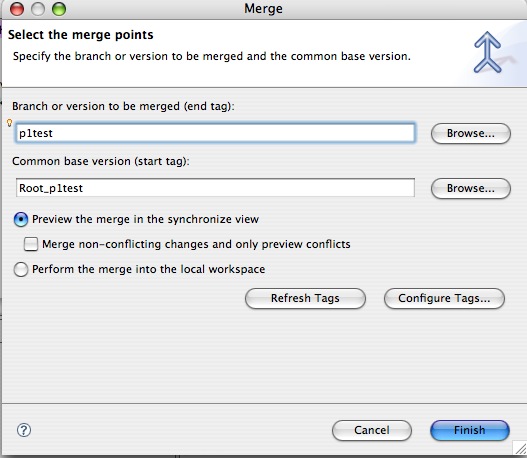
- You are now working in the Trunk. Right-click on the project folder and select Team>Merge....
- Click Browse next to Branch or version to be merged. Choose p1test.
- It will try to guess the common base version for you. In this case it will guess correctly: Root_p1test. It will use the file versions tagged with Root_p1test to determine what has changed since then. So you can see why it is important to tag your files at milestones - it is one way to have control over exactly what gets merged. You can restrict merges to specific intervals, keeping them as small as necessary, and not have to re-merge old changes.
Leave Merge non-conflicting changes and only preview conflicts unchecked. Click Finish.
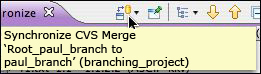
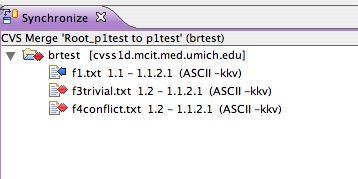
- It will now ask you to Synchronize. Files which have been changed by Paul in the branch since Root_p1test will display different arrow icons depending on whether they conflict or not with the changes Wing has made in the Trunk. Blue arrows mean non-conflicting changes; red arrows indicate conflicts.
Take a look at the buttons available in Synchronize mode. The blue and red arrow buttons are filters. Clicking the blue-arrow button will show incoming changes. Clicking the red arrow will show only the conflicts. For more on the Merge Synchronization view, see this page


If you aren't sure what you are doing, you can mouse over the Synchronize button to see the name of the Merge and the name of the source of the changes.
 You'll notice that f2.txt is NOT shown, and that's because Paul never edited that file - only Wing did, in the Trunk.
f1.text was ONLY edited by Paul, so that will not conflict with the version in the Trunk.
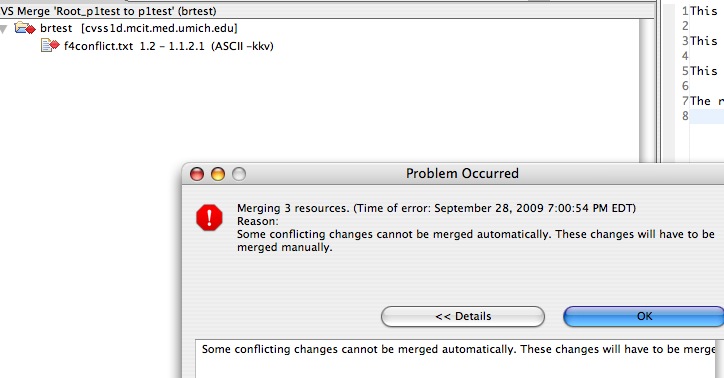
- Now we'll have CVS automatically merge any files it is able to. Right-click on the brtest folder and select Merge. CVS will attempt to resolve simple conflicts on its own, but will ask for help when things get complicated. f3trivial.txt can be fixed automatically, because Paul and Wing edited lines 3 and 9, respectively. Although both made changes to the file, the changes were not to the same lines, so CVS makes the assumption that they do not really conflict. (This may not be correct, so if you want to be VERY careful, you can do all the merges yourself.)
f4conflict.txt DOES have conflicting changes on the same line (3) so you need to step in. You will see this message, since we did not check "Merge non-conflicting changes and only preview conflicts" when we selected merge points. Click OK.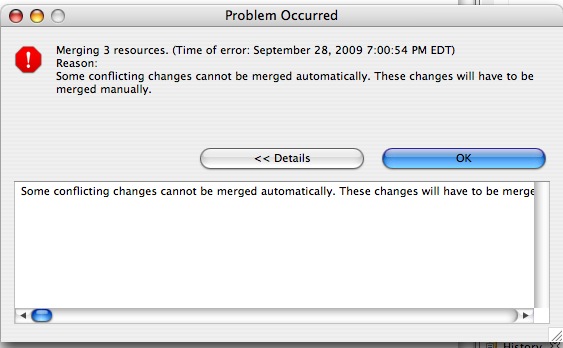
- You'll see the remaining conflicting file in the Synchronize View. To resolve the conflicts, double-click f4conflict.txt to open the Compare editor of the merge tool.
- Line 3 of the local file (on the left) will say "This line changed by Wing in iter1." Line 3 of the remote (repository) file will say "This line changed by Paul in iter 1." Resolve the conflict by changing Line 3 of the Local file to "This line changed by Paul and Wing in iter 1." Right-click in the Local side, and select Save.
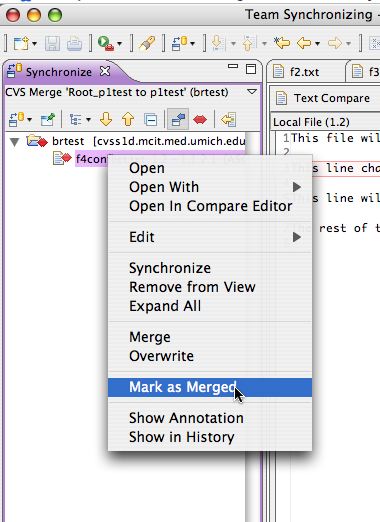
Since this was not a trivial merge, the color red was used to display the areas that need work. Blue would be used to denote trival merges. Resolving code conflicts can take some thought - that's why CVS is asking for human help.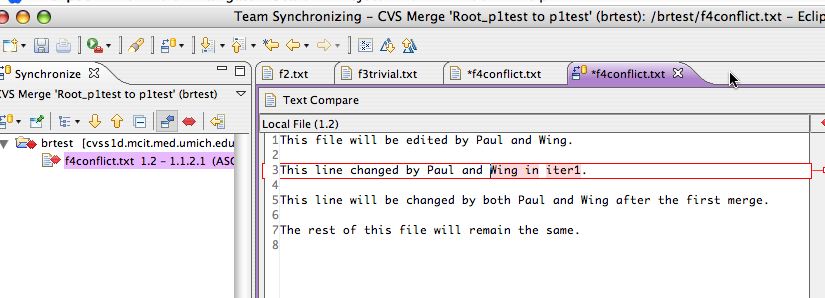
- Even after the save, the entry in the conflict editor and the red arrow icon will remain red. This is because, as far as Eclipse knows, there is still a conflict, albeit with some extra changes. To inform Eclipse that the conflict is resolved, right-click the file in the Synchronize view and select Mark as Merged.
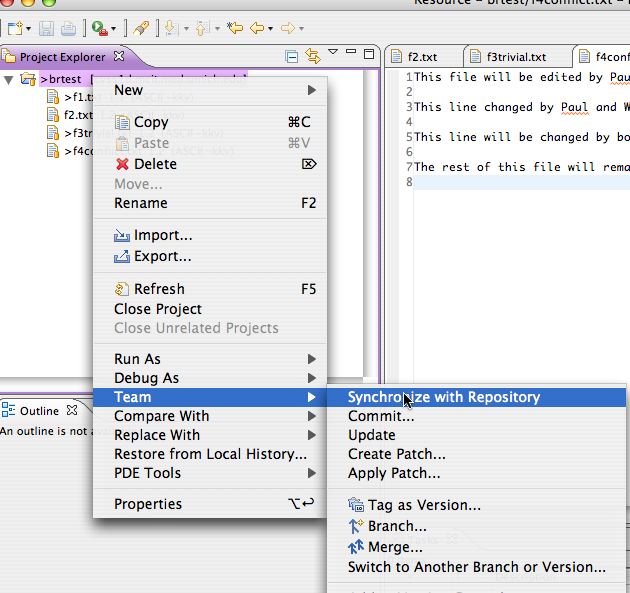
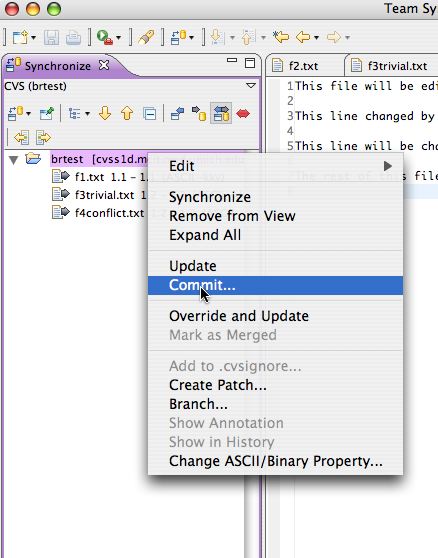
- At this point, the merged version only exists in the local workspace. Commit it to the CVS repository by right-clicking the brtest project folder in the Project Explorer view, and select Team > Synchronize with Repository.
- These changes should not present any conflicts: all the arrows are gray, indicating simple one-way changes. Right-click on the brtest folder again, and select Commit...
- Add a comment as shown.

- Tag the result as WM1: Right click the brtest folder, select Team >Tag as Version

- Enter the tag WM1
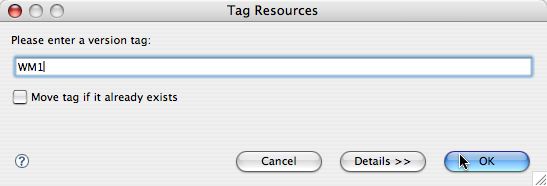
- You may view and select from existing tags by clicking Details>>. After the tag you just created, the list should look like this.

- At this point, we are here in the scenario diagram:

- To review what we've accomplished so far, let's look at the History panel. Right-click f4conflict.txt in the Project Explorer and select Team > Show History.
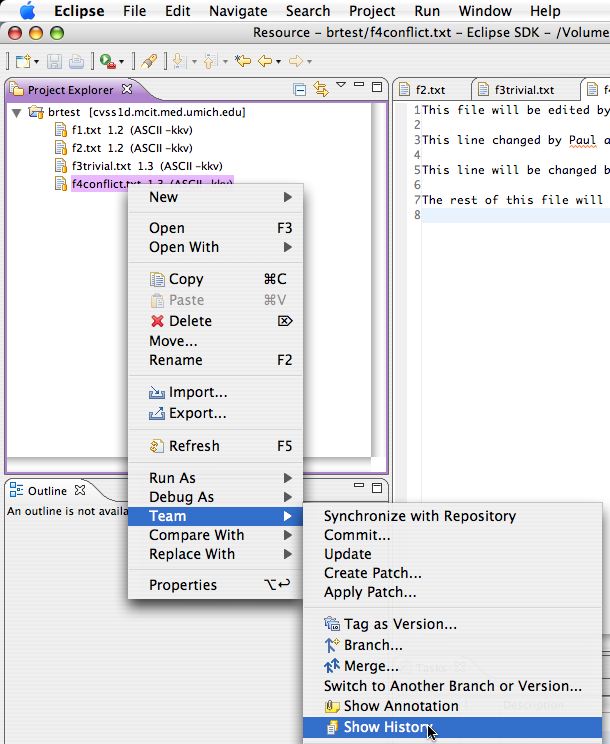
- We can see that the Root_p1test tag is assigned to revision 1.1, the initial version. This means "Branch 1, version 1). Branch 1 is the main branch or Trunk.
Paul's change ("First iteration changes made by Paul") were assigned to revision 1.1.2.1, or Branch 2, version 1 of the main branch, version 1.1. Wing made changes that were committed to the main branch. Finally, the merge resulted in revision 1.3, which was tagged for posterity with the label WM1.

NOTE: This section of the Eclipse CVS tutorial is based on Paul Glezen's article on the Eclipse website: Branching with Eclipse and CVS, and is used with his permission under the terms of the EPL license. The changes I am making to his version are mainly to expand it with more step by step images and explanations, and integrate it with my own beginner tutorials in an attempt to make it more accessible to beginners and designers. Experienced developers will probably prefer to work from Paul's version.
Ads by Google

Bullet 9: Should say, file f4conflicts.... instead of f4trivial...
Thanks
Fixed!
Giga AKS said:
Bullet 9: Should say, file f4conflicts.... instead of f4trivial...
Thanks
nice tutorial
Thank you !
I was trying to do it the wrong way, exactly the opposite !
This tutorial is very clear.