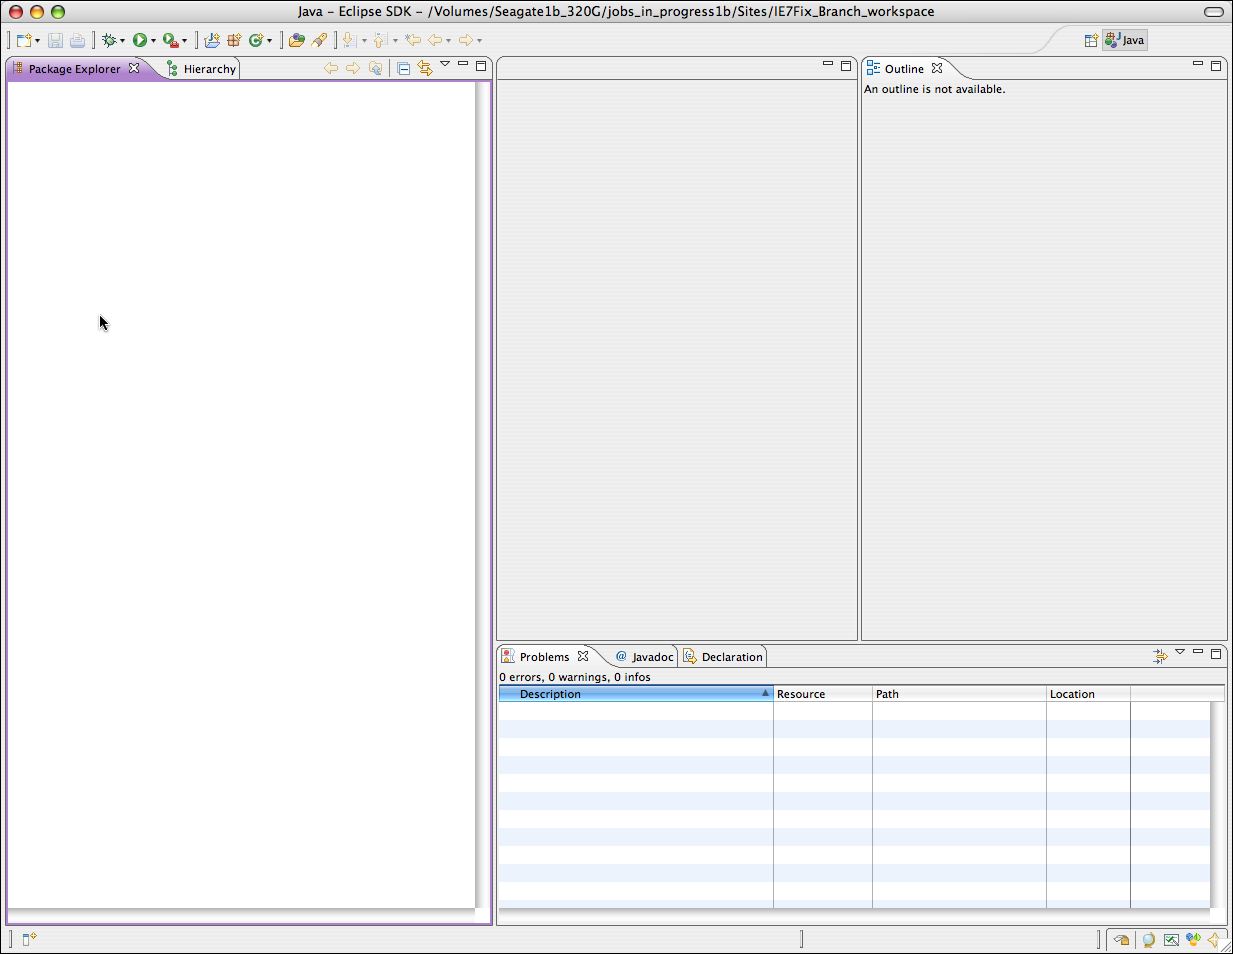
Eclipse can be used for many types of development tasks. As a result the interface is almost infinitely customizable. This can be confusing. When you first open it, you will probably see only functions related to Java development, as shown below:
Continue reading below break...
Ads by Google
Posted by ellen at September 15, 2009 05:37 PM
(click image to enlarge)
If you are not developing Java applications, but want to use CVS primarily to manage a website or web application you may want to rearrange the interface to better suit your purposes. What follows is an example of setting Eclipse up to manage an ASP/HTML web application.
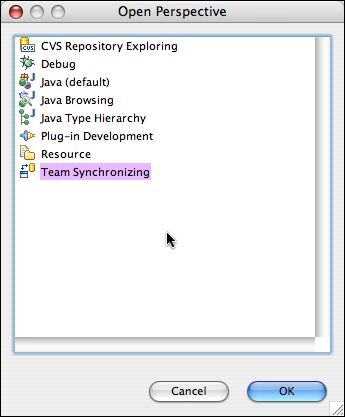
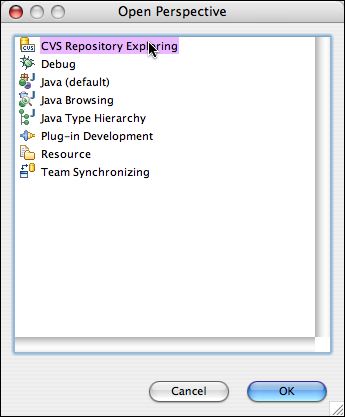
- Eclipse uses the word "Perspective" to describe a layout of panes in the Eclipse window that is geared to providing a specific type of functionality. There are perspectives for editing and debugging Java, for managing resources and assets of any type, for viewing the contents of a CVS repository and for synchronizing local resources with the CVS repository. We will be opening the CVS Repository, Team Synchronizing, and Resource perspectives.
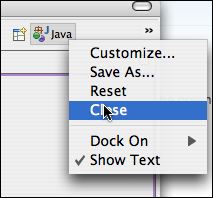
- First we'll remove the Java button by right-clicking it and selecting Close.
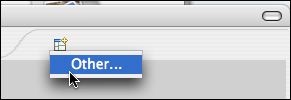
- Click the
 icon, and select "Other" from the dropdown menu.
- Select Resource from the list and click OK.
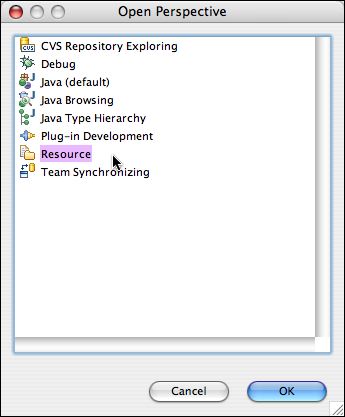
- Repeat with Team Synchronizing and CVS Repository Exploring.
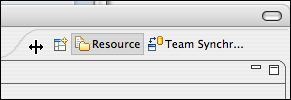
- The correct buttons will appear on the tab.

- To make more room for your links, click in a blank area on the tab (cursor will change to the one shown) and drag toward the left to enlarge it.
You may of course create your own perspectives to better suit your needs:
- Open an existing perspective that is closest to what you will want, and modify it by adding, closing or moving the views (panes) around in that perspective's window. (Use Window>Show View to open additional views, click on the X in the view's tab to close it).
- Save the new layout by clicking Window > Save Perspective As...
- Type a new name for the new perspective and click OK. The new name will now show up in the Window > Open Perspective menu.
Ads by Google
