Beginning Eclipse CVS – Basics 3: Import an existing set of project files into CVS
<= Back to previous section “Create a Project from Scratch”
- Once you have created a workspace, you need to add files to it somehow. If you already have existing files that you want to use in your project, you’ll need to import them. You can also check out an existing project from CVS or import files from a zip archive, among other possibilities.
Create a new, empty project in your workspace to import the files into: in the Resources Perspective, select New Project from the File menu.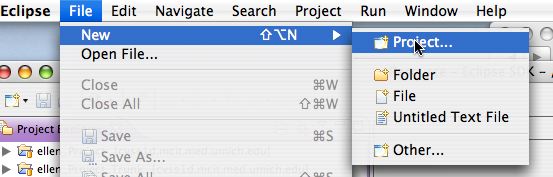
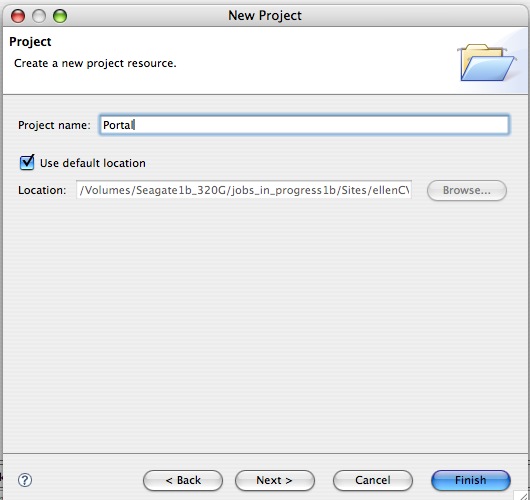
- Enter a project name and leave Use default location checked. It is usually set to the root of your workspace. It is possible to have projects outside the workspace, but it is simpler to have all your projects and files inside a workspace. You can have multiple workspaces, however.
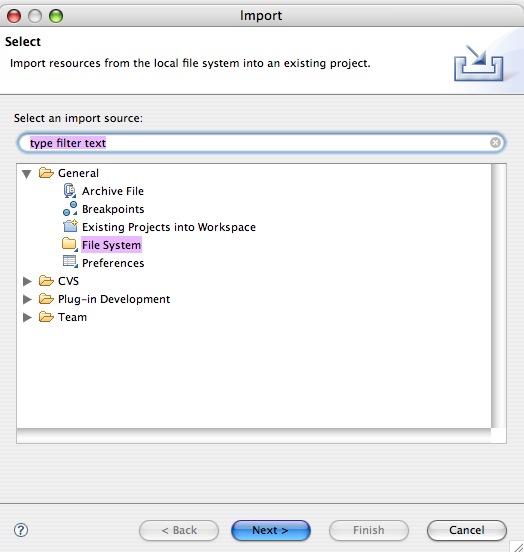
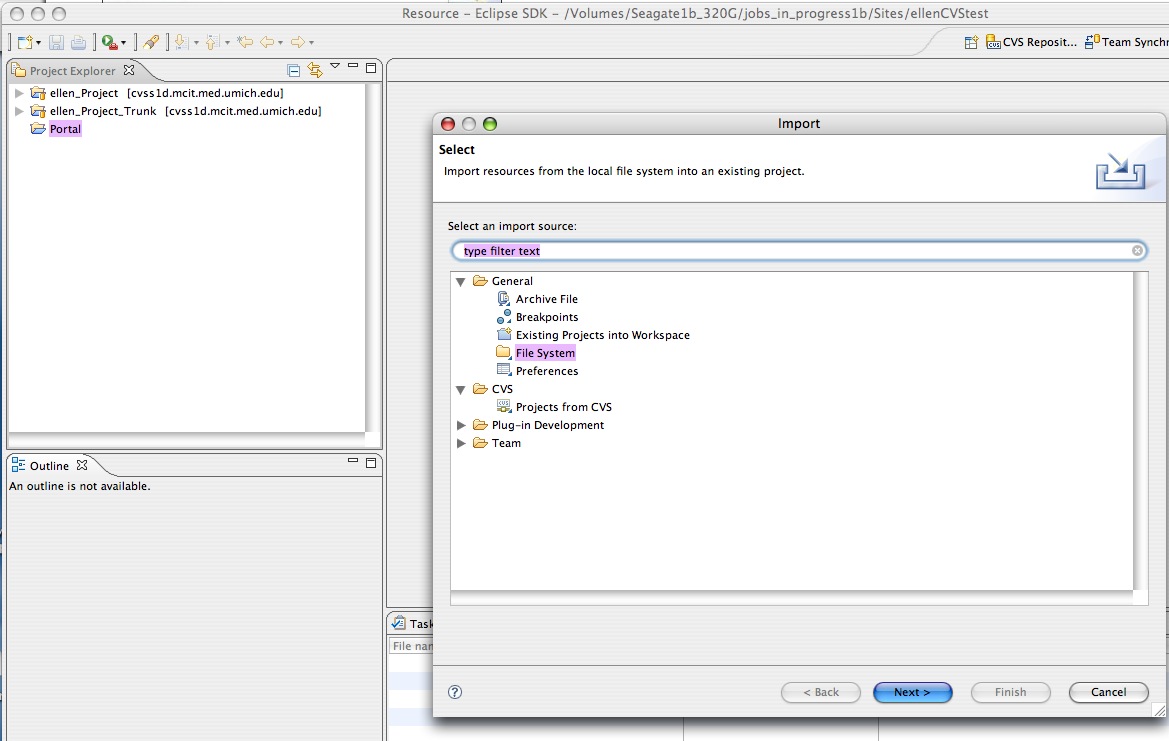
- Select Import from the File menu. The Import dialog will appear.

- Select General : File System.
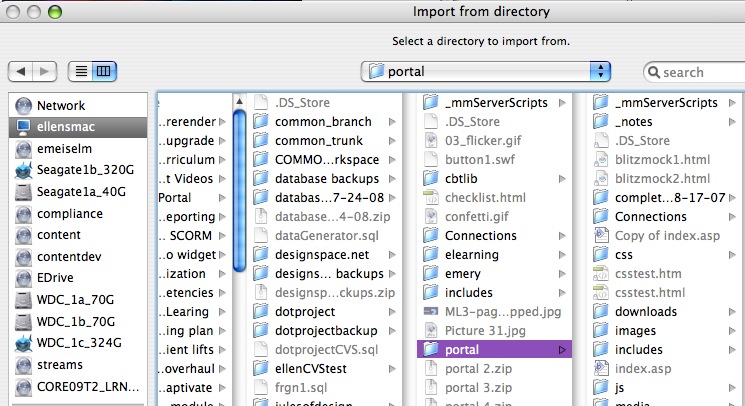
- Browse to the directory containing the files you want to import. Click Choose.
-
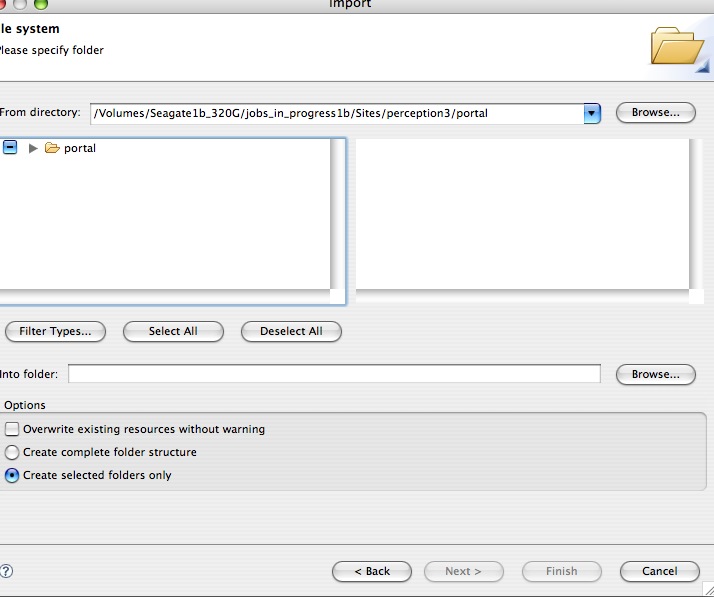
Once you select the directory, you’ll notice this warning:
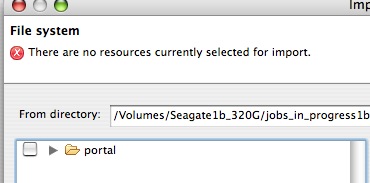
- The warning will disappear when you check the box next to the directory listed. Leave Create selected folders only selected. At this point it is set to import every file and folder within “portal.” If you were to select Create complete folder structure, it would also create the parent folders of “portal.”
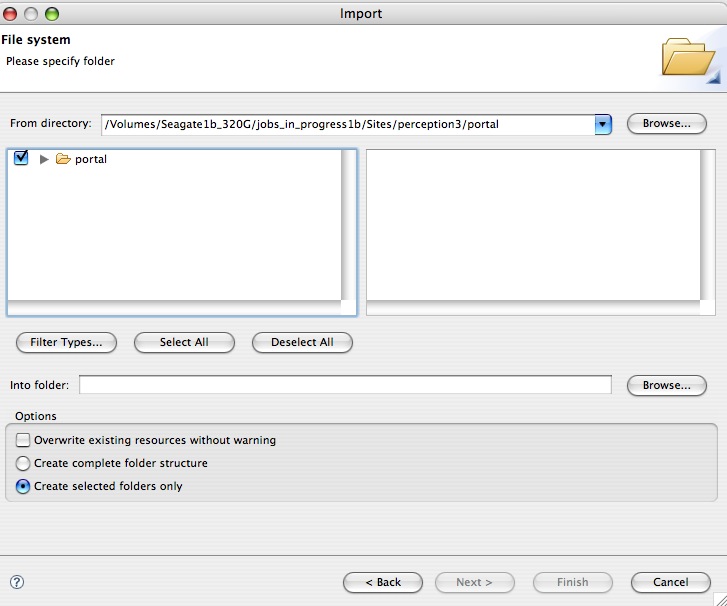
- It is possible to restrict the files that will be imported by type. You can choose from the types listed, or enter your own choices in the Other Extensions box. Use this format:
jpg,gif,png

- If you filter the file types, the check next to the folder name turns to a minus-sign indicating a partial selection has been made.
- The project will appear in your workspace, in Project Explorer.
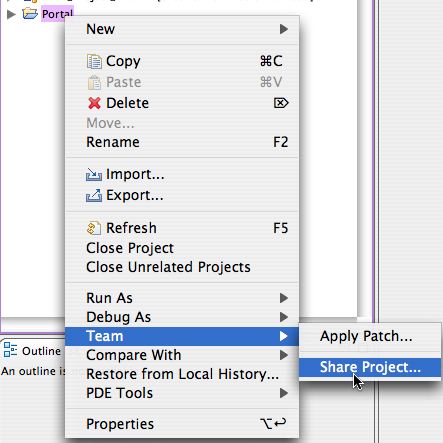
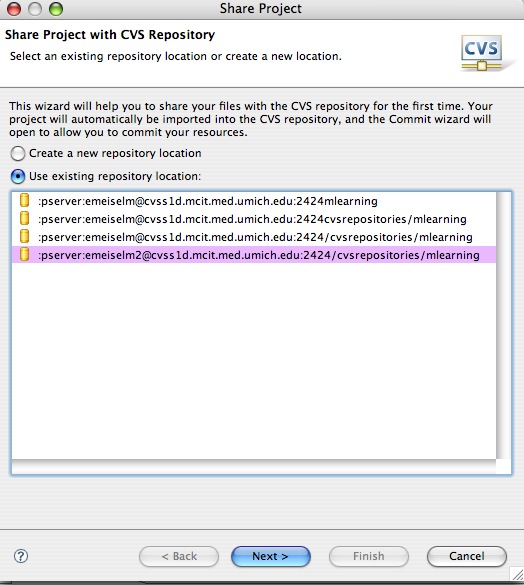
- To add the new project to the CVS repository, right click (Control-click on Mac) the project folder, and select Team : Share Project
- Select the repository you want to use and click Next >
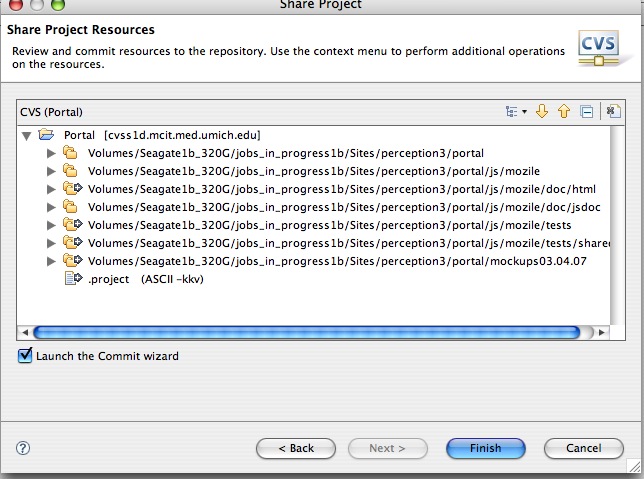
- It will display a list of all resources that have not yet been committed to the repository. Click Finish. It will ask you to enter a comment each time you commit files, so enter “Sharing Project to CVS” or something similar. Click Finish to complete the process.


Continue to next section “Check out a project from CVS” =>