Category: Tutorials

How to publish Powerpoint files for the web

This procedure which will leave you with an original PowerPoint-format (to use in lectures) document, and a web-enabled version:

  1. Create a standard powerpoint presentation. Save it as ProjectName.ppt in the folder you are using for the project. Make sure every slide has a Title. These titles will be used as the titles of the buttons on the left navigation column in your web page. It helps to use a powerpoint template so that you are definitely creating a title with each new slide.
  2. When you are done editing, and ready to make a web version of the presentation, select Save as Webpage from the File menu.
    The Save As dialog comes up.
  3. Navigate to your project folder in the file list area. Double-click on the folder so that it opens and you are working inside it.
  4. Click the CreateNewFolder icon just to the right of the Save in: box. (the icon looks like a folder with a spark on it.)
    A New Folder dialog will pop up. Type learningmodule in the Name box.
  5. Hit OK. You will now be “inside” the learningmodule folder.
  6. Continue reading

Adding Narration to Powerpoint

Preparation:

  1. You will need to purchase a microphone or a headset Microphone. I recommend the Plantronics USB headset mics, LISTED HERE. I use the Plantronics DSP 400, but the less expensive ones work well also.
  2. Find a quiet room, preferably one with no air-conditioning or heating blower hum, and no other ambient noises. If you work in an older building this can be a challenge, enough so you may want to consider doing the recording elsewhere.
  3. Prepare a script for your narration. Run through it once or twice, to eliminate “umms” and “errr’s” in your rendition.
  4. Plug in the microphone, and if you are using Windows, you will also need to install the software that comes with it, and restart. On a Mac, simply plug in the mic, then select System Preferences from the Apple menu or the Dock, select
  5. If you haven’t already, create your Powerpoint slides.
Continue reading

Part 2. Step by Step guide to using Fireworks to create Popup Menus

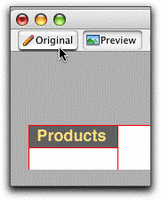
Make the rectangle into a functioning button

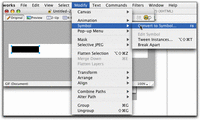
  1. To designate the rectangle as a button, so that it will react when your mouse rolls over it or clicks on it, it needs to be converted to a button symbol. Fireworks button symbols have some functions built in, making it very easy to create the behaviors you want.

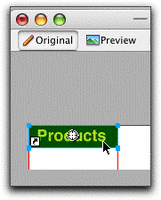
    With the rectangle still selected (the blue handles showing), select “Convert to Symbol” from the Modify menu.

  2. Continue reading

Part 1. Step by Step guide to using Fireworks to create Popup Menus

Many people don’t realize that a tool they already own, Macromedia’s Fireworks, is one of the best for creating buttons, navbars, and especially popup hierarchical menus. Try the steps below to see how easy it is to create customized menus.

Note: this tutorial is geared for beginning web developers, with very little knowledge of HTML.

Before we start, I’ll put in my plea for restraint when using popup menus. As handy as they are, I’ve seen them overused and misused.When incorporating these menus into your design, keep them brief and closely related to the button topic they are associated with so that your users can EASILY guess what might be under each topic. If you find yourself making huge lists of popup menus with many submenus, consider reorganizing your navigation scheme. Flatten it so that it is more easily scanned, either as a whole, or in sections. Perhaps use a site map, or table of contents at the start of each section of your site.

Continue reading

2 Caption Templates for MS Producer

If you purchase the MS Producer resource disk available here HERE you will find it contains an example of a Captioned Video template, along with this white paper captioning in Producer (MS Word format)

I found the one captioning template on the CD (captioned video with fixed-size slides) was a good beginning but quickly realized I needed several others. I made two more, which can be downloaded below. To use these templates, unzip them, and put the entire folders into the Producer templates directory on your C drive.
Within Producer, they will show up within the Templates area as:

“Standard Captioned Audio – Resizable Slides” Download Zip File (36K)
and “Standard Captioned Video (320×240) – Resizable Slides” Download Zip File (36K))

Continue reading

Create Database-Driven Sites the Easy Way with GoLive 6

PHP/MySQL for the rest of us!
(originally published Spring, 2002)

Intro:
Designers now have a new tool to help them create php/mySQL-based
dynamic sites using without a steep learning curve. It is now
almost as easy to create a simple database-driven site as an html-based
one. Adobe’s GoLive 6 has improved their dynamic link module and
completely integrated it into the application. It now includes
php/mySQL support and plenty of help and templates for creating
your first database-driven website.

  • Why make a dynamic
    site?
  • Getting
    started.
  • How to talk
    to MySQL without a Ph.D.
  • Setting
    up the site in GoLive.
  • Adding Dynamic
    Content to your page.
  • Continue reading

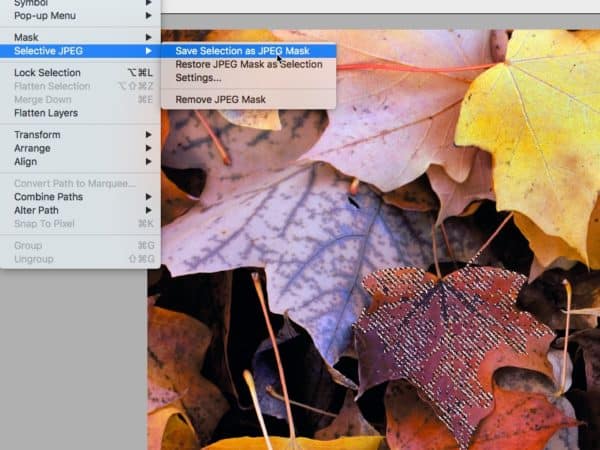
    Selective JPEG compression in Photoshop

    Despite the prevalence of high-speed connections these days, there are times when it is necessary to keep page-download times short. Some target audiences still primarily use dial-up systems.

    I had just such a project when designing a home-page for a hospital site. A large percentage of visitors to the site have old computers and slow dial-up connections. A typical user is a middle-aged woman searching for health information for either her parents or children, and usually using a modem. We did not want slow page load time to discourage these visitors from getting the information they came for. Our goal was to get the load time for the home page to under 10 seconds.

    The problem was, the home page is content-heavy and features a large photo of hospital volunteers welcoming you into the hospital atrium.

    Continue reading