Creating simple animations in Powerpoint 2002
How can you make a shape or image move across the screen? Follow these steps to create your first motion-path animation in Powerpoint. PC-version required, unfortunately.
How to make a shape move across the screen
Note: this tutorial is written for older versions of powerpoint. The menus and toolbars will be in different locations for the newer versions, but the instructions are basically the same. Powerpoint for the PC is required for this type of motion-path animations, but the steps are similar for using other types of custom animations.
- Make sure the Drawing toolbar is displayed. (View > Toolbars > Drawing)
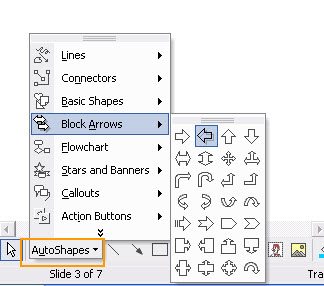
Select Autoshapes > Block Arrows from the Drawing toolbar.
Choose a left-facing arrow as shown.
-
Dragging your cursor from left to right across the lower part of your slide, draw an arrow similar to the one shown.

-
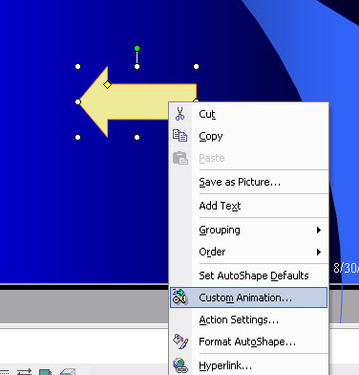
Right click in the middle of your arrow and select "Custom Animation" from the popup menu. The Custom Animation palette will appear.
-
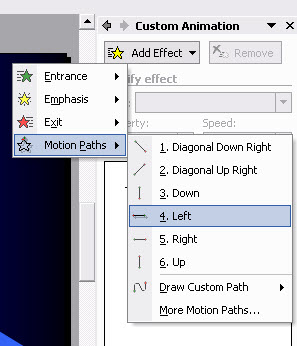
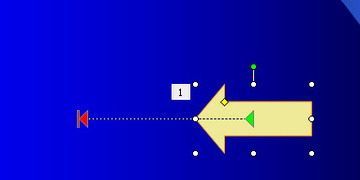
In the Custom Animation palette, select Motion Paths > Leftfrom the Add Effect menu. A motion path dotted line will appear on top of the arrow shape.
-
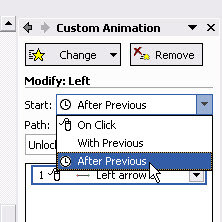
In the Custom Animation palette, select After Previous From the "Start" drop-down menu.
-
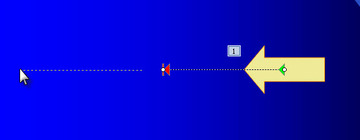
Click on the red arrow on the left side of the motion path. Be careful to just select the red arrow, or the entire line will move when you drag your cursor.
-
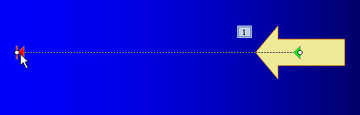
Drag the red arrow to the left side of the slide. Preview the slide to see your animation!
-