Powerpoint and video
Successfully incorporating video clips into powerpoint isn’t hard, but the process will go more smoothly if you consider how the presentation will be delivered before inserting the video file. This tutorial is mainly oriented toward the PC version of powerpoint, and Windows Media Player, although I may add notes on the Mac version and Quicktime soon.
Let’s go over some possible scenarios:
Scenario 1. You create and present the powerpoint presentation on your own laptop.
If the .ppt file is not going to be moved from its current position on the laptop, you only have to ensure that the video clip actually resides on your laptop, so that it will be available when you are giving the presentation.
So before inserting the video file, make sure that it is indeed on the C drive, or more simply, in whatever folder the powerpoint presentation is in, and not on a networked drive somewhere. This may seem obvious, but I’ve found that many users are not at all clear on what drives they are using.
The important thing to remember is: Powerpoint only inserts a pointer to the clip into the presentation. The pointer specifies the path to the current position of the clip, relative to the powerpoint file. This pointer will NOT be updated if the presentation file or the video file are moved. Powerpoint will continue looking for the file in a location it can no longer reach. Easiest solution: start with the video file in the same folder as the powerpoint, THEN insert it into the presentations, then move both files into the same folder on the laptop
Scenario 2. You develop the powerpoint on your desktop computer and move it to a laptop or CD:

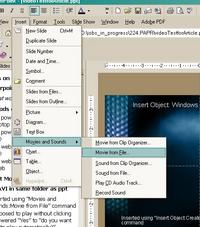
Use the "Insert Movies and Sounds" command.
For the same reasons as above, before inserting the video clip into your Powerpoint presentation, move it to the same directory as the powerpoint file, or at least to a relative path that you can duplicate on the laptop. Windows does not keep track of changing file locations, and will not be able to find the clip if it does not remain in the same relative location to the Presentation as when it was inserted. When you move the presentation over to the lapto, be sure to move the video clip as well, into the same folder again, or to the same relative path.
Scenario 3. You develop the powerpoint on one computer, then move it to the web.
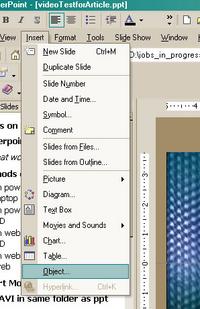
Use the "Insert:Object:Create New: Windows Media Player" command
You will probably need to put the video clip on a streaming server if a lot of people will be viewing the presentation at once. However, you can’t use the standard "Insert: Movies and Sounds" command for a streaming file. You need to insert a Windows Media Player object, which can be set to point to either streaming or non-streaming files. To use this player, select Insert:Object: Create New: Windows Media Player. Once the player appears on the slide, right click it, select "Properties" from the popup menu, and in the space next to "URL" type in the URL (mms://your.streaming.server.com) of the streaming file, OR type in the URL of the .asx file that points to the streaming file.
