An Actionscript 3 Drag and Drop Medical Treasure Hunt Game
This game is a framework to create a simulation of a crash cart in a hospital. A crash cart is a red metal tool cart with 6 drawers, filled with the items used by the Cardiac Arrest team to save people’s lives when they have a cardiac arrest. Speed is of the essence in an arrest, so the people on the team need to know exactly where each item is in the drawers. The goal of this game is to help train team members to find the items they need.
An item to be found is randomly chosen, and the player clicks on a drawer and looks through the items to find the one they are looking for. When it is found, they drag the item to the target (which will probably be animated and a whole lot cooler looking in the final game. If they get it right, they get positive feedback of some sort and another item is chosen. If not, the item pops back to its last position before the drag and they get another chance to find the correct item.
Still to be added, a lot of graphics, additional animations around clicking the drawers, additional feedback, target animations, a preloader, etc., etc. The game is in a very rough graphical state at the moment with the graphics mostly represented by placeholders. However, all the functions are in place and the code can be used to build your own custom treasure-hunt style game. To customize the look of the game to meet your own requirements, follow the instructions below.
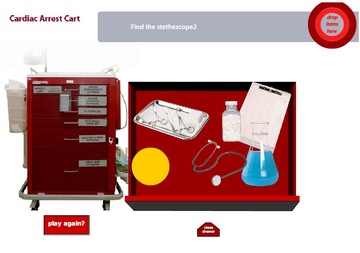
When the game opens, it will ask for an item (use the XML file listed below as a cheat sheet). Click a drawer, it will open, and drag an item to the target. If it is correct, you’ll get a “You Got it” message.
Instructions for customizing the game
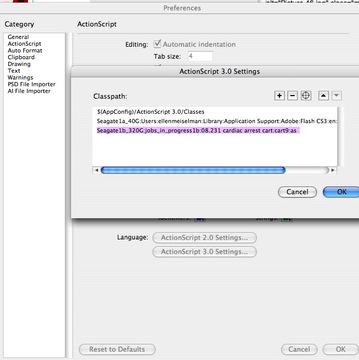
- Add the as files in the as folder to your classpath settings:
-
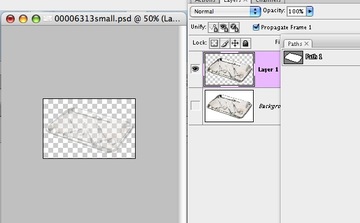
To finish each drawer, create Photoshop files with one item on each transparent layer. You can have more than one item per layer, but each needs to be outlined, on a transparent background.
- Open one of the FLA files inside the “drawers” folder.
- Import the items
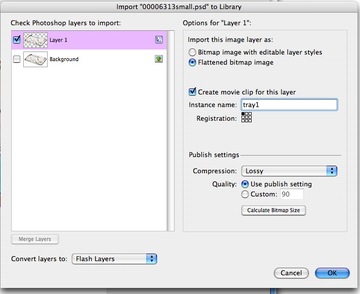
Double click the drawer symbol so that you are editing inside the symbol.Import the psd file to the stage with as a Flattened bitmap image. Select “Convert layers to Flash Layers.” For each layer, create a movie clip instance, and name it. This name is what you will enter into the drawers.xml file.
- Arrange the items
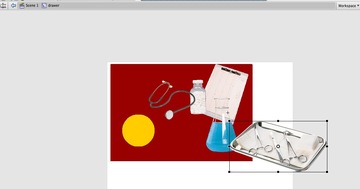
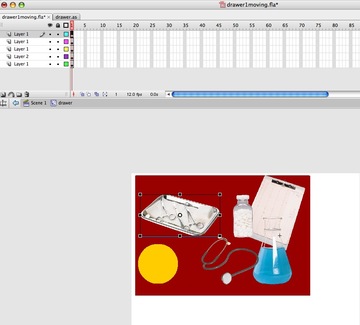
Position the items in the drawer. You can put items on different layers in the timeline so they overlap each other correctly. When they are picked up by the user, they will jump up to the top layer, so items will not be dragged behind each other.
- Once you have put all the items into place in the drawer, select “Test Movie” from the Control menu. (Command-enter, on a Mac). This will create a newly compile swf in the drawers folder. You may get a permissions error in the output window as this movie plays, but just ignore it. It has to do with the fact that the movie is loading an xml file from the desktop.
- List all the items
Now you will need to list all the items in all the drawers in the “xml/drawers.xml” file. The display name that shows up in the tooltips goes in the “name” area, and the movieclip instance name goes in between the item tags.<?xml version="1.0" encoding="UTF-8"?> <drawers> <drawer title="drawer1" name="Drawer 1"> <items> <item name="Triangle 1">myTriangle1</item> <item name="Circle 1">myCircle1</item> <item name="Square 1">mySquare1</item> <item name="Stethescope">stethescope2</item> <item name="Flask">flask1</item> <item name="Tray">tray1</item> </items> </drawer> <drawer title="drawer2" name="Drawer 2"> <items> <item name="Triangle 2">myTriangle2</item> <item name="Circle 2">myCircle2</item> <item name="Square 2">mySquare2</item> </items> </drawer> <drawer title="drawer3" name="Drawer 3"> <items> <item name="Triangle 3">myTriangle3</item> <item name="Circle 3">myCircle3</item> <item name="Square 3">mySquare3</item> </items> </drawer> <drawer title="drawer4" name="Drawer 4"> <items> <item name="Triangle 4">myTriangle4</item> <item name="Circle 4">myCircle4</item> <item name="Square 4">mySquare4</item> </items> </drawer> <drawer title="drawer5" name="Drawer 5"> <items> <item name="Triangle 5">myTriangle5</item> <item name="Circle 5">myCircle5</item> <item name="Square 5">mySquare5</item> </items> </drawer> <drawer title="drawer6" name="Drawer 6"> <items> <item name="Triangle 6">myTriangle6</item> <item name="Circle 6">myCircle6</item> <item name="Square 6">mySquare6</item> </items> </drawer> </drawers>
- Tooltips: I’ve included a that generates tooltip hints. If you don’t want to use them, open “drawer.as” and comment out line 154 as shown:
// tt.show( currentItem.parent, currentItemName+" ");
- Note on paths
The main cart swf loads the drawer swfs at runtime, as well as the associated actionscript classes. It looks for those files in specific places, so do not change the arrangement of the files in the cart folder.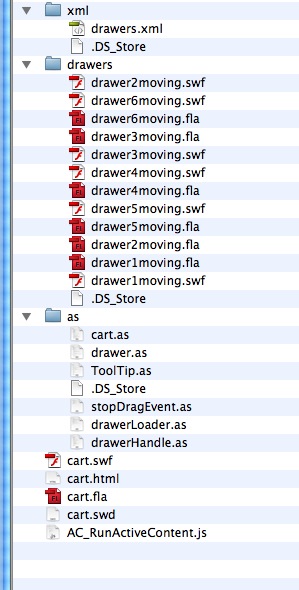
- Playing the game:
When the game is loaded, a message will appear in the gray area asking you to find one of the items. The item is chosen randomly from the drawers.xml file. Click on a drawer to open it, select an item and drag it to the target to see if it is correct. Once you find the correct item, it will immediately ask for another one. If you want it to pick another item, click “Play again”.
Please make sure that the link is working. I can’t download the game.
This is fixed now.
I tried to insert this drag and drop file into captivate 4, but I could get it to work. I didn’t notice any instruction on how to make this file work with captivate.
Am I missing something.
Thanks
Yes, I have never attempted to make this work from within Captivate. This is a stand-alone flash game. I imagine you could get it to work, but at the very least you’d have to be careful to have the actionscript files and graphics in the right paths with respect to the compiled captivate files . This game loads classes and graphics at runtime, so you must have all the files in the right spots, as they are arranged in the zip archive. I’ll add some details about that to the tutorial.
Ellen
You could create this game now in either Captivate 4 or Captivate 5 using the Drag and Drop Lite question widget from Infosemantics.
It sells for just $27.00 USD from this link:
http://www.infosemantics.com.au/catalog/widgets/question/wdgt_dragAndDropLite_AS3
It allows you to use almost any object you can add to a Captivate stage as a drag object or a hit target object, including text captions, images, animations, buttons, and highlight boxes (which make great target areas).
—–