December 27, 2010
Fix certificate issues on IE8
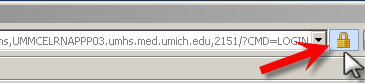
Our LMS users sometimes have problems accessing SCORM learning activities. These days, when all other possible causes (java not installed, security settings, etc.) have been eliminated, the next most likely culprit is an expired certificate. The JAVA adaptor used by our LMS is very particular about security, and fails with various silent exceptions if the certificates aren't in order.- To fix this, you'll need to install the new, valid certificate and remove the expired one. Navigate to the problem website, and click the padlock icon next to the location bar.
- A window will appear with the Certificate Authority (in this case, "VeriSign Class 3 Primary CA") and the site name. Click the View Certificates link.
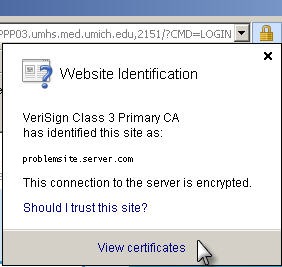
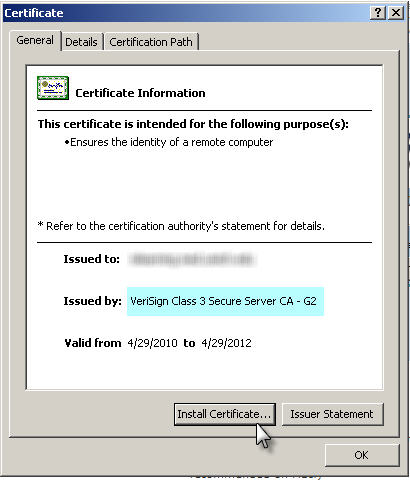
- Note the "Issued by:" name. You will need this information later, to find the expired certificate. Click Install Certificate.
If you find that you are missing the "Import button" or the "Delete" button when trying to Import or install certificates, close all Internet Explorer windows, then right-click the IE icon (the big blue "e") and select "run as administrator".
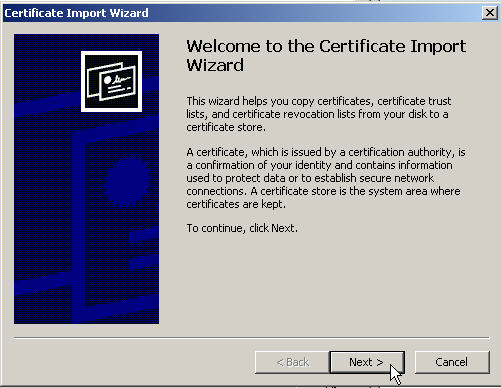
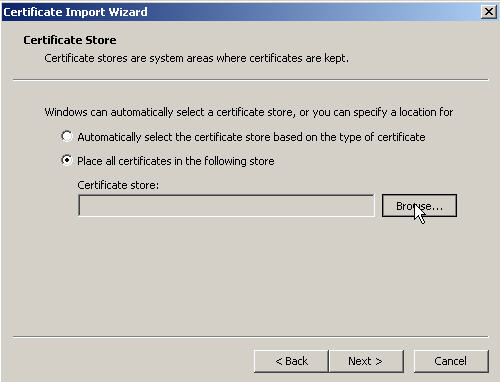
- The Certificate Import Wizard will open. Click Next >.
- Select Place all certificates in the following store, and click Browse...
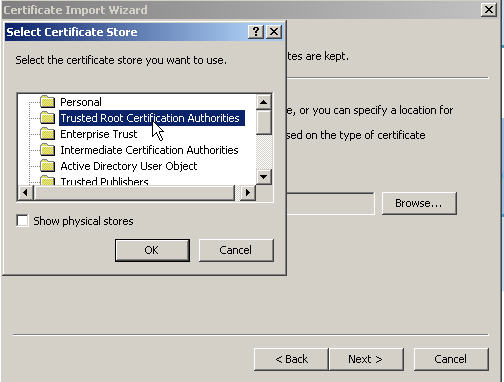
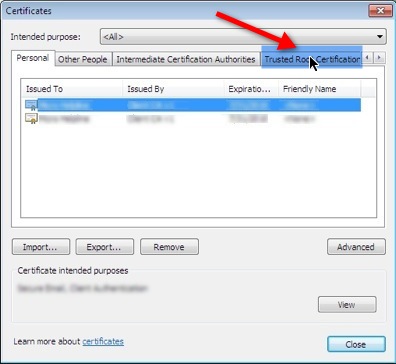
- Select the Trusted Root Certification Authorities certificate store.
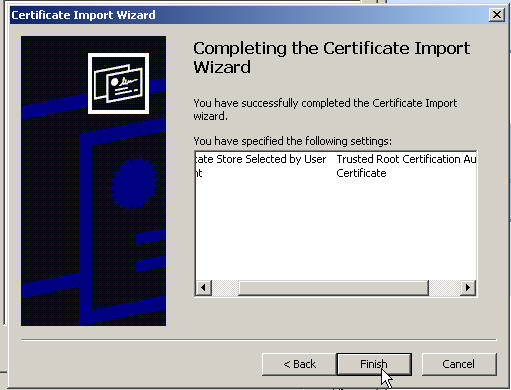
- Click Finish.
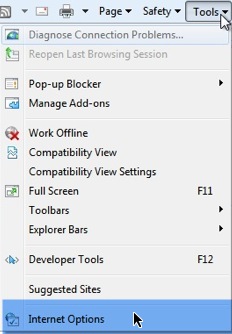
- Now delete the expired certificate. This is necessary because in certain browsers, it can cause problems, even if you have the valid certificate installed as well. In Internet Explorer, open Tools > Internet Options.
- Click the Content tab.
- Click the Certificates button
- Scan through the tabs (chances are, your cert is in the Trusted Root Authorities tab) and look for a certificate that matches the Issued by that you noted earlier, that is expired. If you have a lot of certs, it helps to sort by Expiration Date by clicking the header of that column. Select the old certificate and click Remove. If a warning appears, click Yes to confirm that you want to delete it. If you find that you are missing the "Import button" or the "Delete" button when trying to Import or install certificates, close all Internet Explorer windows, then right-click the IE icon (the big blue "e") and select "run as administrator".
December 25, 2010
FTP and Zip toolkit for Windows users
Most of the users I work with with are unfamiliar with the concepts of FTP transfer or compressed archives, primarily because they never have to use them. These days, there are other options for transferring files than FTP, with a fast network and various cloud sharing services, and documents rarely have to be compressed, even for email purposes.
But occasionally, we run into something that really has to be zipped to get to the destination in working order, or where FTP is the only method available for transfer. So here are some tips and suggestions for those who have never used zip or ftp before.
FTP using Windows Explorer
Probably the easiest way to use ftp on Windows is to use Windows Explorer. Just open a new Explorer window (right-click on Start, select Open Windows Explorer), and enter the server path in the format shown here:
ftp://ftp.servername.com/path/
If a username and password are required, you will be prompted for them.
You can store these locations as shortcuts or as Network locations as described here:
"You can also create shortcuts to Internet locations, such as websites or FTP sites. Here's how to do that:Open Computer by clicking the Start button , and then clicking Computer.
Right-click anywhere in the folder, and then click Add a network location.
Follow the steps in the wizard to add a shortcut to a location on your network, a website, or an FTP site."
--From Create a shortcut to (map) a network drive
More complete explanations of how to use ftp with Windows Internet Explorer and Windows Explorer are available at these sites:
- Microsoft.com: File Transfer Protocol (FTP): frequently asked questions
- How to use FTP via Windows Explorer
- Setting up FTP via Windows Explorer
7zip - a better zipping utility.
Part of the reason for the customary confusion with zipped archives is that WinZip is so incredibly unintuitive. People often double-click on the archive, and then are unaware that the files they are looking at are still zipped. When they try to use them as is, it usually does not work well. If they simply drag them from the window they've opened, they usually lose any folder structure that might have been in the archive. The software is constructed so you usually make the wrong choices by default. WinZip is also limited in the formats it can handle.
7-zip would be my best recommendation for a utility to replace WinZip. It is free, first of all. It can compress and decompress files in several common archive formats. It integrates well with Windows, providing contextual menus just as WinZip does, but is easier to understand.
iPhone "Waiting for Activation" message
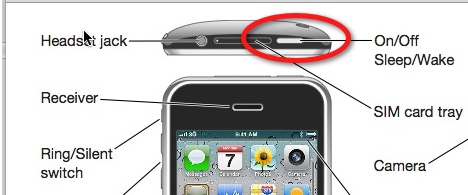
If you have followed all the instructions that come with your new iPhone, only to be faced with a "Waiting for Activation" message that remains unchanged for hours, try powering the phone down completely. Press and hold down the Sleep/Wake button on the top right corner of the phone until the red "slide to power off" slider appears, then slide the slider. To power it up again, press the same button until the Apple logo appears.
December 24, 2010
Settings to get Drupal 7 working on Hostgator
At the moment, Hostgator's default PHP version is v.5.2.4, although version 5.3 is available. Drupal 7 requires 5.3, so until they make it the default, it is necessary to manually tell Drupal where to find PHP v. 5.3. Do this by adding
Action application/x-hg-php53 /cgi-sys/php53
AddType application/x-hg-php53 .php
to an .htaccess file located in the public_html directory of your site. If Drupal is not at the root of your site, and you don't want to change the entire site over, it works just as well to modify the .htaccess file in the Drupal directory.
An .htaccess file is just a text file named ".htacess" which can contain many different types of directives understood by the apache server.
The other setting that may be necessary is to turn on the PDO extension:
Add:
extension=pdo.so
extension=pdo_mysql.so
to a php.ini file in the public_html (or Drupal directory, if it is not at the root of your site).
A php.ini file is a text file named php.ini which can contain many different types of settings to configure PHP on your server.
December 23, 2010
A SCORM-Ready Template: Qualtrics Quizzes - Part 7: Add the quiz to the module
Add an entry for the Qualtrics quiz to the module's page array
- If you aren't familiar with using the pageArray to add pages to your learning module, see Creating the Navigation.
- Copy and paste the sample Qualtrics quiz entry into your pageArray.
{buttonTitle:'Qualtrics test', title:'',url:'qualtricsWrap.htm?href=https://umichumhs.qualtrics.com/SE/?SID=SV_4N65iNij70e29ms',chapter:11,level:1, type:'U', quiz:'2761832350879729', qmax:10 }, - Instructions: what the settings in the code mean
- buttonTitle: a short title that will show up on the navigation button. Note: if you need to use apostrophes or quotation marks in the title, they must be preceded by a backslash: ( \" or \')
- title: Leave "title" blank.
- url: for Qualtrics quizzes, "url" should always point to
qualtricsWrap.htm?href=https://yourbrand.qualtrics.com/SE/?SID=surveynumber
where yourbrand is replaced by your company's qualtrics brand if you have one (otherwise, just use "qualtrics.com") and surveynumber represents the unique survey ID number for your Qualtrics quiz. You will find that number on the end of the link to your survey that Qualtrics provides. - chapter and level are handled as usual (as described in Creating the Navigation).
- type should always be 'U' for Qualtrics quizzes.
- quiz must be a unique (unique within this module) 12-digit number that starts with any digit but zero.
- countscore can be either 1 or 0, for scoring or non-scoring quiz as desired.
- qmax should be the maximum raw score for the quiz. This is necessary mainly if the user gets a "zero" score, because Qualtrics does not yet provide a "total raw score" parameter, so we are calculating that from raw score and percent score, except when Raw Score = 0. If you the user earns 0 points, we use whatever you set as "qmax" If you aren't sure, just put "10".
| 1 | 2 | 3 | 4 | 5 | 6 | 7 |
Next Page |
A SCORM-Ready Template: Qualtrics Quizzes - Part 6: LMS-related settings
LMS and report-related settings
Special settings need to be applied to report individual results properly within Qualtrics, and to communicate the results back to the template so it can send them on to the Learning Management System.
- Embedded data: Embedded data are parameters stored with the quiz which are populated either by the quiz itself ("Grade", "GradePercent") or by the learning module ("fullname", "id", "url') These parameters required by the learning module template are already added to the example quiz for you, but here's how to create the correct Embedded Data in other quizzes:
- Click the green Add a New Element here link.

- Select Embedded Data from the options presented.

- To add embedded data, click Add a New Field, and type the name of the field.

- Add each Embedded Data item shown below:
fullname
id
Grade
GradePercent
url
o
When you are done it should look like this:
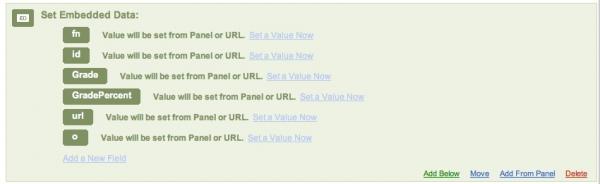
What they mean:- fullname is the student's first and last name, which is sent to the learning module by the LMS as standard SCORM data. It is being passed to the quiz so it can be used in Qualtrics reports.
- id is the student's login ID from the LMS, also sent to the module as part of SCORM data. It is being passed from the module to the quiz so it can be used in Qualtrics reports.
- Grade is a standard Qualtrics parameter, which contains the raw score of the quiz. It is passed from the quiz to the module, so it can be used in score calculations.
- GradePercent is a standard Qualtrics parameter, which contains the percent score of the quiz. It is passed rom the quiz to the module so it can be used in score calculations.
- url will be passed to a special redirector file necessary to communicate between the quiz and the module because of browser security restrictions. It tells the redirector file what page of which module to communicate with. It could also be used in reports to distinguish between originating pages, in case you are using the same quiz in different learning modules.
- o is simply the 12-digit objective number of the quiz, used in some scripts by the module, and potentially in reports.
Grade and GradePercent will be used later, in Qualtrics reports. fullname and id are sent back to the learning module for use in calculating total module score and recording quiz and module scores in the LMS.
-
Shift the Embedded Data element up to the top of the Survey Flow area, by clicking the "Move" link at the bottom of the Embedded Data element.

Drag it up above the Question block(s).
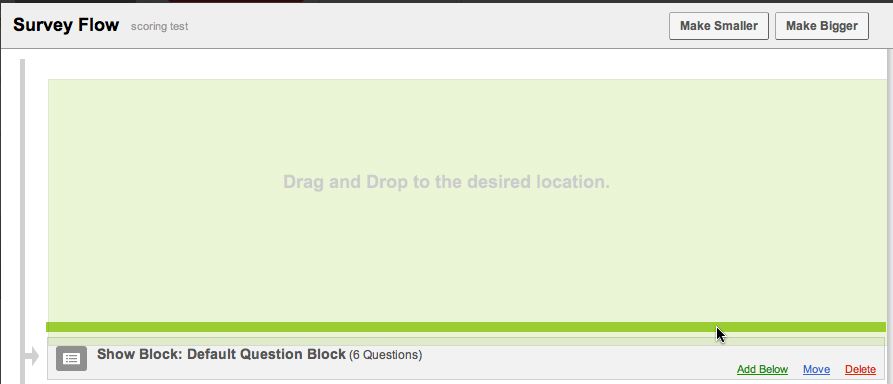
- After the last Question block, click Add a new Element again. Add an End of Survey Element after the last question block.

- At this point your Survey Flow structure will contain an Embedded Data element, one or more Question blocks, and an End of Survey element.

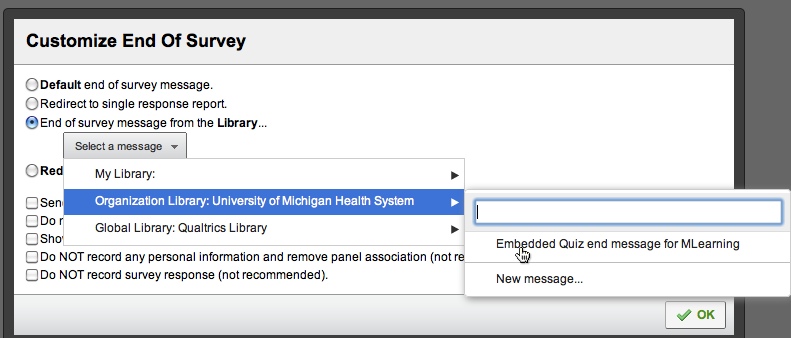
- In the End of Survey block, click the Customize link.

- The Customize End of Survey dialog will appear. Select Show Response Summary. Then select the End of survey message from the Library... option. Find the Embedded Quiz end message that you created earlier in your library.
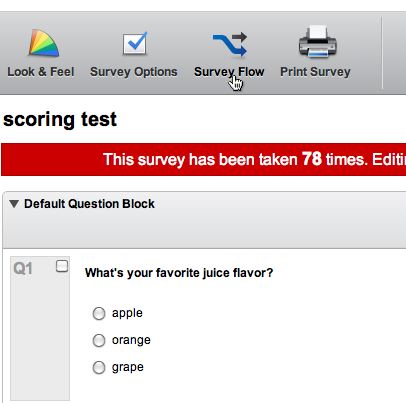
In the toolbar at the top of the quiz, click Survey Flow.

| 1 | 2 | 3 | 4 | 5 | 6 |
Next Page |
8 |
A SCORM-Ready Template: Qualtrics Quizzes - Part 5: Set scores for each question
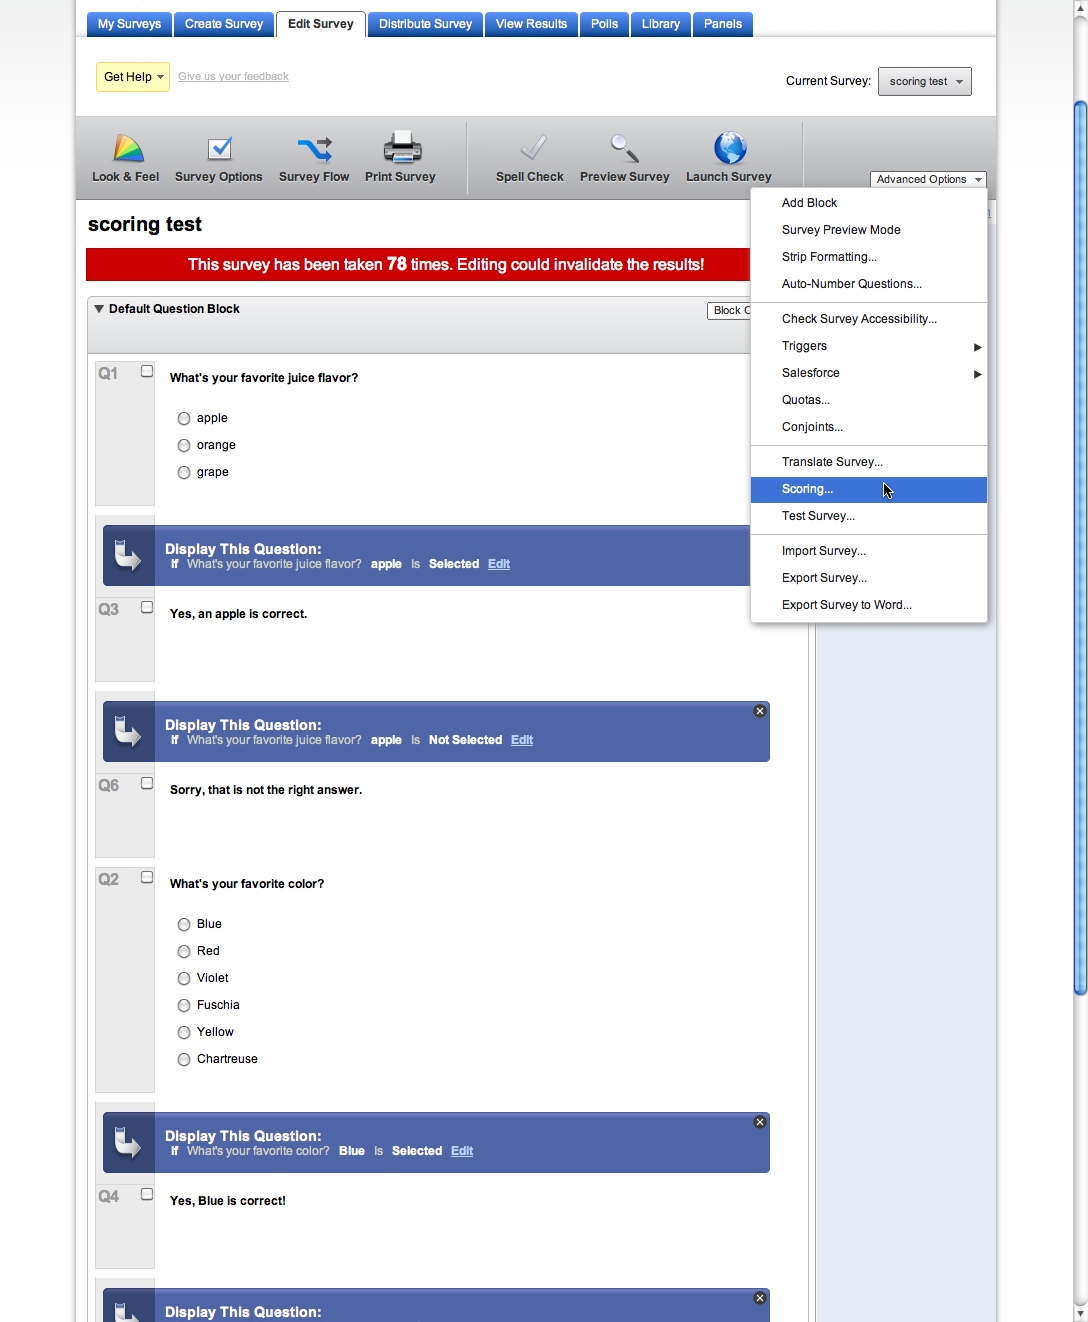
- Once all the questions and feedback are added to the quiz, go to the scoring menu by selecting "Scoring... " from the Advanced Options menu.
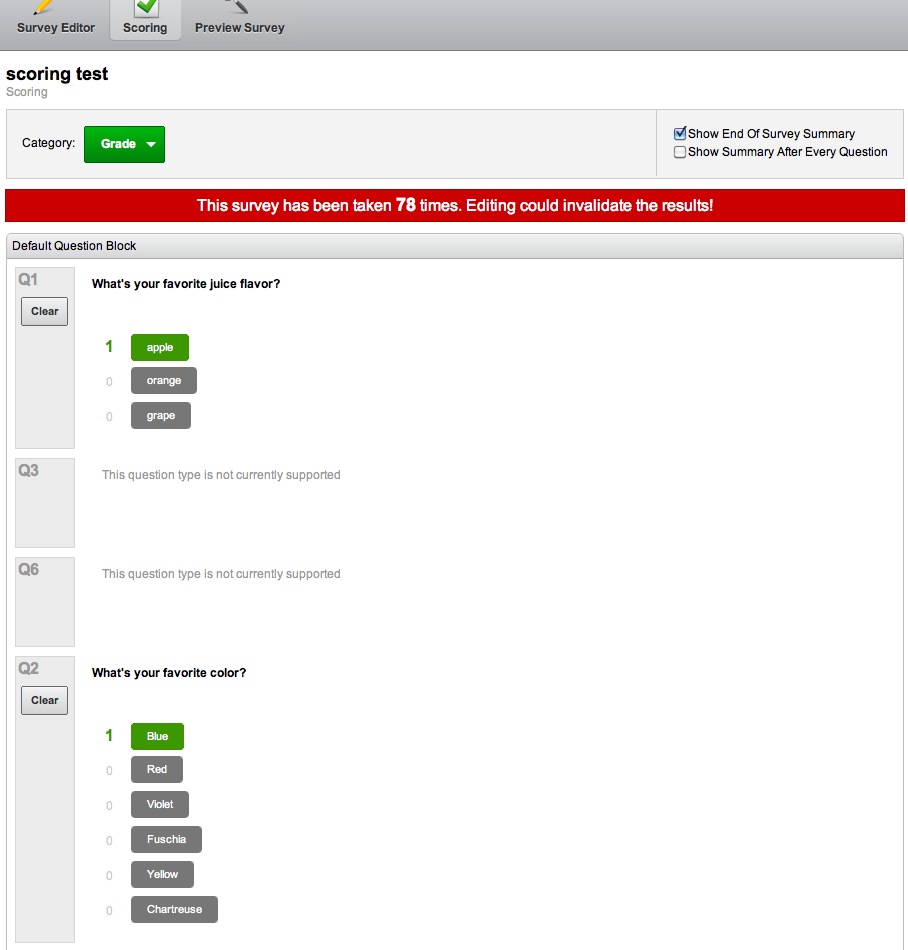
- The Scoring panel will open. Select Grade from the Category menu at the top of the page if it is not already selected.
Assign scores to the correct choices in each question. Your choices will automatically save.
Important: Occasionally, a question may lose track of its scoring. I don't know yet what causes this. If a quiz suddenly starts scoring incorrectly, check this panel again to be sure that all questions have retained a score setting.
1 2 3 4 5 6 7 8
December 20, 2010
A SCORM-Ready Template: Qualtrics Quizzes - Part 4: Create Feedback
Create feedback for each question
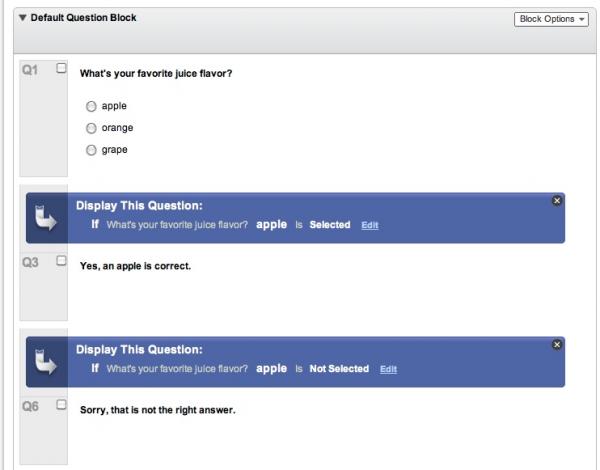
- Qualtrics does not automatically generate feedback for each question, but it is simple to create feedback items using Display Logic. After each scored question in your quiz, add one or more Text/Graphic questions, containing the feedback for each choice.
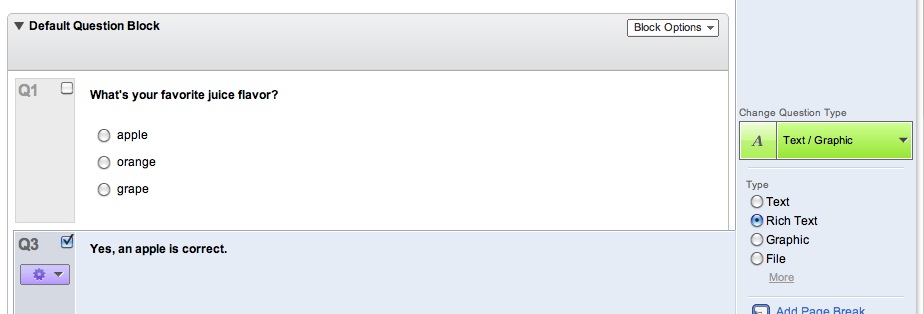
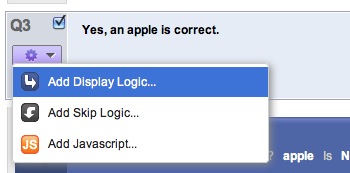
- Select Add Display Logic from the drop down menu to the left of the feedback item .
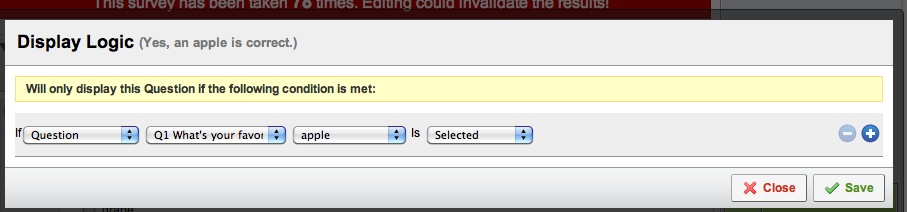
- The Display Logic dialog will appear. Select the conditions that will cause this feedback message to be displayed: look at the examples already in the quiz if you aren't sure what to do. You will usually want to have a feedback message for the wrong answers and one for the right one(s). Conditions can be set for each choice or for any of several choices.
- The Feedback message item should end up similar to this.
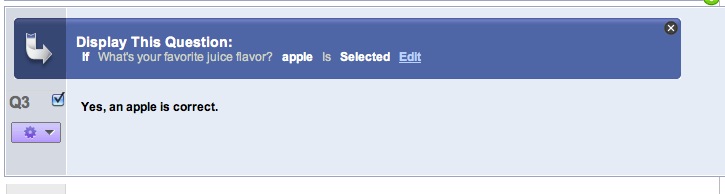
- When you are done, you should have a question at top, followed by two or more Feedback messages, as shown below.

| 1 | 2 | 3 | 4 |
Next Page |
6 | 7 | 8 |
A SCORM-Ready Template: Qualtrics Quizzes - Part 3: Create the quiz
Create a scored quiz in Qualtrics
- The easiest way to get all the pieces right is to import an example Qualtrics quiz and add your own questions to it.
Download this example Scored Survey XML file. - Log in to Qualtrics and create a new, blank survey by clicking the Create Survey tab.

- Select Quick Survey Builder

- Give your survey a name and select a folder if desired.

- Select Import Survey from the Advanced Options menu.

- Click Choose File and browse to the Example_scoring_test.qsf file.

- Qualtrics will warn you that you are about to replace the contents of your survey. Click Import.

- Your quiz should now look like the one shown below.

Now add some multiple choice questions, following the examples given. You can certainly use many other types of questions in scored quizzes, but for purposes of this tutorial, we'll keep it simple. Also, please do not add any branching to this tutorial quiz. It is possible to use branching in a template quiz but will add complexity to the setup, so we'll leave it out. Once you've added some of your own questions to the quiz, continue with the next section.

| 1 | 2 | 3 |
Next Page |
5 | 6 | 7 | 8 |
December 16, 2010
A SCORM-Ready Template: Qualtrics Quizzes - Part 2: End of Survey Message
Create an "End of Survey" message
We'll start at the end first: in order to communicate with the learning module, your Qualtrics quizzes will all need to reference a custom End of Survey message, which will be located in your Qualtrics message library.
- To create the new message, click the Library tab.
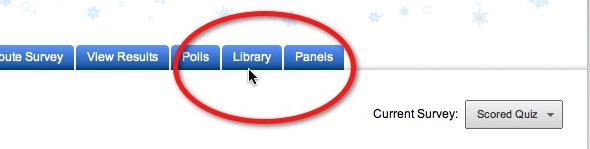
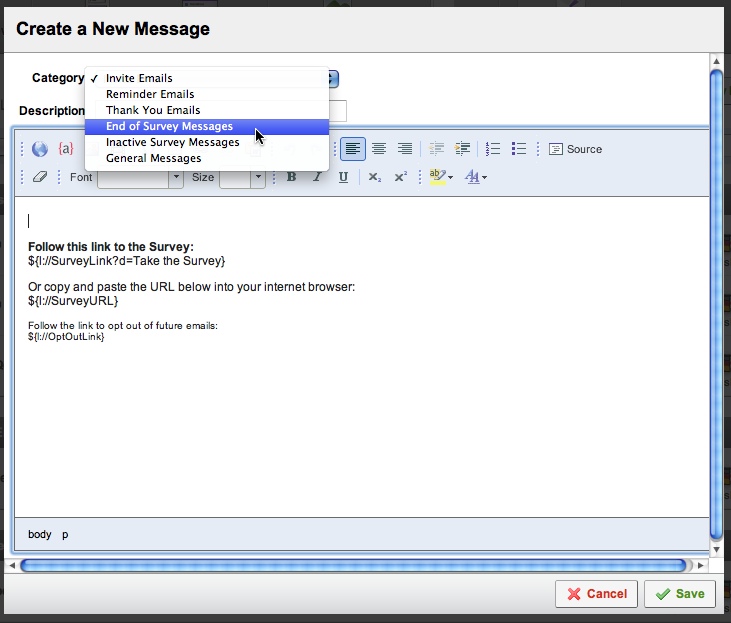
- Click the Message Library icon. Then click "Create a New Message".

- When the Create a new Message window opens, select End of Survey Messages from the Category menu.
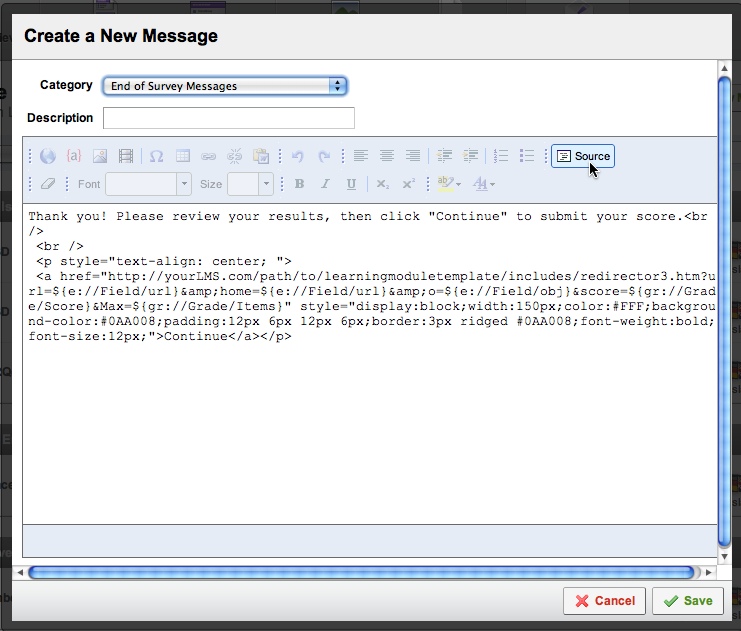
- Click the Source button. Delete all the default code in the box - it should be empty.
Copy the code from the box below and paste it into the New Message box.Thank you! Please review your results, then click "Continue" to submit your score.<br /> <br /> <p style="text-align: center; "> <a href="http://yourLMS.com/path/to/learningmoduletemplate/includes/qualtricsRedirector.htm?url=${e://Field/url}&o=${e://Field/obj}&score=${gr://Grade/Score}&p=${e://Field/GradePercent}" style="display:block;width:150px;color:#FFF;background-color:#0AA008;padding:12px 6px 12px 6px;border:3px ridged #0AA008;font-weight:bold;font-size:12px;">Continue</a></p> - Replace "
yourLMS.com/path/to/learningmoduletemplate/" in the code with the path to the master copy of the qualtricsRedirector.htm file. The master copy is a copy of the qualtricsRedirector.htmfrom the includes folder of the SCORM Template. Put the file on a webserver in the same domain as your LMS. All learning modules created with this template will use this same redirector file, so put it where it will not be deleted or moved. This redirector file is necessary because Internet Explorer 7 blocks cross-domain iframe to parent communication
| 1 | 2 |
Next Page |
4 | 5 | 6 | 7 | 8 |
A SCORM-Ready Template: Embedded Qualtrics Quizzes, Part 1
IMPORTANT If you have never used the SCORM-ready learning module template before, please go back to Part 1: Features, Outline your Module to learn how to set it up correctly.
The SCORM template is now capable of incorporating scored Qualtrics quizzes. This is good news for subject matter experts who want to create their own quizzes without a steep learning curve. Qualtrics.com is an exceptionally easy-to-use, full-featured online survey building application that allows you to create scored quizzes as well as surveys.
The learning module template factors in the Qualtrics quiz score when calculating the overall status and score for the activity. A mixture of Qualtrics quizzes and other types of scored interactions, such as Captivate's simulation quizzes can be used within a single learning module.
You will need a copy of the latest beta version of the learning module template.
| 1 |
Next Page |
3 | 4 | 5 | 6 | 7 | 8 |
December 14, 2010
Make the console.log() command IE-8 compatible
I often use the command console.log() to trace the execution of my javascript functions in Firebug's or Safari's consoles.
The only problem is, Internet Explorer doesn't understand console.log() and moreover, it doesn't error out gracefully. It stops the script execution. As a result, it was necessary to be very careful to turn off the console.log() statements whenever a script goes into production.
This can be inconvenient, particularly if you forget, so I was glad to find a way to make Internet Explorer fail more gracefully. The line of code below redefines console.log() to an empty function when it isn't defined in a given browser.
Even better would be to redefine it to create a little console right on the page, so that it would be easier to trace code in IE as well. I'll post this when I get it done.
Meanwhile, to make IE understand console.log(), place this line at the top of any scripts that contain console.log() statements:
if (typeof console == "undefined" || typeof console.log == "undefined") var console = { log: function() {} };