January 31, 2011
A SCORM-Ready Template: Captivate Quizzes - Part 3: Add the quiz to the module
Publish the Captivate file
- In the Publish window select Flash (SWF). Check Publish to Folder. This will help keep your published files in one piece, isolated from unrelated files.
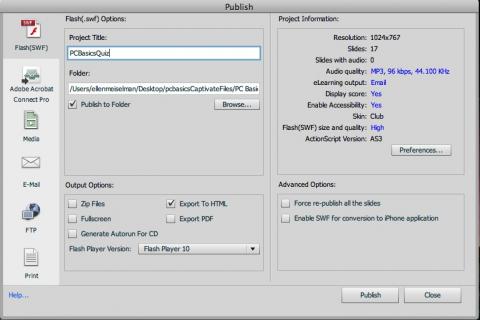
- Take note of the Resolution values in the Project Information area at upper right. Also note what your project title is. Captivate will create a folder with that title, at the location shown in the "Folder" field, and add the published files to it. Click Publish.
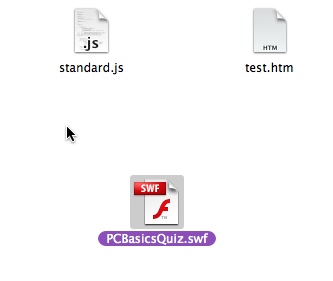
- Once the files are published, locate and open the new folder. You will probably need to change the name of the SWF file. I've noticed that people like to use long phrases for the titles of their projects, which is definitely more readable for humans, but since Captivate defaults the the name of the swf file to the project title, it can create long unwieldly URLs in our final project. (The project title can also be changed at publish time, but this process can be confusing for some users.) Change the filename of the swf you just created to something brief but meaningful. For example "Point of Care Glucometer Part I.swf" could be changed to something like "poc_gluc1.swf" The name should have no special characters in it other than hyphens or underscores, and no spaces.
Drop the SWF into place in the module
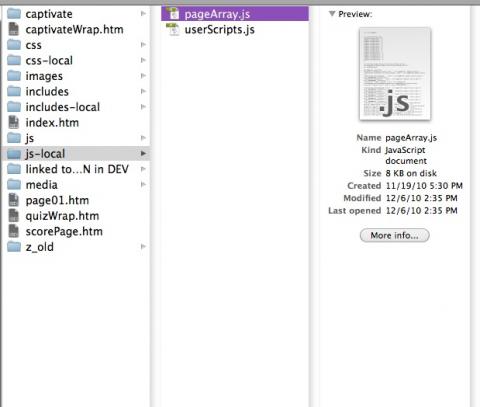
- Open the learning module template folder for the module you are working on. Create a new folder at the same level as the "js", "css", "includes" and other common folders. Call the new folder "captivate". If you are going to use multiple Captivate files in this module, make subfolders inside the captivate folder for each one, named for each file. Drop the SWF file and any accompanying files or folders that were published with it into the appropriate folder.
In the example below, there are four subfolders, containing the SWFs and accompanying support files for four quizzes. I've also stored backups of all the original Captivate files there, which can be a useful practice if space is not an issue.
- In Dreamweaver, open the file pageArray.js in the js-local folder for your module.
- Look for the line "var PageArray". If you aren't familiar with the page array, brush up on the concepts here: [LINK]. You will need to add an entry for each page containing a Captivate quiz. An example Captivate entry is shown below:

- Here is a sample page array containing several Captivate entries:
var PageArray = new Array(
{buttonTitle:'Competency Criteria', title:' ', url:'page01.htm', chapter:0,level:1 },
{buttonTitle:'Multiple Choice Quiz', title:'', url:'captivateWrap.htm?&swf=captivate/quizMC/quizMC.swf&w=1024&h=768',chapter:1,level:1, type:'C', quiz:'200100000015', countscore:1 },
{buttonTitle:'RN Student test 1', title:'', url:'captivateWrap.htm?&swf=captivate/quiz1/quiz1.swf&w=800&h=600',chapter:2,level:1, type:'C', quiz:'200100000016', countscore:1 },
{buttonTitle:'RN Student test 2', title:'', url:'captivateWrap.htm?&swf=captivate/quiz2/quiz2.swf&w=800&h=600',chapter:3,level:1, type:'C', quiz:'200100000017', countscore:1 },
{buttonTitle:'RN Student test 3', title:'', url:'captivateWrap.htm?&swf=captivate/quiz3/quiz3.swf&w=800&h=600',chapter:4,level:1, type:'C', quiz:'200100000018', countscore:1 },
{buttonTitle:'>Score & Status Page: Complete this Module', title:'',url:'scorePage.htm',chapter:12,level:1 }
//IMPORTANT!!! the last item does NOT get a comma at the end
); //do NOT delete this final punctuation - Explanation:
The pageArray item properties which are significant for Captivate quizzes are highlighted in yellow below.
- buttonTitle and title are handled as usual.
- url - for Captivate quizzes, this should always point to "captivateWrap.htm?swf=captivate/path/to/your.swf&w=1024&h=768" where captivate/path/to/your.swf represents the relative path to your swf file from the file captivateWrap.htm, and w and h are the width and height of your captivate file.
- chapter and level are handled as usual.
- type should always be 'C' for Captivate quizzes.
- quiz must be a unique (unique within this module) 12-digit number that starts with any digit but zero.
- countscore can be either 1 or 0, for scoring or non-scoring quiz as desired.
- Important: The last page in any module with quizzes must be scorePage.htm as shown in the Page Array above.
- That's really all there is to it. Publish the Captivate files, drop them into the template folder, and add an entry for each quiz page into the Page Array. Test your module in your LMS to see how it tracks scores. Be sure to add a mastery score into the manifest, as you would for any scored SCORM activity.
January 28, 2011
A SCORM-Ready Template: Captivate Quizzes - Part 2: Captivate settings
Project Size
At this time, the maximum width the template can handle is 1024px. Set your project size at 1024 x 768 or smaller.Project Preferences
Under Project > Start and End, uncheck Fade in on the First Slide. Select Close Project for Project End Options > Action.
Uncheck Fade Out on the Last Slide.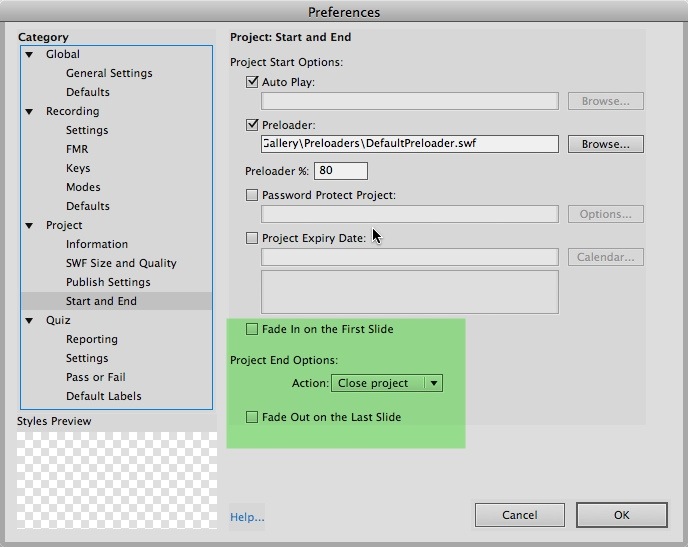
Quiz Preferences
- In the
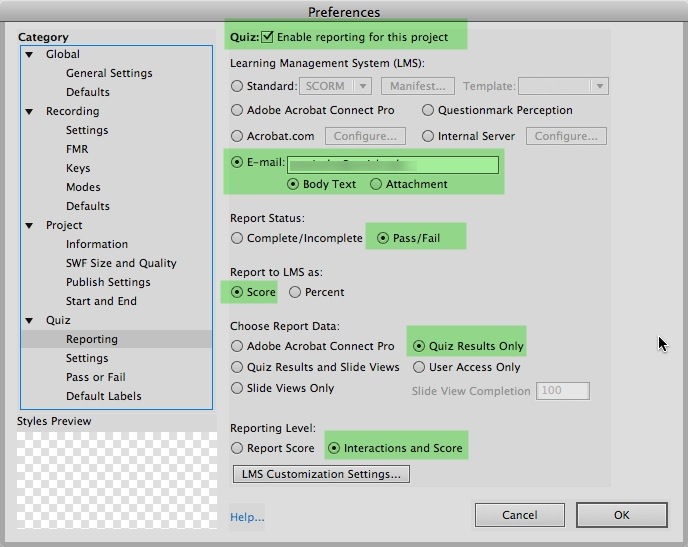
Captivate Preferences screen, select Quiz, then Reporting. Check Enable reporting for this
project. Select
E-mail as the type of LMS, and enter any email address into
the box. The address will not be used, but must be there to enable
this option in Captivate. Select the "Body Text" option under E-Mail.
- Under Report Status, check Pass/Fail.
- Under Report to LMS as: check the
Score option and
Quiz Results
Only.
- Under Reporting Level, select Interactions and
Score.
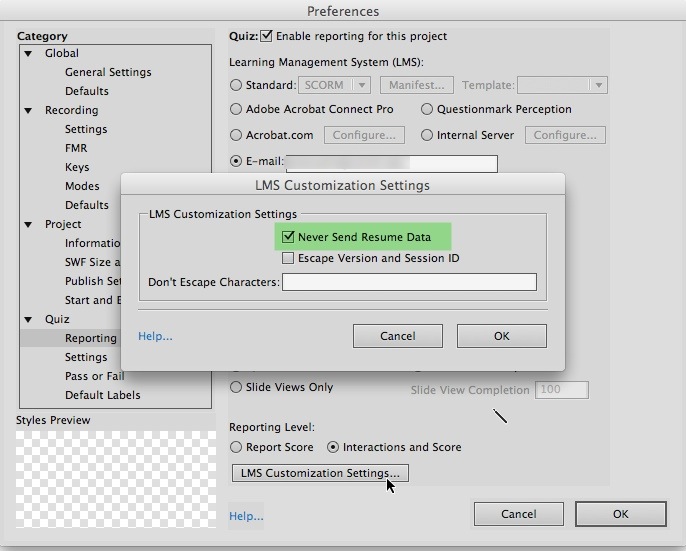
- Click the LMS Customization Settings,
and make sure Never Send Resume
Data is checked.
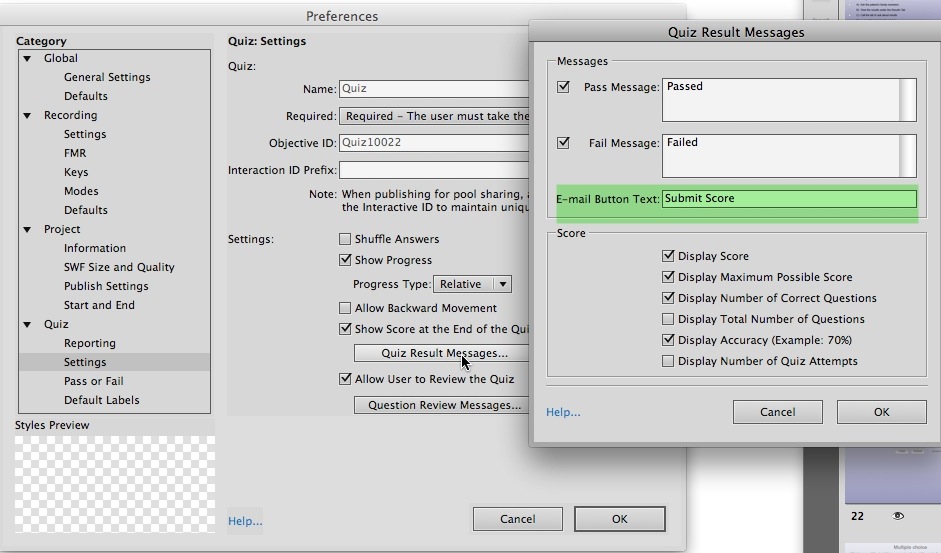
- Under Quiz > Settings, select Show Score at the End of the Quiz. It is probably safest to uncheck Allow Backward Movement, but you can test it if required.
- Click Quiz Result Messages, and change E-mail Button Text
to Submit Score or
simply Submit, since
the score will be submitted and judged by the module, not
emailed.
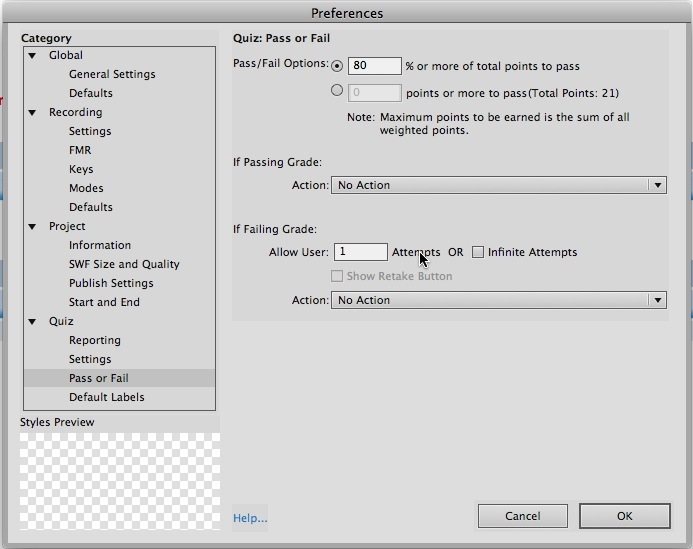
- The Pass or Fail settings depend on the way in which this quiz will be used. If this will be the ONLY quiz in the module,
make sure that it this is set the same as the mastery score in
your LMS, since they should both agree on whether the user has passed -
there are no other points to be earned.
- If there are multiple quizzes in the module, the module divides the total maximum possible points for all quizzes by the total points earned, and arrives at a total percent score. That
total percent score is what is compared to the mastery score in
the LMS, which determines pass/fail on the
module.
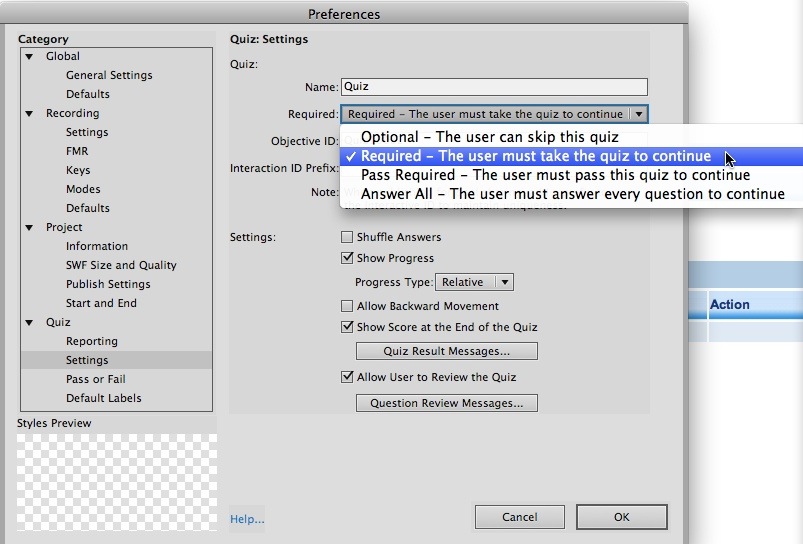
- Quiz Settings: the exact effects of all of these settings in the module context have not been determined yet, so it is probably safest to select Required - The user must take the quiz to
continue, if it is in fact a required part of the module.
- Both If Passing Grade and If Failing Grade should be set to No Action. (there may be circumstances
where this is not true, but try this first.)
This probably will not actually prevent multiple attempts in the context of the module, but try experimenting with it to see what the effects are if you need this.
- In the
Captivate Preferences screen, select Quiz, then Reporting. Check Enable reporting for this
project. Select
E-mail as the type of LMS, and enter any email address into
the box. The address will not be used, but must be there to enable
this option in Captivate. Select the "Body Text" option under E-Mail.
January 25, 2011
A SCORM-Ready Template: Captivate Quizzes - Part 1: Introduction
Although Captivate has its own SCORM interface, its reliability in our LMS over the last few years has become increasingly problematic. Data gets lost, quizzes score incorrectly, or do not complete at all, and there is a lot of frustration.
At the same time, there has been increasing demand from subject matter experts and educators for inexpensive, easy to learn tools like Captivate that leverage their Powerpoint skills but have plenty of flexibility and options for interactivity. So something had to be done to make Captivate useful again.
What I decided to do was to turn over all the SCORM communication for Captivate activities to our HTML template, which doesn't have the communication issues of the Adobe products. Using the SCORM template as a wrapper does not add a lot of work to a project, in fact, it requires only one line of code to add a scored Captivate or Presenter quiz to a template-based learning module.
Any type of scored Captivate file will work - both question slides and interactive slides. The module can handle one or more Captivate quizzes, either by themselves, or in combination with other types of content and quizzes, such as Questionmark Perception or the template-based interaction quizlets.
What the user sees
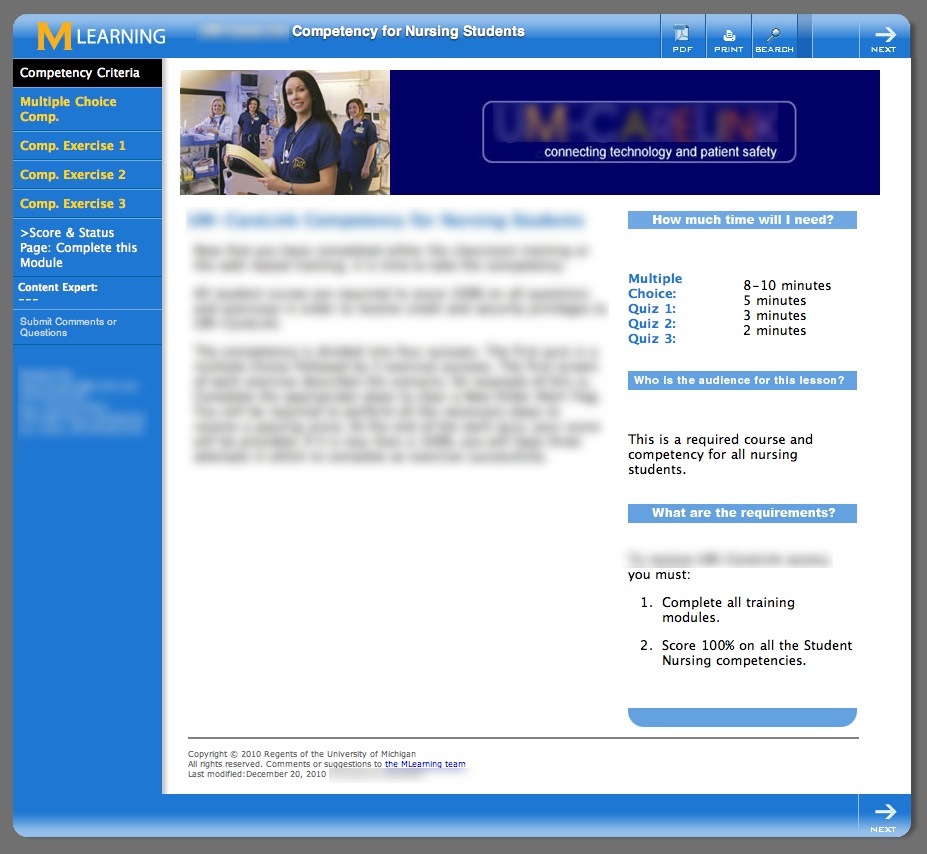
- When a user opens a template-based learning module with embedded Captivate files, they first see an introductory page, which can be used for course objectives, duration, etc. . The 4 Captivate files in the module below are listed in the nav bar on the left. Each one is on a separate page. This module uses a multiple choice Captivate quiz followed by three interactive simulation quizzes.
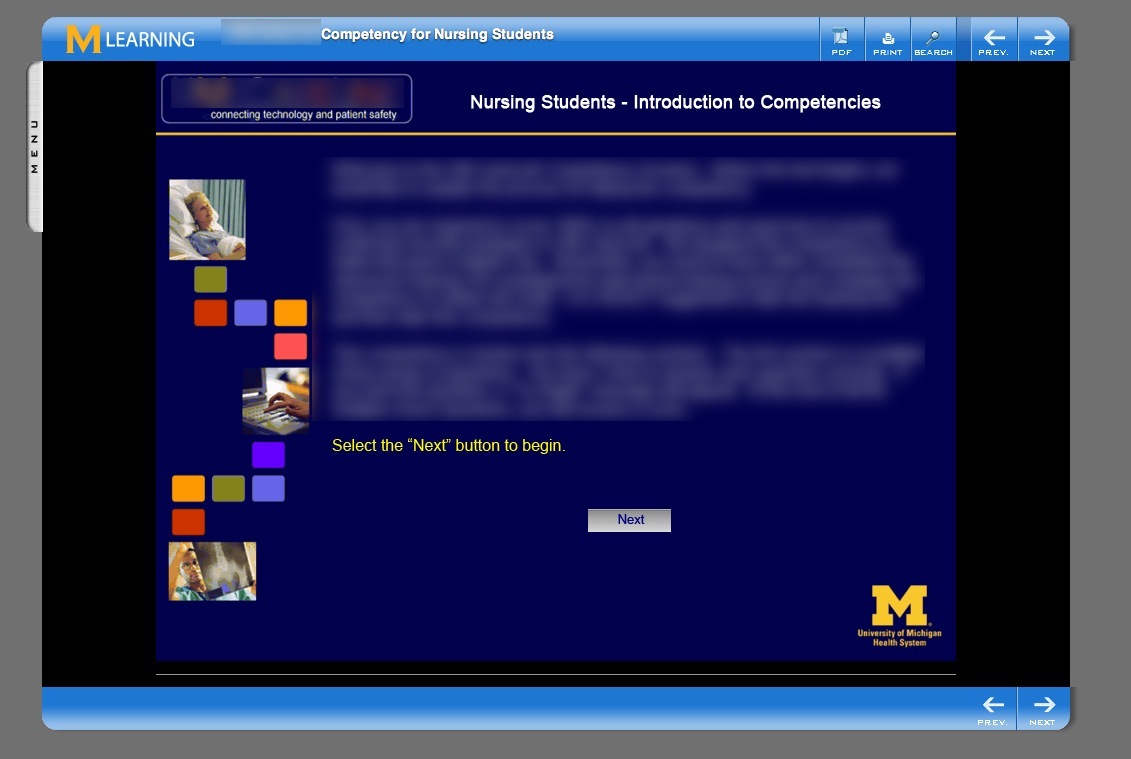
- Clicking the Multiple Choice button opens the first Captivate file. Note that there is no longer a left-hand navbar showing but there is a little metallic menu "handle" on the left, which increases the amount of room available for the movie.
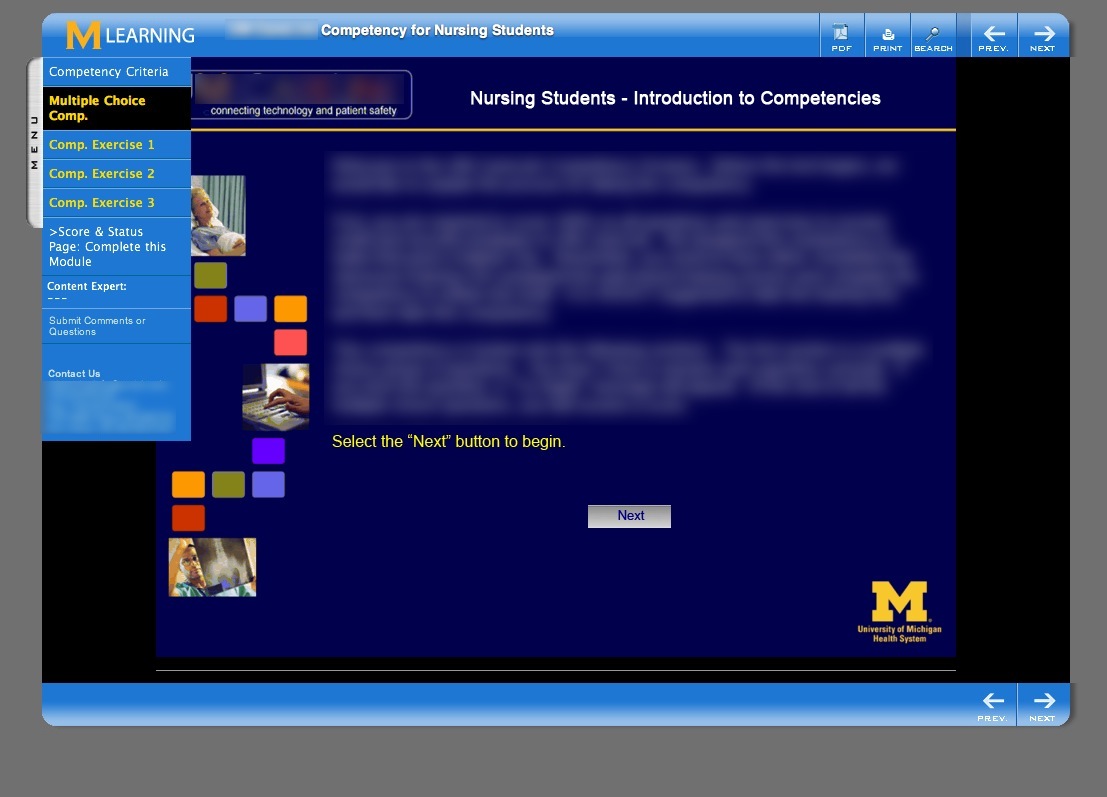
- If the user wants the menu back, clicking the menu handle will re-open the navbar on top of the Captivate file. Even without the navbar, the user can still navigate away from the current page by using the Previous/Next arrows at top and bottom of the page, so they aren't stuck. But it is there as an option.
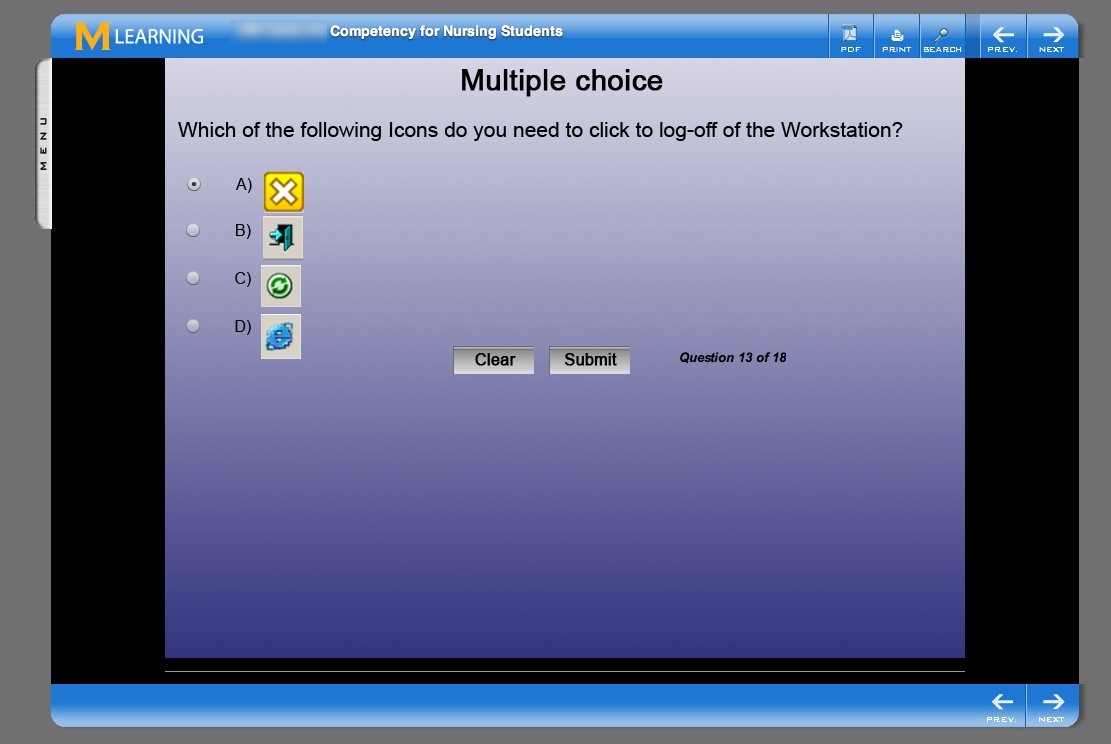
- The user works through the multiple choice questions ...
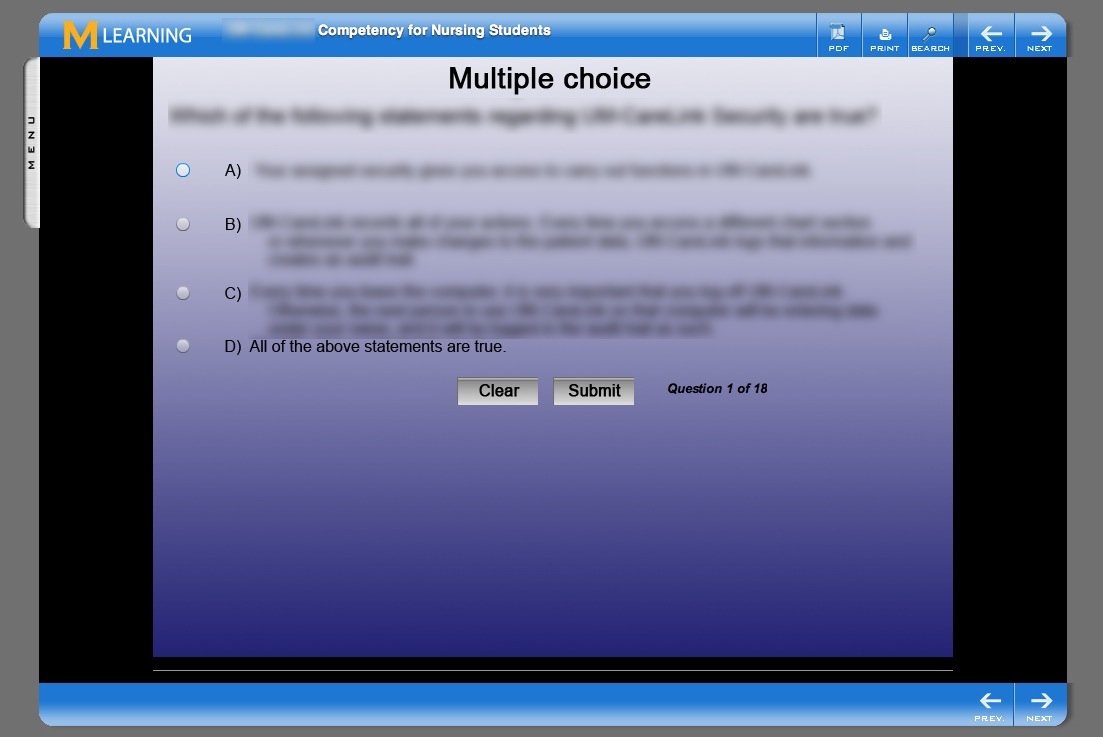
- Questions can include text and graphics.
- At the end of the quiz, a summary page is shown, with a Submit Score button.
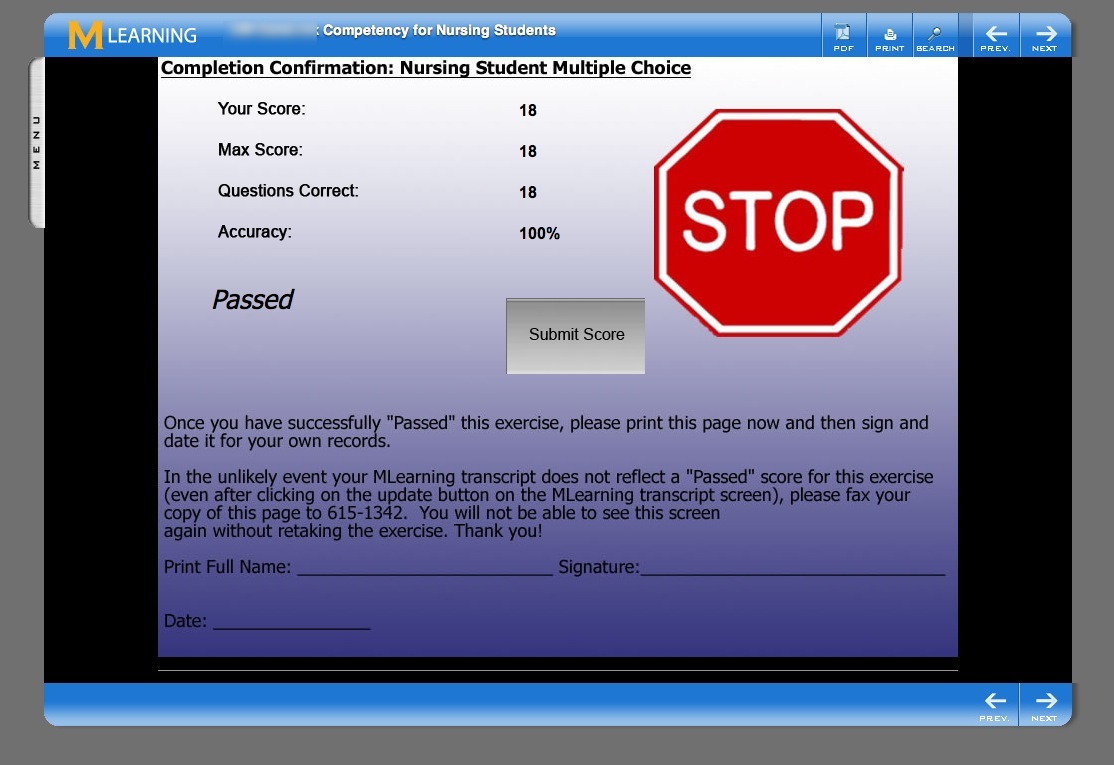
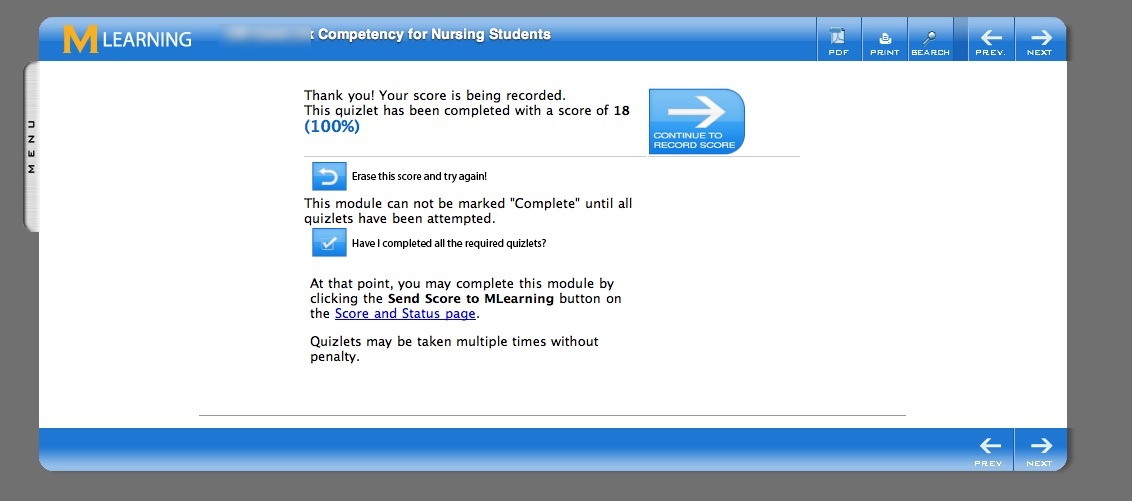
- Clicking the Submit Score button sends the score to the module. The user is presented with several choices as to what to do next: continue to the next page, erase the score and try again, or jump to the final score and status page for the whole module.
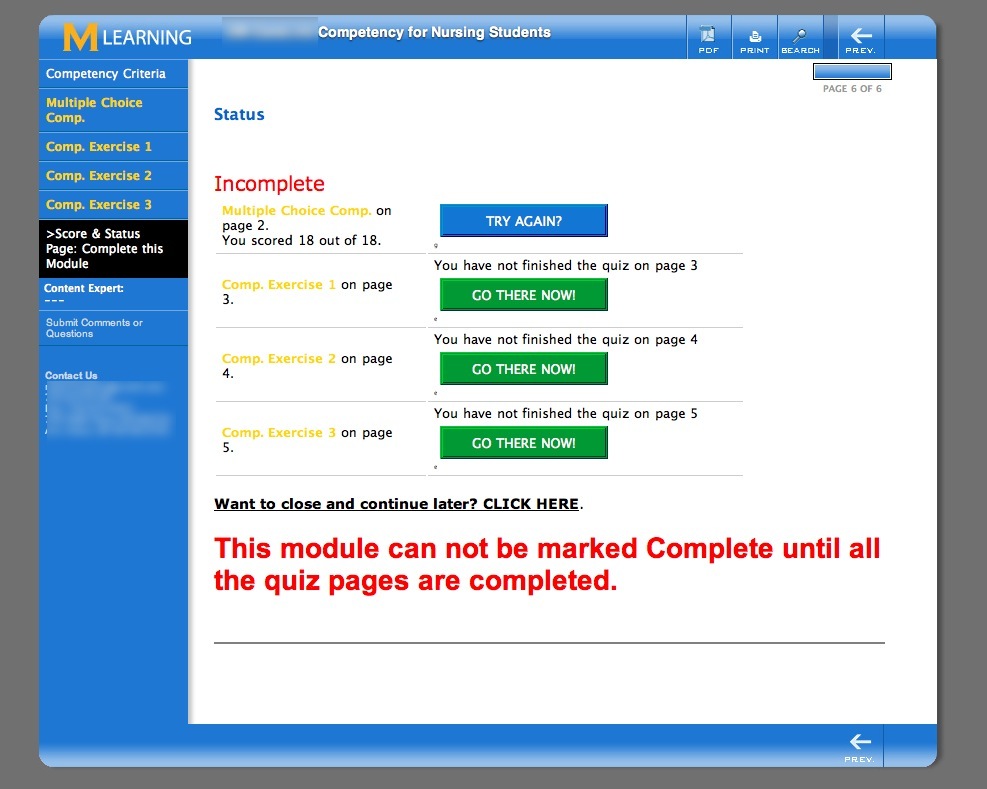
- The score and status page lists all the quizzes in the module, with their completion status and scores, if any. Quizzes can be any combination of Captivate, Questionmark, Qualtrics or Interactions pages.
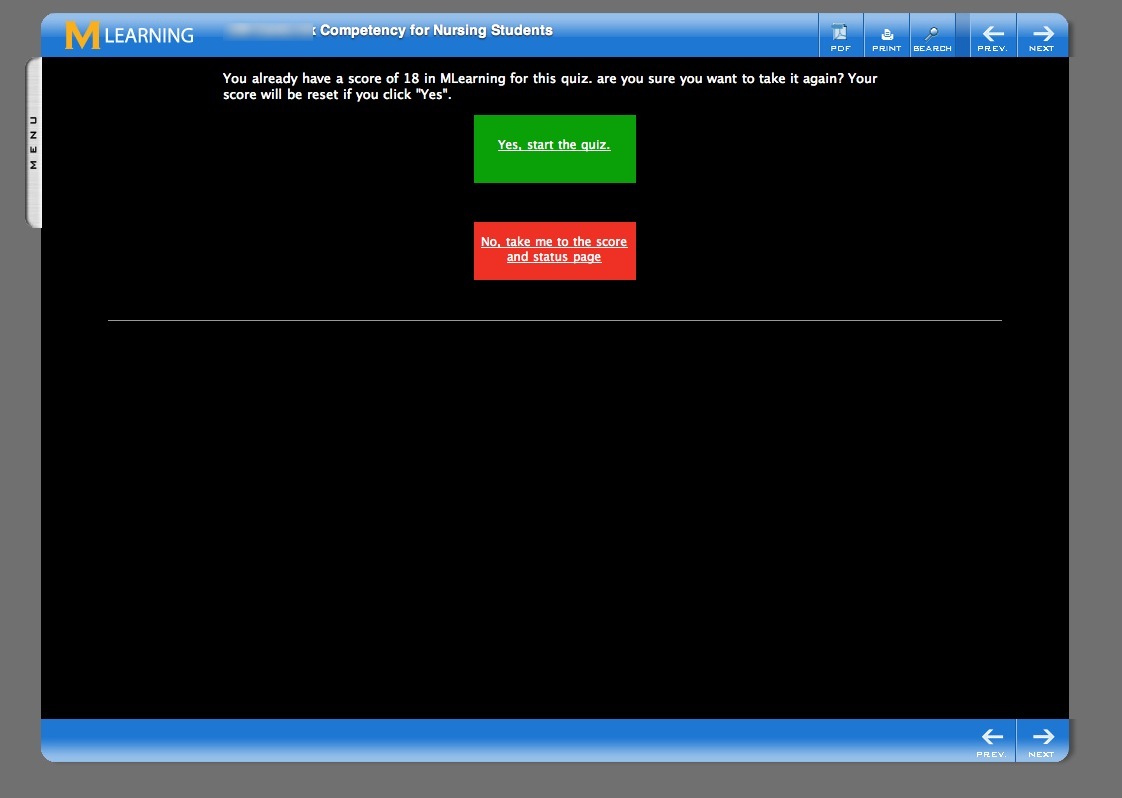
- If a user clicks one of the blue Try Again buttons on a Captivate quiz, they will be presented with this screen, which asks them to confirm that they really want to take the quiz again. This is because once the Captivate quiz starts playing, it will wipe out any score they had before. This extra step should help prevent accidentally overwriting good scores.
They will also see this screen if they simply accidentally navigate back to a completed Captivate quiz while browsing through the module.
January 24, 2011
Phone recording with the iPhone - and other devices
I've been doing a series of phone interviews lately, and I find it difficult to take notes while I talk, so I needed a reliable way to record these conversations (after getting all parties' permission, of course!). An added complication is that the interviews usually involve multiple participants, so we typically use a conference line to connect - either DimDim or something similar.
At first I assumed "that should be easy on the iPhone," but soon found out how wrong that was. Apple makes it very difficult to record your iPhone conversations directly, perhaps to prevent people from secretly recording calls. None of the voice recorder apps will take input from the Phone part of the iPhone.
The only one that comes close is "Recorder" by Retronyms. Recorder works by using a server in the cloud as an intermediary in the recording process. To use Recorder, you must first purchase minutes - the cost is only $1.99/hour, so it's possible to test without a big investment. Call your contact, dialing from within the Recorder app. Recorder dials the external server, then the app exits and switches you over to the iPhone's native Phone app where you can use all the normal phone features during the call. So you have access to the keyboard for making menu selections, your contacts, etc.
It all works pretty much as advertised. Unfortunately there is a slight sound delay introduced by the intermediate bounce of the call to the server. It ranges from a little irritating to very noticeable. The call can also occasionally disconnect if your wifi or 3G signal is poor - it needs more bandwidth than a normal call. I used it for a couple of interviews then went on a search for a more reliable method. it is good in a pinch, though.
Another method you can try is to set up a free Google Voice account. If you first call the Google Voice number, and let it flip over into voice mail, it will start recording the call. Then you can conference in the conference call. Google Voice may announce it is recording to everyone on the line, but that is fine for this purpose. If you are lucky and everyone speaks clearly, Google will even transcribe the call for you. Unlike Recorder, Google Voice does not add any delay, since the call is not being routed through their servers before it gets to you. But it is a somewhat complicated method, and I was hoping for something drop-dead simple, that would always work.
I next purchased a cheap suction cup mic, the type that attaches to a phone receiver, hoping that I could plug it into the headset/mic jack on the iphone and record direct in to any of the voice recorder apps. Unfortunately it takes a fairly strong signal to make the iPhone recognize the external mic and switch from the built-in mics. So I had the choice of putting a preamp or mixer in between the mic and the phone, or trying something else.
The next thing I tried was using the suction cup mic with an old Olympus digital recorder I had laying around. That works, but the signal is still pretty weak, even with phone at top volume and best settings on the Olympus. So, I am ordering a little Olympus phone mic, hoping it will provide a slightly better signal. Updates to come soon, when I've had a chance to try it out!
January 19, 2011
The next generation of screen technology
An interesting peek at the not too distant future of visual, gestural interfaces. Thin, light, responsive and embedded. Every incremental improvement in devices and UI's enables a whole new range of expression and interaction, so I'm looking forward to a small cultural revolution based on the ideas shown here.
January 7, 2011
.htaccess tricks Allow public access to a subdirectory
I run a little site that is mostly access-protected. If it is viewed from a location within the company IP, no password is needed. If viewed from outside the company firewall, it will ask for a user-id and password. However we wanted to make one subdirectory public.
After trying to add various combinations of "Allow Override" and <Directory > and Location sections to the .htaccess files, and getting nothing but server errors like ".htaccess:
# inside company firewall
Allow from 100.100.243
Satisfy Any
In /root_dir/private/public/
Satisfy Any
Allow from All
January 3, 2011
Drupal: imagepicker / openWYSIWYG module incompatibility fix
A site I administer uses the openWYSIWYG rich text editor module as the default input format for most users. Like other rich text editors, openWYSIWYG makes it possible for anyone to add styles and colors to their posts, including tables, images, links and more.
The openWYSIWYG interface

Most of the site's users prefer the ease of use of a rich text editor but for those of us that need more control over the HTML than rich text editors provide, it is possible to shut it the editor off for specific users or for specific types of nodes. It is also possible to shut it off by simply using Safari, since the module is not yet built to work with Safari.
My preferred module for uploading images when openWYSIWYG is not active is Imagepicker, because of its simplicity and reliability.
The Imagepicker interface

Imagepicker allows you to select an image from a collection of uploaded files, then insert it into the text area. But a problem arises when trying to use imagepicker when open WYSIWYG is installed, even when the editor is not being displayed, because certain key variables are still in "openWYSIWYG" mode, and that fools Imagepicker into thinking the editor is active. Because of this, Imagepicker cannot find the text editing area and the "insert image" button stops working, because it is looking for an element that does not exist on the page.
Fortunately, it's fairly easy to do a quick fix for this, so it will at least work in Safari.
In the imagepicker module folder, find imagepicker_iframe.js
Search near line 172 for
else if (isWysiwyg == 'yes') {

        //inst = 'edit-body';

       inst = win.Drupal.wysiwyg.activeId;

      }
and change it to:
 else if (isWysiwyg == 'yes') {

        //inst = 'edit-body';

       // inst = win.Drupal.wysiwyg.activeId;

         inst = 'win.Drupal.edit-body';

      }