Many people don't realize that a tool they already own, Macromedia's Fireworks, is one of the best for creating buttons, navbars, and especially popup hierarchical menus. Try the steps below to see how easy it is to create customized menus.
Note: this tutorial is geared for beginning web developers, with very little knowledge of HTML.
Before we start, I'll put in my plea for restraint when using popup menus. As handy as they are, I've seen them overused and misused.When incorporating these menus into your design, keep them brief and closely related to the button topic they are associated with so that your users can EASILY guess what might be under each topic. If you find yourself making huge lists of popup menus with many submenus, consider reorganizing your navigation scheme. Flatten it so that it is more easily scanned, either as a whole, or in sections. Perhaps use a site map, or table of contents at the start of each section of your site.
Ads by Google
Posted by ellen at June 25, 2005 10:34 AM Hiding complex systems of information in popup menus will prove very frustrating to your poor audience.
In this tutorial, we're going to build a horizontal navbar consisting of five buttons, each with its own short menu. A working example is here.
CLICK ON ANY IMAGE BELOW TO SEE IT ENLARGED.
Start by drawing one button
- Open Fireworks. Create a new document either by selecting "New" from the File menu, or by clicking Create new Fireworks File in the splash screen that comes up when you open Fireworks.

- Set the document size to 500 pixels wide by 50 pixels high: long and skinny, so we can make five 100 pixel wide buttons, side by side.
Hit OK, and your blank document will appear.
- We'll start by making a single button. Select the rectangle tool from the toolbar. Choose a paint color by clicking on the color swatch next to the little paint bucket.
- Now, draw a rectangle on the left side of the canvas.
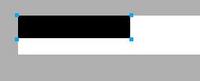
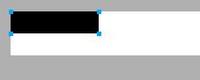
- Since we will want the buttons to be an exact size, we need to set the dimensions precisely by entering exact values for height and width once the rectangle is drawn. Make sure the rectangle is selected (the blue handles must be showing as in figure X). Open the properties palette if it is not open already, and type 100 in the W field, and 25 in the H field to make it 100 px X 25 px. Our navbar will have 5 buttons, each 100 pixels wide, so it will be 500 pixels wide total.

-
Also in the Properties palette, choose colors for the buttons: Select black as the fill color (the paint bucket) and white as the stroke color for your button. Make the white stroke 2 pixels wide.