June 26, 2005
Part 3. Step by Step guide to using Fireworks to create Popup Menus
Editing Popup Menu Properties-
Now click back on Original to continue. The green web layer will reappear.
-
Select your button by clicking on the green area. This will make the handles display, as well as the little register mark in the middle.

- Clicking directly on the register mark brings up a menu.

-
Select Add Pop-up Menu...

-
This brings up the Pop-up Menu Editor. Type in the selections you want to appear in this button's popup menu. Add more by clicking the plus sign. Delete unwanted selections by clicking the minus sign.
-
To make a menu item into a submenu of another item, select it, and click the indent button as shown. The selected item will move to the right slightly, indicating it is now part of a submenu.
- When you are done entering selections, click the Appearance tab.
-
Choose menu colors by selecting text and fill colors for the Up and Over states. Click the Advanced tab to move on.
- Choose border colors, and set the width and padding (space between the text and edges of the button) of the menus. Click the Position tab to move on.
- Choose the position of the menu with respect to the button by clicking the appropriate icon. Our menus will hang from the bottom of the button.

Choose the submenu position by selecting the appropriate icon as shown. Click Done to close the Editor.

-
Below the button, you should now see blue outlines indicating the size and position of the popup menu when extended. If you click and drag on the outline, you will find you can move it around to adjust the position. It also has a little "leash" indicating whch button it is associated with.
June 25, 2005
Part 4. Step by Step guide to using Fireworks to create Popup Menus
-
Create the navbar
Select your button, then duplicate it by selecting Duplicate or Clone from the Edit menu.

- Drag the cloned button to the right of the first button. Hold down the shift key as you drag to constrain the motion vertically.
- To change the title on the new button, make sure the Properties palette is open (select Properties from the Windows menu), then select your new button with the arrow tool. Change the text of the button in the Properties palette. You change the text here instead of in the button symbol editor, because changes there will affect every button made from the symbol. The button symbol is specially designed to allow the text to be different on each button, without affecting the common look and feel of the buttons.
- Repeat this process 3 more times until you have a navbar with 5 buttons.
Select all the buttons by holding down the shift key and clicking each in turn, or by dragging the marquee tool around all at once.
-
Exporting
With all 5 buttons selected, choose Export from the File menu.
- The Export dialog will appear. What you will be doing is exporting an html file and supporting javascripts and images from which you can extract just what you need to drop into your own layouts. There are several ways to do this, but I'm going to show you the one that I have found the simplest and cleanest.
Choose a destination, then choose Save as: HTML and images. For the HTML option, choose Save HTML file, for Slices select Export Slices and make sure Selected Slices Only is checked. I usually also check Put images in a subfolder just to keep things neat.
-
Click the Options button to the right of Save As. This will present you with yet another dialog, above the first, which contains options concerning the details of the HTML you want.
Under the General tab, choose HTML Style: Dreamweaver HTML, and Include HTML comments.
-
Click the Table tab. The "Space with" option is sort of a matter of preference. Single table - No spacers may be the easiest code to use. These are all methods of keeping all the pieces of complex layouts in exact positions, but since your navbar is a very simple slicing structure, Single table - No spacers. will work fine.
- Click the Document Tab: Uncheck Include Areas without Slice Objects. Click OK to return to the main Export dialog.
- Click Save to export your files.
- Open the folder you saved the files to. There will be three files; the HTML file, a javascript file which controls the menu functioning, and an images folder containing all necessary images.
- Let's assume we have designed a site around a simple page layout with two areas on each page: a navigation area at the top, and a content area below as shown in the image. The navbar we are building will go into the top region.
For the sake of simplicity and my audience, I'm using an old fashioned table-based layout. There is a 2 row page-layout table, shown below.
-
Open the exported HTML file in Dreamweaver's code view or your favorite code editor, and copy everything from where it says "BEGIN COPYING HTML HERE" down to "STOP COPYING THE HTML HERE." This is the code for the table containing the navbar buttons.
-
Open your page layout, and paste the table code into the top cell of the page layout table. If you are not used to working with tables, make sure you don't accidentally lop off the closing tags of the layout table.

Here is the navbar table, inserted into the top cell.
If you prefer not to use nested tables, just insert the table above the content.
- Now we are going to create one additional javascript file. Go back to the exported fireworks HTML, and copy everything BETWEEN the lines
<script language="JavaScript">"
<!--
and//-->
In other words, copy the contents of the script but not the open-script and close-script tags surrounding it. Do not leave the empty script tags in your final document - you may delete them.
</script>
Paste this code into a BLANK text file, and save the file as "fireworks.js" in the same directory as your content page. Next, insert a link to this new file into your content page by pasting<script language="JavaScript1.2" src="fireworks.js"></script>
into your page just above the line:
<script language="JavaScript1.2" src="mm_menu.js"></script>
Save the file.
-
Put the content page, the two javascript files, and the images folder in the same directory.
- What do all the files do?
contentPage.htm, is the HTML page which you can use as a template for the rest of your site's pages. It also contains code that opens each popup menu upon rolling your mouse over any of the buttons. Inside each of these onMouseOver statements are the settings for the position of each popup menu, relative to the button itself.
onMouseOver="MM_showMenu(window.mm_menu_0605230637_0,-1,25,null,'exampleLayers_r1_c1');
means "when the mouse rolls over this button, open menu number 0605230637_0 -1 pixel from the left edge of this button, and 25 pixels from the top edge of this button."
'null' indicates that this button has no child menus, and 'exampleLayers_r1_c1' is the name of the button image.
fireworks.js contains the settings you chose for styling your menus, and also contains all the text and links for each menu.
mm_menu.js contains the javascript functions that generate the menus, and control the way the menus behave.
Using one Navbar, no matter how deep your site gets.
if you are using the navbar in pages in different directories (folders), you will need to decide how to handle the need to change the URLs you used in the navbar to accommodate the changing paths to the linked files.
For example, if the content page you just created is in the root folder, the relative URL from that content page to a target page in that same folder would be: "targetpage.htm" If instead, the content page is in a sub-folder within the root folder, the URL to a target file in the root folder becomes: "../targetpage.htm". So links hardwired into your navbar would no longer be correct.
There are several ways to handle this issue.
- Put all your content pages are in the same directory.
- Use absolute URL's in all cases: instead of href="corporate.htm" use href="http://YourSite/corporate.htm"
- Use the BASE element to specify the path to the current document. For example, if all the URL's in your navbar were specified as if the current document would be in the root directory, the folder structure migh look like the example below:
YourSite/ (directory)
So links between corporate.htm and products.htm would look like this:
- corporate.htm
- products.htm
- news.htm
href="corporate.htm" , href="products.htm", href="news.htm"
However if your site grows, and you decide you want to create folders within the root called "corporate", "products" and "news", and put the appropriate topic files within the folders, your new folder structure might look like this:
YourSite/ (directory)
Links become a little more complicated in this situation. A relative link from YourSite/corporate/index.htm to YourSite/products/page2.htm becomes
corporate/ (subdirectory)
--index.htm
--page2.htm
products/ (subdirectory)
--index.htm
--page2.htm
news/ (subdirectory)
--index.htm
--page2.htm
href="../products/page2.htm"
while a link from YourSite/products/page2.htm back to YourSite/corporate/page2.htm becomes
href="../corporate/page2.htm"
You could create different "fireworks.js" files for each subdirectory, with differently specified URL's for each link. But it's easier to use the "BASE" element to specify the same base URL for all the documents in the site, and use the same navbar code in all of them. If your current document is in a subdirectory called news/, you would put this in the HEAD area of your current document:<BASE HREF="http:/YourSite.com/">
then a relative URL contained in news/index.htm like: "href="corporate/index.htm" will translate to:
http://YourSite.com/corporate/index.htm
instead ofhttp://YourSite.com/news/corporate/index.htm
Posted by ellen at 11:49 PM
Part 2. Step by Step guide to using Fireworks to create Popup Menus
Make the rectangle into a functioning button
- To designate the rectangle as a button, so that it will react when your mouse rolls over it or clicks on it, it needs to be converted to a button symbol. Fireworks button symbols have some functions built in, making it very easy to create the behaviors you want.
With the rectangle still selected (the blue handles showing), select "Convert to Symbol" from the Modify menu.
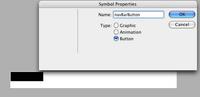
- Name your symbol and select Button as the type. Click OK to finish.
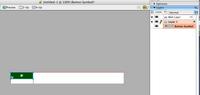
- Your rectangle will now have a greenish tint. The green tint is a transparent layer called a "slice". A slice is used to determine how the graphic you are creating in Fireworks should be cut up. This slice delineates the boundaries of the button and show the active area of the button and determine the size of the table cell or layer that will contain the button.
- Now, we need to further edit the properties of the button, to make it blink or flash when a mouse rolls over it. This rollover effect is used to give the viewer some feedback: it makes it obvious that your mouse is over the button, and that if you click the button, something will happen. The mouse rolling over or off of the button is treated as an "event" which can be used as a trigger for changes to the look of the button. Fireworks divides the various states of the button into UP (the default state of the button, the mouse is up off the button.), OVER (mouse rolls over the button), DOWN (mouse clicks on the button) and OVER WHILE DOWN (mainly used in navbars to show rollovers on the current page's button). Generally, the only ones you need to show some feedback to the user are UP and OVER.
Double-click the green rectangle anywhere but on the center registration mark (we'll use that later). The Symbol editing panel comes up.
Use the text tool within the Symbol editor to type a label for the button in the "Up" state, the first tab.
- The rollover effect is created by making a variation in the appearance of the button that will flash on when the mouse rolls over it. For example the type color could become brighter, or the background of the button could be indented.
Click the Over tab to begin creating the Over state of the button.
- To make the rollover animation effective, all the elements should be in exactly the same place or they will appear to jump slightly. You can make an exact duplicate of the graphics by clicking Copy Up Graphic. This copies whatever you created in the Up state into the Over state. In this case we will make very minor changes in the button colors - we'll change the text to a lighter yellow, and the background rectangle to gray.
Click Copy Up Graphic...
and the graphics from the Up state are copied to the Over state
- Select the text. It can be difficult to tell if you have selected the text or the rectangle behind it. The text layer is on top of the rectangle layer, and probably will be the first thing to be selected if you click in the middle of it. There are two ways to tell which is selected: the handles of the text layer will not line up exactly with the corners of the rectangle, but the rectangle's handles will be exactly at the corners. The second way is, if you look at the properties inspector, you will see the word Text in the upper left.
Text is selected: handles don't line up with black rectangle. Instead, the boundaries of the text box turn blue.
Background rectangle is selected: the four corner points of the rectangle turn blue.
-
Press the "Play" button to see the movie showing how to select overlapping objects: observe which handles turn red as you roll the mouse over them.
-
Still in the Over tab, select the text and choose a brighter yellow. Select the black rectangle and choose a gray color. Though only slightly different than the UP colors, these are different enough to show a blinking effect when the mouse rolls over the button.
- Click the Done button to close the editing window and return to the main view. To see your rollover effect in action, click the Preview button. In Preview mode, run your mouse over the button and watch the color change.
Part 1. Step by Step guide to using Fireworks to create Popup Menus
Many people don't realize that a tool they already own, Macromedia's Fireworks, is one of the best for creating buttons, navbars, and especially popup hierarchical menus. Try the steps below to see how easy it is to create customized menus.
Note: this tutorial is geared for beginning web developers, with very little knowledge of HTML.
Before we start, I'll put in my plea for restraint when using popup menus. As handy as they are, I've seen them overused and misused.When incorporating these menus into your design, keep them brief and closely related to the button topic they are associated with so that your users can EASILY guess what might be under each topic. If you find yourself making huge lists of popup menus with many submenus, consider reorganizing your navigation scheme. Flatten it so that it is more easily scanned, either as a whole, or in sections. Perhaps use a site map, or table of contents at the start of each section of your site. Hiding complex systems of information in popup menus will prove very frustrating to your poor audience.
In this tutorial, we're going to build a horizontal navbar consisting of five buttons, each with its own short menu. A working example is here.
CLICK ON ANY IMAGE BELOW TO SEE IT ENLARGED.
Start by drawing one button
- Open Fireworks. Create a new document either by selecting "New" from the File menu, or by clicking Create new Fireworks File in the splash screen that comes up when you open Fireworks.

- Set the document size to 500 pixels wide by 50 pixels high: long and skinny, so we can make five 100 pixel wide buttons, side by side.
Hit OK, and your blank document will appear.
- We'll start by making a single button. Select the rectangle tool from the toolbar. Choose a paint color by clicking on the color swatch next to the little paint bucket.
- Now, draw a rectangle on the left side of the canvas.
- Since we will want the buttons to be an exact size, we need to set the dimensions precisely by entering exact values for height and width once the rectangle is drawn. Make sure the rectangle is selected (the blue handles must be showing as in figure X). Open the properties palette if it is not open already, and type 100 in the W field, and 25 in the H field to make it 100 px X 25 px. Our navbar will have 5 buttons, each 100 pixels wide, so it will be 500 pixels wide total.

-
Also in the Properties palette, choose colors for the buttons: Select black as the fill color (the paint bucket) and white as the stroke color for your button. Make the white stroke 2 pixels wide.
June 20, 2005
iPod Freeze
If your iPod freezes up, as mine did several times before dying completely, follow these instructions:
To reset iPod mini, iPod mini (Second Generation), iPod photo, and iPod (Click Wheel)
Toggle the Hold switch on and off. (Slide it to Hold, then turn it off again.)
Press and hold the Menu and Select buttons until the Apple logo appears, about 6 to 10 seconds. You may need to repeat this step.
Tip: If you are having difficulty resetting your iPod, set it on a flat surface. Make sure the finger pressing the Select button is not touching any part of the click wheel. Also make sure that you are pressing the Menu button toward the outside of the click wheel, and not near the center.
[note: this is the tip that got it unfrozen for me]
If the above steps did not work, try connecting iPod to a power adapter and plug the power adapter into an electrical outlet, or connect iPod to your computer. Make sure the computer is turned on and isn't set to go to sleep.
________________________
To Apple's credit, they replaced the dead iPod immediately, for free.
Needless to say I am purchasing the extended warranty. This is one case where it may be worth it.
UPDATE! If the steps above did not help, take a look at this page:
How to fix an iPod that won't boot