Captivate allows you to import a Powerpoint file to use as the starting point for your learning activity. It's often easier for people to "think" in Powerpoint, so many users prefer to rough out a project in Powerpoint, then import it and continue working in Captivate.
When a Powerpoint file is imported this way, its images become part of the Background element of the slide in Captivate. Backgrounds are not easily repositionable, or croppable, but it's not hard to bring the background image up onto the slide as a regular image element that can be moved around, edited, and included in actions.
Ads by Google
Posted by ellen at November 15, 2011 04:10 PM
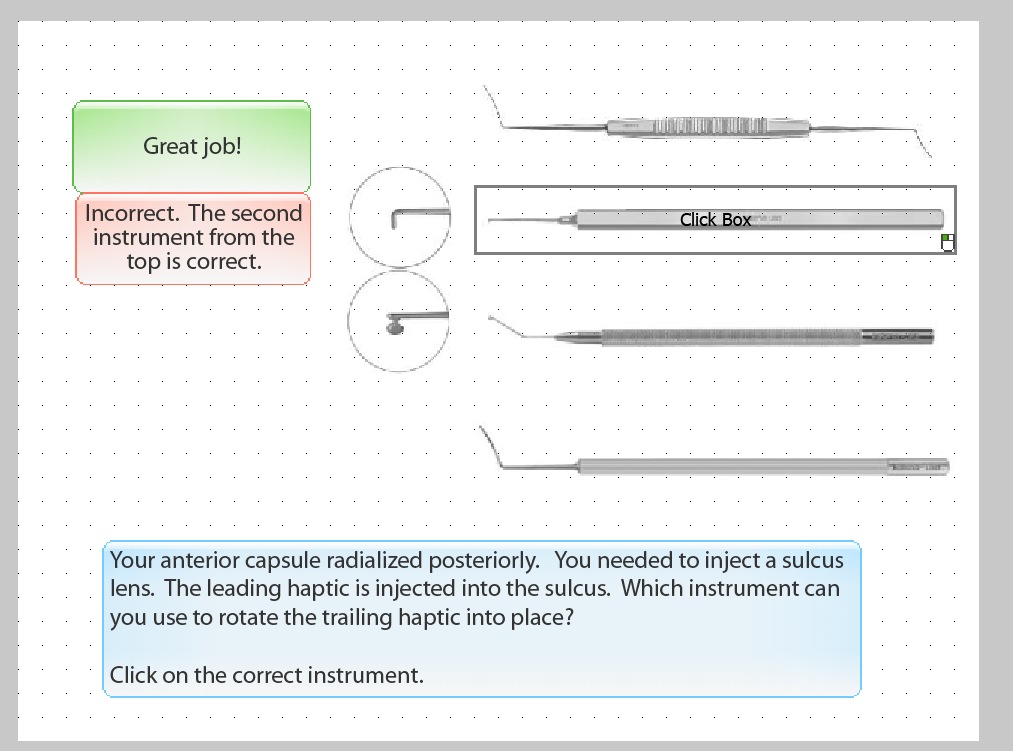
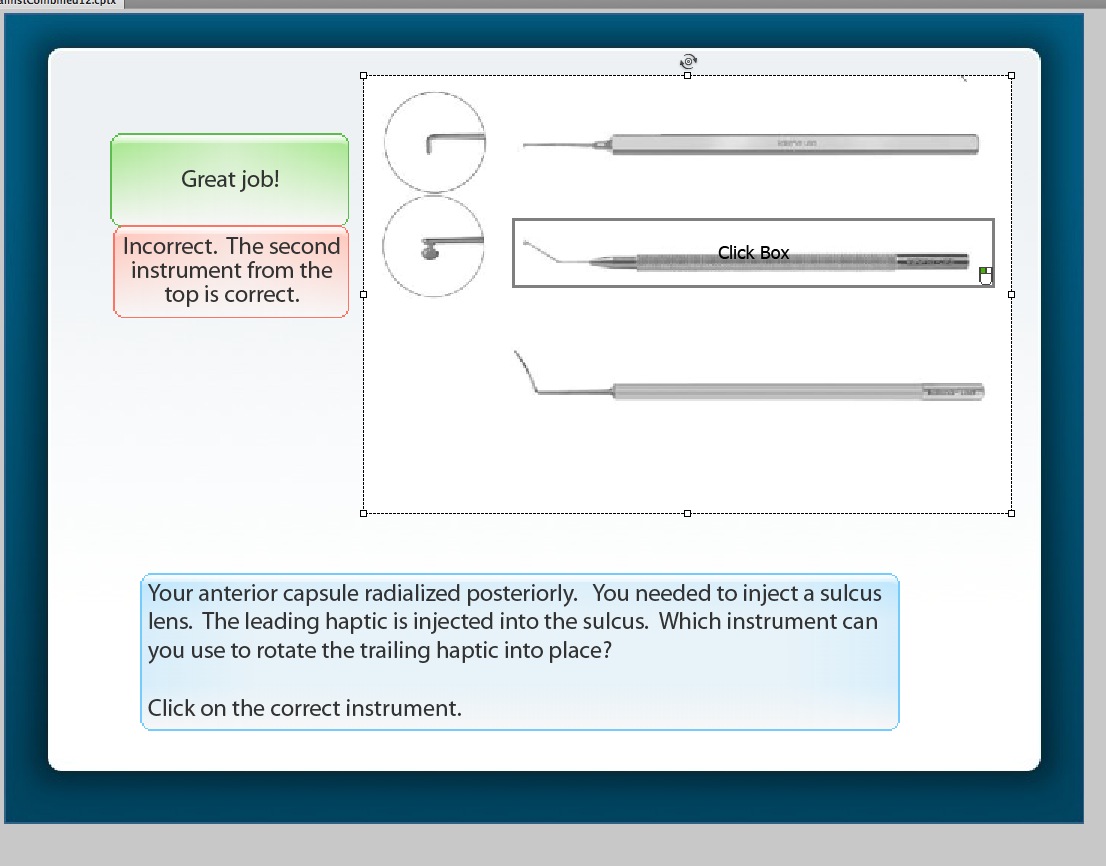
The slide below is an example of an imported Powerpoint slide. The image of the instruments is part of the background. This is a problem because the image needs to be cropped, and because we also want to use a consistent background template throughout. If we add a background now, it will merely replace the image of the instruments.
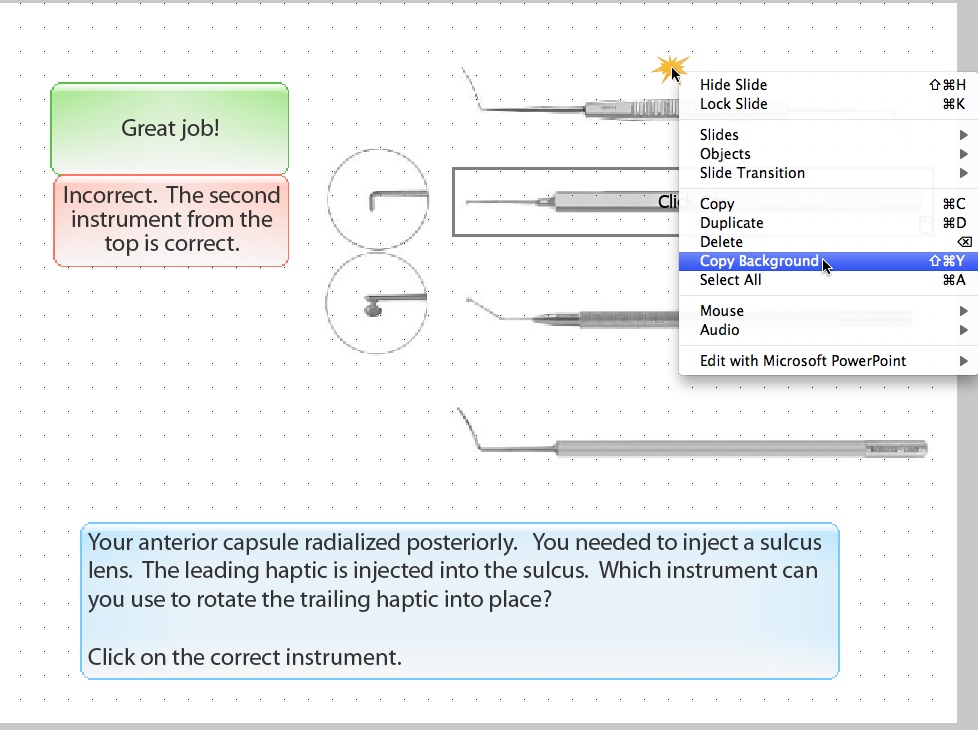
To bring the background image up to the top, right-click (Control-click on Mac) on the background area of the slide, and select Copy Backgroundfrom the menu.
Before pasting the image in the clipboard back onto the slide, let's apply the template. Click on the Slidelayer in the timeline tab below the slide to see the properties for the slide in the Properties panel on the right. Then select the correct template from the properties menu for the slide.
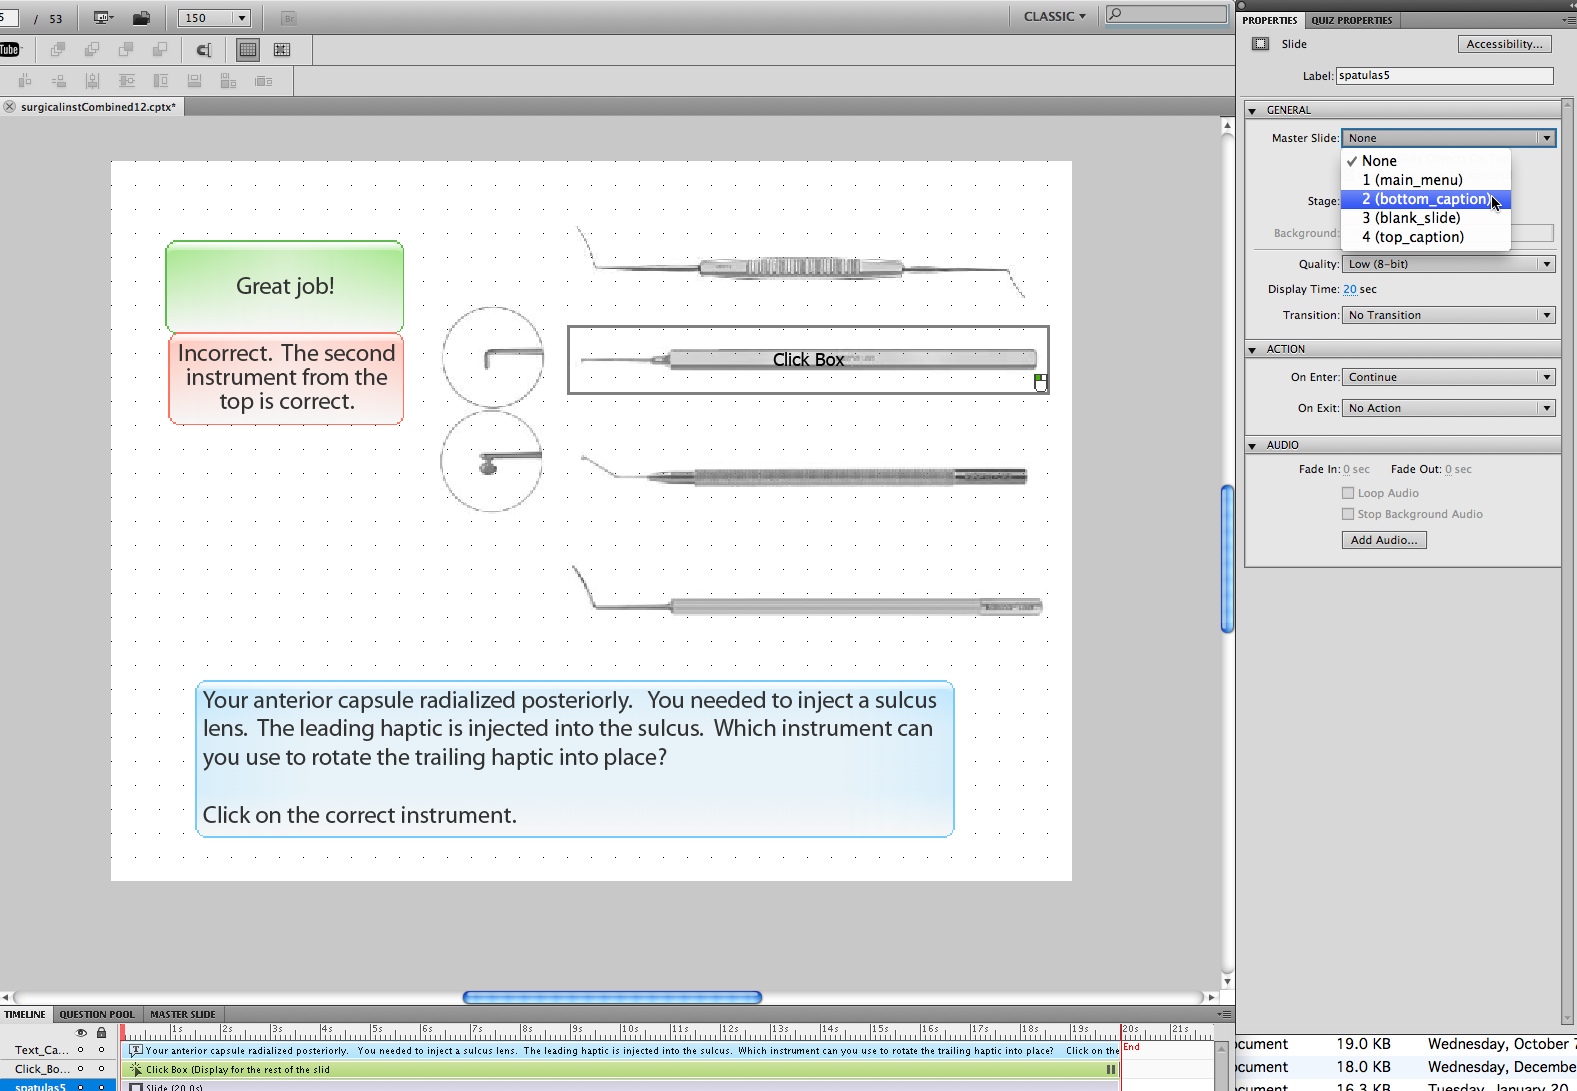
The template will now fill the background of the slide.
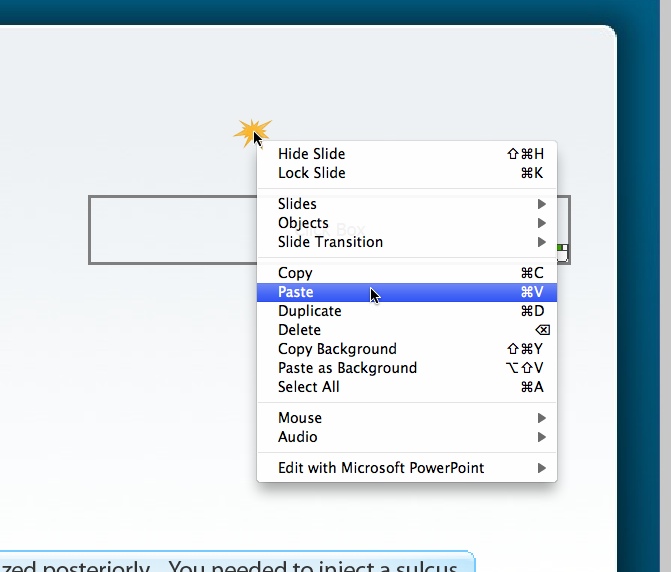
Right click (Control-click on Mac) in the background area and select Pastefrom the drop-down menu.
The image you copied earlier will be pasted on top of everything else. With the new image still selected, click the cropping tool icon as shown.
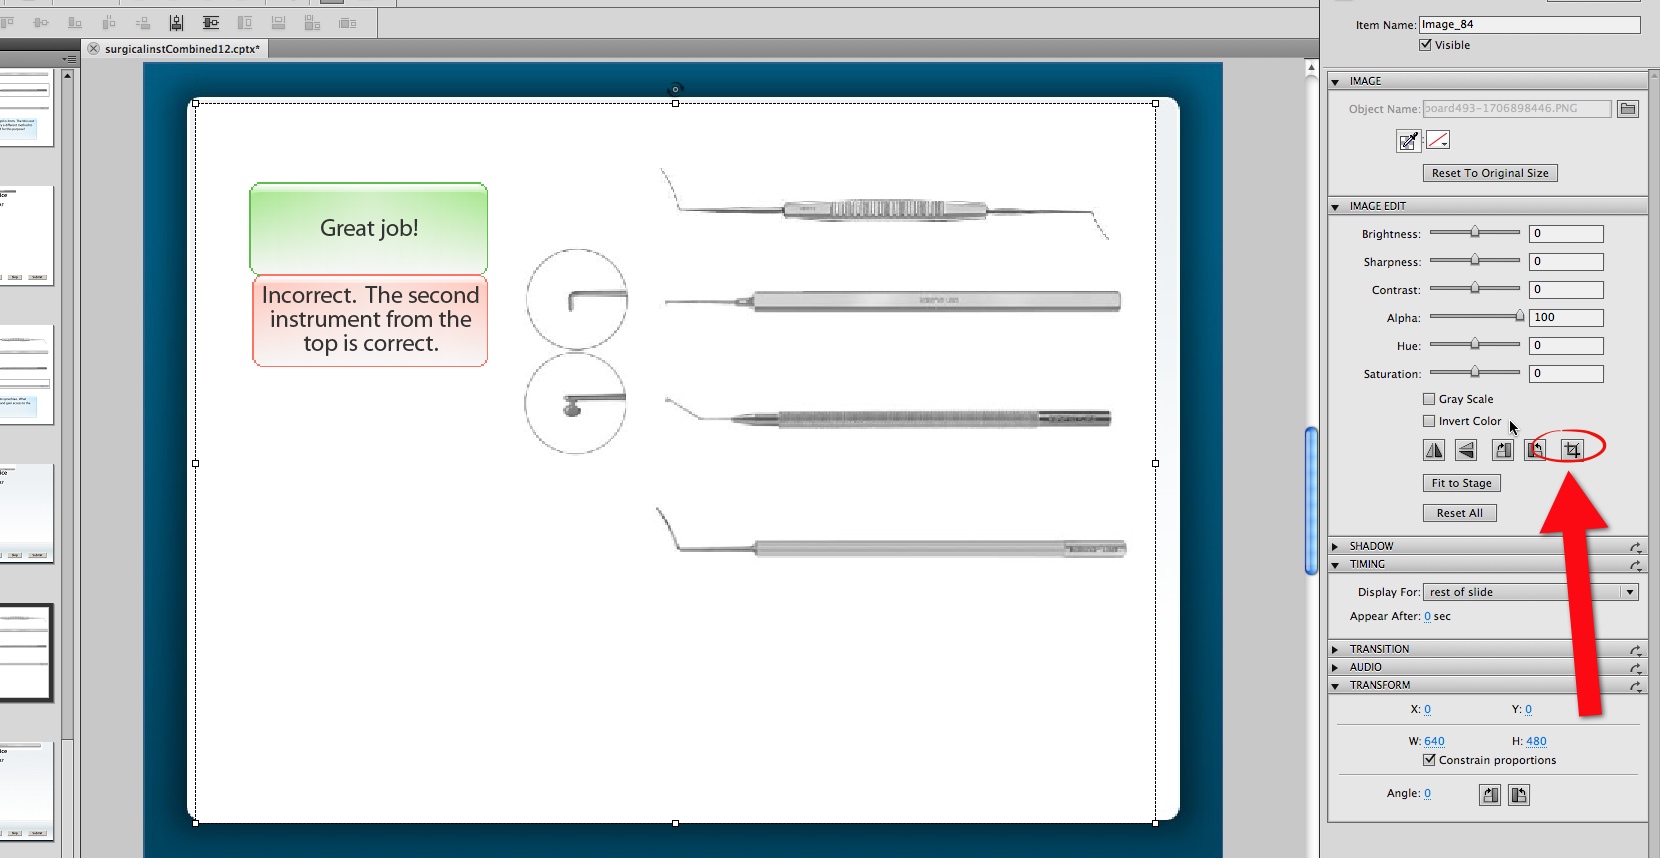
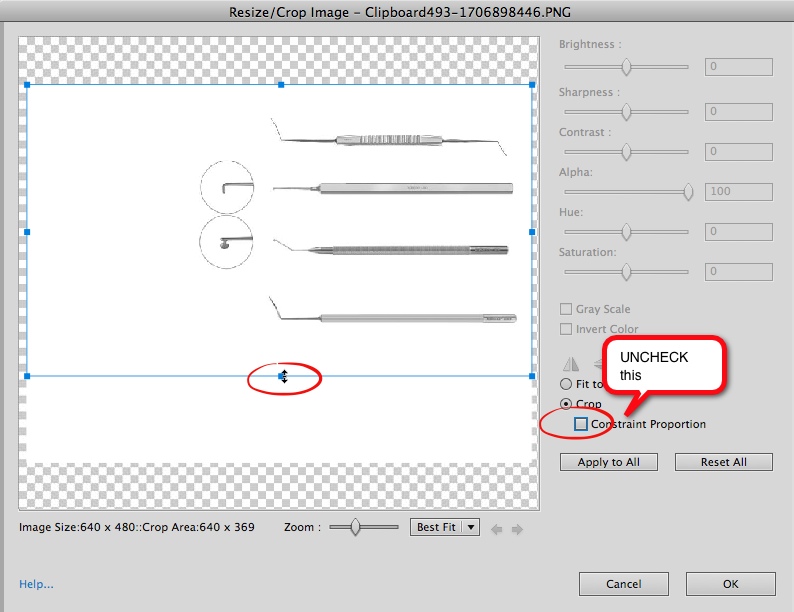
The Resize/Crop Image window will open. Uncheck the Constraint (sic) Proportions checkbox. This will free up the cropping guides so you can move them to create any size rectangle. Adjust the handles of the image until you are satisfied with the cropping. In this case we wanted to eliminate the top instrument entirely.
Click OKwhen you are done cropping the image.
The image will have shifted to the top left corner. Move it into the correct position.
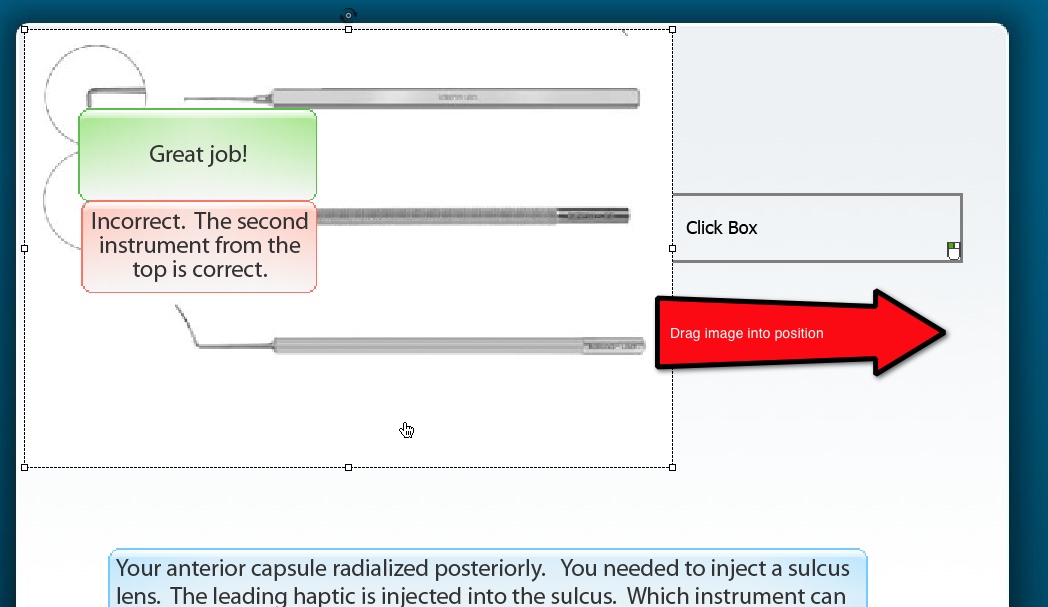
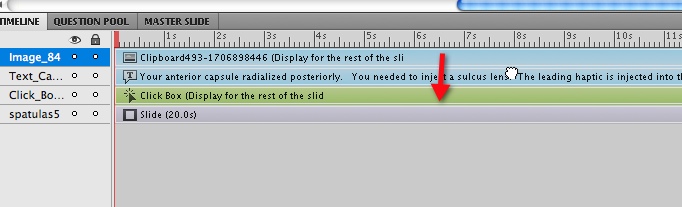
Note that the image is sitting on top of the click box. Fix this in the timeline by shifting the image's layer down below the click box layer.
Before shifting the layer:
After:

The click box now appears on top of the image. It will be invisible once published.
Ads by Google
