Dreamweaver Crashes on Tiger when expanding files panel
Since installing Dreamweaver 8, expanding the files panel to show both remote and local sites caused freezes. The application would become unresponsive, and a few seconds later "not responding" would show up by Dreamweaver's title in the force quit window.
Updating the application did not help. However a suggestion in the Emerging Issues document did provide a work-around: Create a new, empty site. Select that site in the un-expanded files panel. Right click the Files tab and select "Group Files With>New Panel Group".
Once the Files panel is moved to a new group by itself, expand the panel. Then switch back to the site you were working on.
Posted by ellen at
10:44 PM
SCORM-ready template: Part 1
Note: this tutorial has been superceded by a new version. If you aren't redirected there automatically,
click here to view the new version.
Here is a SCORM-compatible HTML learning module template which is easy to use, and easy to modify.
View it here | Download it here
Template Features
This template is designed to simplify the creation of MLearning compatible learning modules. Some of the features include
SCORM compatibility: The required elearning SCORM communication functions are built in so the module can communicate its status to a Learning Management System (LMS).
Requires no server-side languages or processing other than Server Side Includes. Javascript-based.
Bookmarking: last page browsed is automatically stored in the LMS.
Dynamic navigation: The navigation, page titles, and pages left to view are all automatically generated.
Built-in styles: The look and feel has been set up so all you need to do is add text and use styles like H1, H2, and a few classes. The styles adapt to different browsers and screen sizes.
Clean printing: Navbar disappears when printing, creating a cleaner more efficient printout.
Branching capability replace entire page list with a single click to create another version of the module. Insert pages with a single click. Add pages to end of current page list.
Direct linking to pages when not under scorm control. Although the module is structured as a frameset by necessity, linking directly to specific pages is possible when no LMS is present, so module can be used as reference outside the LMS. (Direct linking would break the scorm control).
Using the SCORM template
1. Make an Outline
Start by outlining your entire learning module. List all the pages you want to include. Don't worry, you can change the list after you get started!
The module structure can be very simple as shown below, or more structured with chapters and sections as shown at right. This template can accommodate up to four levels. The module structure can be very simple.
The outline below shows a flat structure, with all pages on the same hierarchical level.

This outline shows a more complex hierarchical structure with chapters and sub-sections.
2. Customize the Header
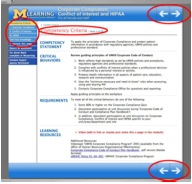
Web view of the header:

Open header file. Find the file named "header.htm," and open it. This file controls the look of the header at the top of every page in the module.
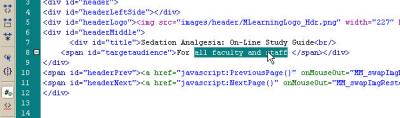
Select Code View.
Show the line numbers by selecting Line Numbers from the Visual Aids dropdown menu.
In Code View, you can see precisely where to type the new title and target audience information. Replace the default text with your own. Find lines 7 and 8 and enter your own module title and target audience. Do not delete or type over any tags.
GO TO PART 2
Posted by ellen at
8:37 PM
SCORM-ready template: Part 2
3. Customize the Window Title
The Window title is the title shown at the top of the browser window. It is controlled by the frameset page ("index.htm"):

To change the title at the top of all your page windows, open the file "index.htm."
index.htm is a frameset, so in Dreamweaver we will need to do a little fancy selecting to edit it. Dreamweaver will open the frameset to the first page
page01.htm. If you select code view from here, you will be editing the code of page01.htm, NOT of index.htm. We need to get to the code of index.htm itself. Here's how:
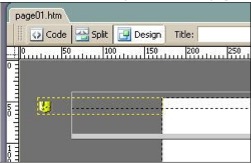
A. Dreamweaver will open to the first page:
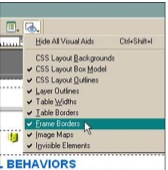
B. We need to select the frame border to make it display the frameset, but it is invisible by default.
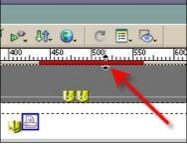
Turn it on by selecting Frame Borders from the Visual Aids dropdown
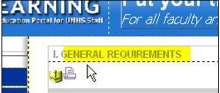
C. Now that the frame borders are visible, you can select them as shown (Click on the area highlighted in red).
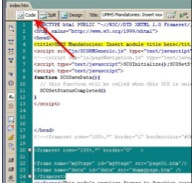
E. With the border selected, click Code View. The title you need to edit is at Line 4 (shown highlighted in yellow).
4. Customize the Navigation
One file pageNavigation.js controls the contents of the nav bar on the left, page numbers, page titles and all the navigation buttons.
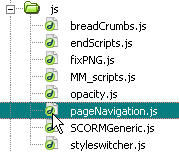
Open the "js" folder.
Open the file pageNavigation.js
Don't be intimidated by all the code on this page. You will simply be adding titles to the list of pages.
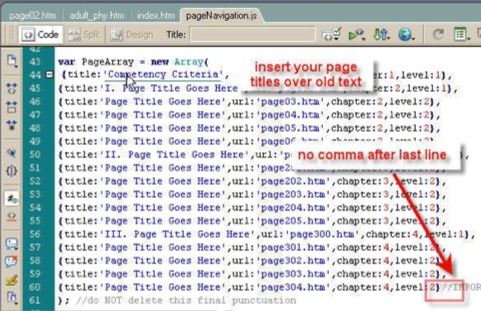
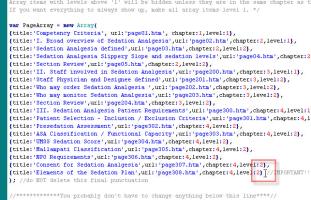
Look for the line "var PageArray" as shown here (approx. line 44) Carefully replace the "Page Title Goes Here" with the page titles from your outline. Don't worry about the chapter and level numbers at this time. It is very important that you DO NOT DELETE ANY PUNCTUATION, so be careful when you are pasting in titles. If you do, and cannot find what you deleted, use the backup file you just created, and try again. Every line gets a comma after it, except for the last one.
Duplicate the file pageNavigation.js so you will have a backup. (Control-D). Open pageNavigation.js by double-clicking it. Insert your page titles over the placeholder text.
5. Add Your Content
Since
page01.htm is a special page (Content Criteria), we'll leave it for later.
Let's begin adding text to the first content page.
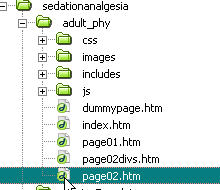
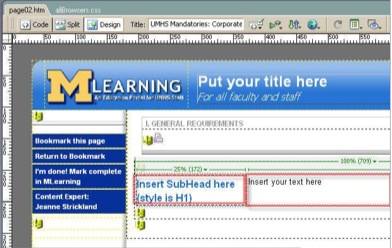
Open page02.htm:
It will open in Design View. You will notice Design View doesn't look exactly like the web view. This is because some elements of the page, like the navigation bar on the left, are generated by javascript, so Dreamweaver will not display everything precisely. You can ignore these differences while editing. Generally the older the version of Dreamweaver, the worse the display will be. However, the content area you need to edit displays well enough to work on easily, so you can ignore the differences.
If your module contains chapters, change the chapter title. If not, delete it.
The white content area is set up as a single table with two columns. Subheadings go in the left column, and the text goes in the right. Paste your content into the 2 areas provided (shown outlined in red).
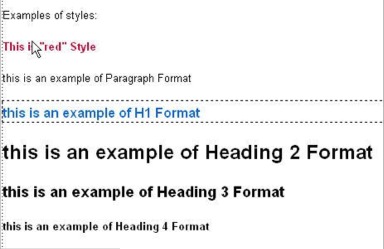
6. Editing: Styles
You may style text by using the options in the Properties Palette.
Use the Format menu or the Style menu, or simply use the Font, Size, and color dropdowns. Some of the styles that are preset for you are shown here:
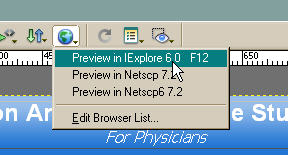
Preview the page by selecting Preview in... or use the F12 key.
8. Editing: Tables
The initial content table in the Table example page is set up with one row and two columns. You may change the width of the columns, add additional rows or columns or remove a column. Each row will automatically have a light gray bottom border. This is set in the style sheet but may be locally overruled where necessary.
Resize columns by selecting column border until cursor changes to double arrow.
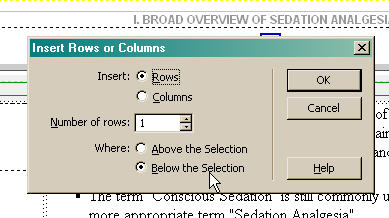
Insert additional rows to the table by clicking inside the table, then select Modify:Table:Insert Rows or Columns.
A dialog will come up asking where you want the new rows or columns. Usually you will want to choose
Below the Selection.
Once you have set up one page to your satisfaction,
Save the page, then duplicate the page by
right-clicking it in the
Files panel, and selecting
Edit: Duplicate.
Posted by ellen at
3:49 PM
Firefox more sensitive to malformed comment tags
Firefox is much stricter in parsing comment tags than Safari or IE.
Comments should have 2 hyphens after the exclamation point, no more, no less, and there should be no hyphens within the body of the comment.
So:
<!--
is OK, but
<!----
is not, particularly in Firefox.
Example 1 shows a table surrounded by a properly formed comment tag.
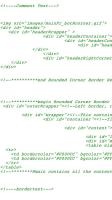
Example 2 shows the same table surrounded by a tag with too many hyphens - the table and all code between comment tags disappears - in Firefox.
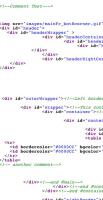
View the code source in Firefox to see how firefox colorizes the code:
With properly
formed comment tag:
|
Improperly
formed tag:
 |
Posted by ellen at
1:03 PM


 C. Now that the frame borders are visible, you can select them as shown (Click on the area highlighted in red).E. With the border selected, click Code View. The title you need to edit is at Line 4 (shown highlighted in yellow).