- Server side include statements in the content pages must be replaced with the real code
- The closing javascript on buttons in the navbar needs to be modified from "top.window.close()" to "window.close" because of the Moodle uses a different learning activity window structure than our own in-house LMS.
I've made these changes and created a "Moodleized" version of the template for you to download:
DOWNLOAD MOODLE VERSION OF TEMPLATE
This template is an unscored activity and should just mark itself complete. I will soon be posting one that will allow scored interactions on each page as well.
Ads by Google
Posted by ellen at June 10, 2009 12:19 AM
Why is it necessary to replace the SSI's for Moodle?
Moodle uses slash arguments so the server cannot see the extension (.htm) that tells it a file may have Server-Side includes in it. For example, a typical module path would be:
There is an ".htm" extension on the end of the path, but "file.php" is the only file that is executed by the server.
Moodle uses slash arguments so the server cannot see the extension (.htm) that tells it a file may have Server-Side includes in it. For example, a typical module path would be:
http://yourserver.com/moodle/file.php/4/unit1/index.htm
There is an ".htm" extension on the end of the path, but "file.php" is the only file that is executed by the server.
Once you've downloaded the Moodleized template, follow these steps to create a test course:
- Go into the category you want to put the course in, and click Add a new course.
- Enter a name and code
- Set format to SCORM format
- Set number weeks/topics to 1
- Set course start date to today's date
- Set news items to 0
- Set show gradebook to yes
- Set activity reports to yes
- Set max upload size to 64 mb
- Set is meta course to no

- Set course enrollable to yes
- Disable the start and end dates
- Set this course is available to students


- Click Save Changes. In the Assign roles to Courses window
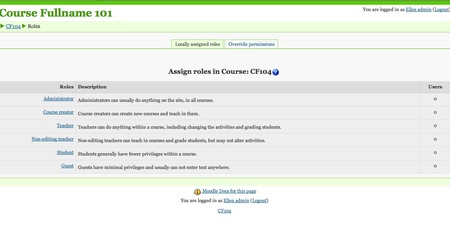
- Add the desired user(s) to that role.
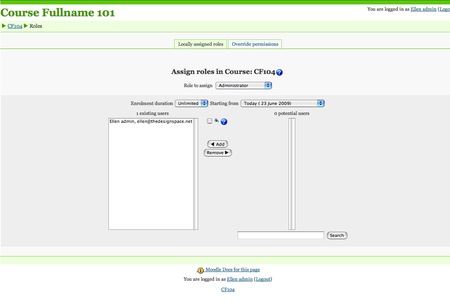
- Click the Course Code (CF104 in the example below) at the bottom or top left of the page to continue.
- Since you have not yet associated any SCORM packages with this SCORM course, it will next display the Adding a new SCORM/AICC page.
- Fill in a Name and Summary for the SCORM package. Then click Choose or upload a file...

- The Upload a file window will open

- Choose a SCORM package (a zip archive containing files plus manifest) and click Upload this file
- There will be no progress bar. Just wait until the screen changes to a list of available files.

- You'll see a list of the available files to choose from. Unzip the package by selecting it and clicking Unzip.

- A list of all the contained files will now appear. Select imsmanifest.xml and click Choose.

- The window will close, leaving the Adding a new SCORM/AICC window visible. "imsmanifest.xml" will now appear in the Package file box.
- Choose a Scoring method, Maximum grade, Number of attempts, and Attempts grading. You may need to consult Moodle documentation to decide which is appropriate.
- For stage size, make height at least 500. You may want to experiment with these settings.
- Display package should be set to New window.
- Check all the options unless you have reason not to.
- The rest of the options are up to you, except that Visible should be set to Show.
- Click Save and display

- The course launch page will appear.
- The module should then open in a new window.
- In the example shown, the two colored buttons in the navbar on the left are SCORM control buttons. The violet button marked Quiz simply opens the next SCO, if there is one. The pink one labeled End this lesson closes the window and marks the module complete.
- Click the End this lesson button and the module window should close.

- You will be back on the course launch page.
- Click Exit activity.

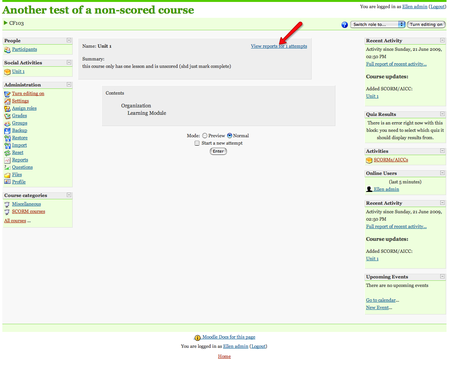
- You will return to the student's main view of the course.
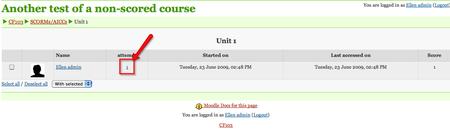
- You should see a report link. Click to view a summary of all your attempts.
- In this example, I have only one attempt. To see more detail, click the attempt number as shown.
Ads by Google

As usual, you propose an other great ressource... I was planing to test your course template this summer. That's great to know there is a tweak to fit with Moodle.
Thanks!!
is there a manifest file inside your zip example?
Probably not, but I'll make you one next week. I figured people would want to make their own (use the Reload editor from http://www.reload.ac.uk/editor.html ) because you may want to combine more than one SCO.
I am trying to upload template_moodleversion.zip but it is not uploading. Can anybody help.
I am able to work till "The Upload a file window will open"
thanks in advance.
hi,
can i use your template in reload and there make a scorm package and then use it?And how is it possible to replace the SSI's for Moodle in apache server?
Regards
Neda
Yes, you can use my template in reload and create a scorm package.
I already replaced the SSI's in the version of the template that is on this page. Here's the link again:
http://thedesignspace.net/master/template_moodleversion.zip
hi,
thanx a lot. do you have any scorm application(real sample) that contain a php file and instead of it as you said in this page you have replaced SSIs like your example http://yourserver.com/moodle/file.php/4/unit1/index.htm? and in your template in which page did you write your code to replace SSIs?in index page? I have created my own scrom course with needed php pages that have server side transactions but i really don't know how to run it in moodle because i just see php files as text in moodle?i appreciate your helps.
regards
Neda
The files page01.htm, page02.htm, etc. have had the server side includes replaced with the real code. I don't think moodle will run php courses for the same reason it won't process SSI's: the slash-arguments at the end of the file.php URL. I'm certainly not a Moodle expert, so you may want to register on Moodle.com and post your questions there.
hi,
do you know any other LMS that can support php pages?
Hi Neda, No LMS would/should allow teachers/normal users to upload PHP files as this is the same as giving them the password to your database or hosting site - anyone with access to upload PHP files can do all sorts of nasty things that could break your site. You definitely don't want to give this ability to students.
If SCORM objects allowed the use of PHP I could send you an "Evil" object that would give me full access to your server (and send me an email with the details)