Creating a captions file
Ads by Google
Posted by ellen at October 13, 2008 08:51 PM
Creating synced captions using Subtitle Workshop
In my opinion, Subtitle Workshop has the best interface for creating and editing captions quickly and accurately. Its key-commands make the whole process go very fast. However to use it, you will have to export a copy of your video to one of the formats that it can read. Fortunately this includes a lot of formats: avi, wmv, quicktime, mpg, mpeg, mp4 - and chances are you have one of them laying around as an intermediate step in creating your video. The one format it does NOT read at this time is FLV. The captioning clip must use the same framerate as your intended final version.Note: Captionate will read FLV, but even Captionate plays MPEG more smoothly, and will offer to convert your file before use.
- Install Subtitle Workshop (it is available on the shared drive in "Ellen Software")
- Download THIS FILE and unzip it.
- Put the file "JW_FLV_player_asp.cfp" in
C:\Program Files\URUSoft\Subtitle Workshop\CustomFormats - Open Subtitle Workshop
- Begin by creating a new subtitle file. Selecting File>New Subtitle. This will add your first caption row.
- Set Input Frames per Second and Frames per Second to equal the frame rate of your video.
- Select File>Save. Since this is your first save, Subtitle Workshop will ask you what format you want to use. Temporarily, choose SAMI captioning. We will change this at the end, using a custom format, but choosing SAMI will enable you to save without some additional steps.
Next you will be asked for a location and filename. I usually choose a filename similar to the video filename, so I can keep track of what captions go with what video.
- Select Movie>Open, and find the video file you want to caption. The video will start playing, so if you aren't ready to start captioning yet, type control-spacebar to pause the video. Control-spacebar toggles between play/pause.
- Select the first caption row (it may already be selected). Hit control-spacebar to start the video. Listen to a single phrase, then pause the video by hitting control-spacebar again. Immediately type Alt-V to set the duration of the first caption.
- Click in the large text field under the caption row. This is where you will type what you hear. As you type, the caption will appear in the "Text" column in the selected caption row.
- When you have finished the first line, hit the Insert key to create a new caption row.
- Type control-spacebar to start the video again. Try to memorize the key sequence: control-space to play, control-space to pause , Alt-V to set the duration. It will make the captioning process go much more smoothly.
- When you reach the end of the video, you will need to save the file to a custom format to create the correct playlist structure. Follow the directions carefully to navigate this somewhat confusing aspect of Subtitle Workshop.
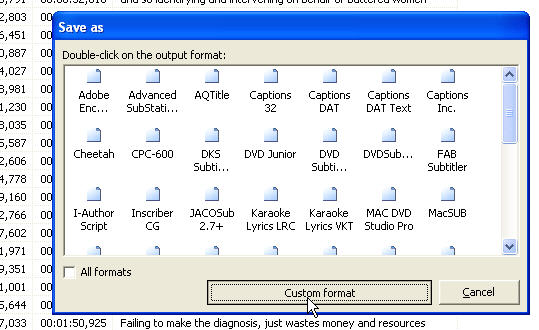
- Select File>Save As from the File menu.
In the Save As dialog, click the Custom Format button.
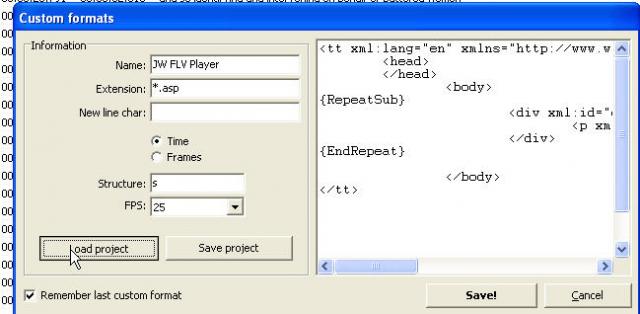
- The Custom formats window will open. Click the Load project button.
- The Open dialog appears. If you aren't there already, navigate to the Custom Formats folder where you dropped the JW_FLV_player_asp.cfp file in Step 3. Select that file and click Open.
- The Open window will disappear and you will be back on the Custom Formats window. The settings for the JW FLV Player format will be showing. Click the Save button.
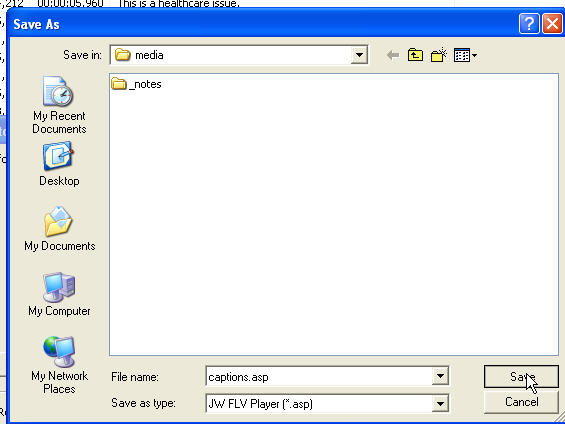
- The Save dialog will appear. Navigate to the "media" folder of your learning module, type a filename in the File name area, and click the Save button.
The Save window will close and you will be dropped back into the Custom formats window again, which can be very confusing. Simply click the Cancel button.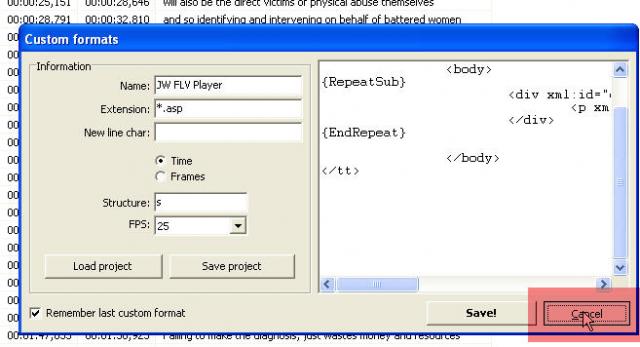
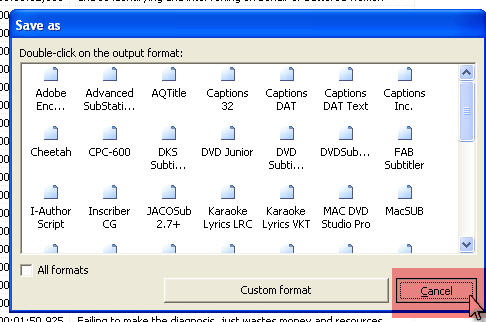
- The Custom formats window will close, and you will be back on the Save as window. Simply click the Cancel button AGAIN! This will return you to the captioning screen. Your file is now saved as an ASP file.
- There is one more important step. Browse to the asp file you just created in a web browser.
- Once you see the page, select "View Source" in your browser. Select the source and copy it.
- Open Notepad, and paste the text into it. Save as "yourcaptionsfile.xml" in the media folder.
The reason for this is that most caption formats do not require a calculated duration, so Subtitle workshop does not provlde a way to generate one. It generates start and stop points for each caption line. So, the custom format file you created outputs instructions in visual basic to calculate those durations. When you browsed the .asp file you creaed with Subtitle workshop, the server executed those visual basic commands, and output the durations in the source. Your XML file is now complete.
Ads by Google
