Adobe Presenter is an add-on to Powerpoint that produces Articulate-like Flash presentations from your Powerpoint slides. At around $500.00 list price it's out of reach for a lot of content developers, but with an academic discount the price drops considerably, to about $150, and it starts to be a viable option for SME's to purchase for Rapid Elearning development.
But even with the lower price, it may not be convenient for everyone involved in producing a course to have Presenter installed, so it is useful to know how to import and sync narration created outside Presenter. This way, a narrator can take their own laptop and a USB microphone off into a completely quiet room, which often makes more difference in the quality of the audio than almost anything else.
Ads by Google
Posted by ellen at February 04, 2009 05:05 PM
Adobe provides a tutorial on importing and syncing audio, but I find that for long narration files, using the Edit Audio feature is more intuitive and makes it easier to fix problems, so here is my method:
- Add the script for each slide's narration to the slide notes in Powerpoint. This will help when recording the narration and later, will provide a transcript for each slide for those who prefer to read instead of listen.
- Record the narration
First you will need to choose a microphone. See this Adobe Presentation for tips on how to select the right one for your needsUse any audio recording software you have to record the narration (use "mono", not "stereo" settings), and save it as a WAV or MP3. If you don't have any recording software, download and install Audacity, free "donationware" available for Windows, Mac and Linux.
If you are using Powerpoint's built in "Record Narration" feature, please use the instructions HERE to do your recording.
- Import the audio files into Presenter
Open the Powerpoint presentation and select Import Audio from the Presenter menu.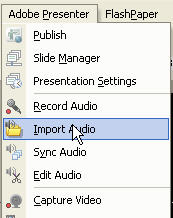
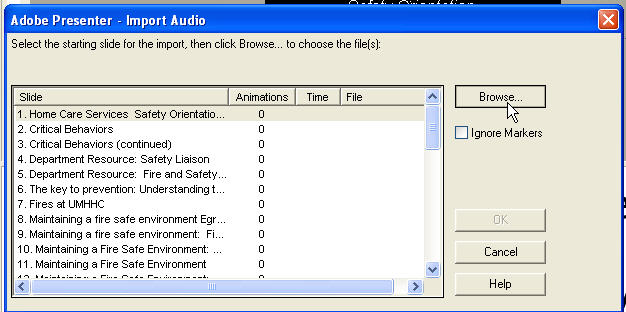
In the Import Audio window, select the first slide, click Browse and find the audio file(s).
If you used Powerpoint's Record Narration feature, just check "Import from Presentation. Presenter will assign the files to each slide in order, then ask for permission to delete the files from the original Powerpoint to save disk space. At this point you are done!
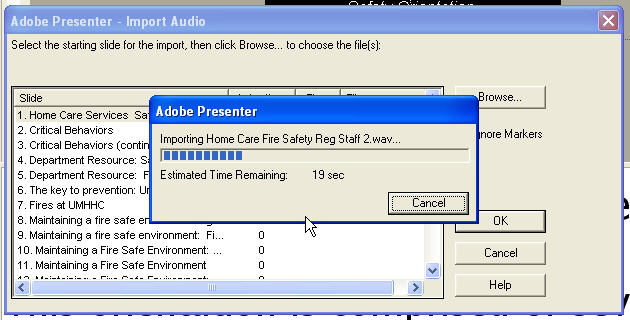
If you have one long narration file, just select it, then click OK. Wait for Presenter to get done with the import.
If you imported a single file, the duration of the first slide will be set to the duration of the audio file, until you tell it where the breaks are and "sync" the slides.
Click OK once you are done importing audio.
- Save a copy
Presenter, just like it's sister software Captivate, has some bugs, so I strongly suggest saving your work frequently. At logical stopping points like this, save a copy of the presentation. Create multiple versions by using "Save As...", and add a version number to the end of the file name. You can delete the intermediate versions when the project is completed, but this procedure can save you a lot of time if something goes wrong.

- Add in the slide notes to each slide
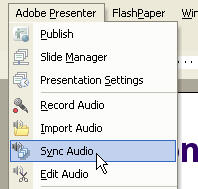
I would also suggest importing the slide notes into all the slides at this stage. I've found that doing this step AFTER syncing the audio can sometimes result in losing the contents of the Media.ppcx file which keeps track of the slide timings. This is one of the biggest bugs I've found in Presenter. Select Sync Audio from the Presenter menu.
Click Import Notes:
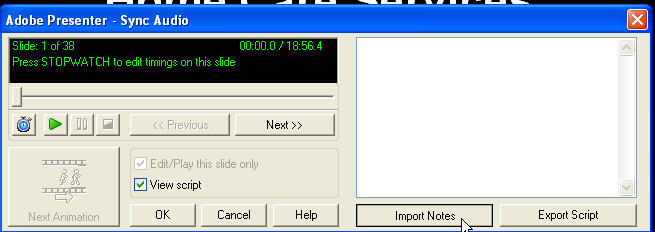
Under Slide range, select All slides.Under Import options select Replace current scripts with imported notes to ensure you have a clean transcript for each slide.
Click OK. You'll be returned to the Sync Audio window. Click OK again to close it.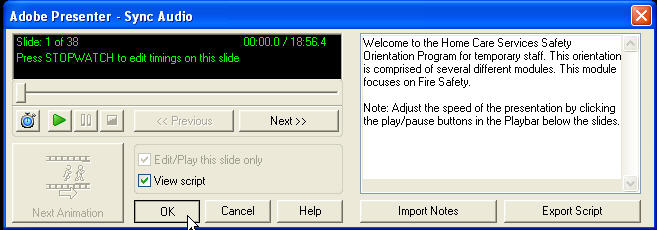
- Sync slides to narration
Change to Slide Sorter view so you can see the slides that are coming up while listening to the narration.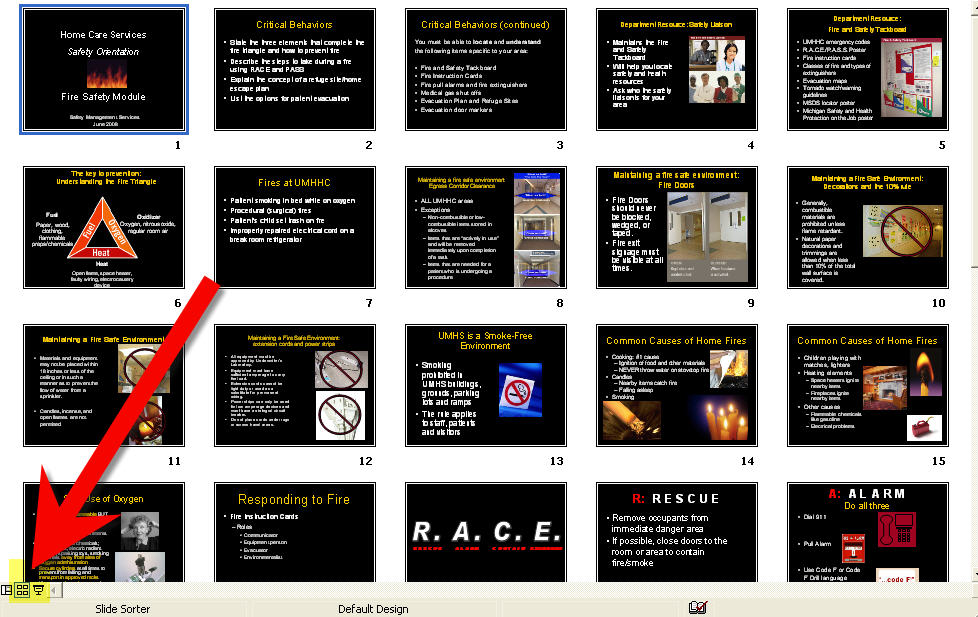
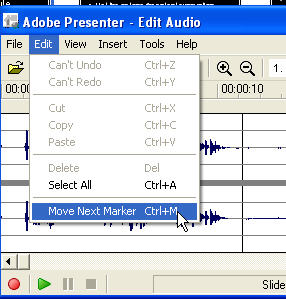
Select Edit Audio from the Presenter menu.

In the Edit Audio window, the waveform for the narration will be displayed. Click the PLAY button to start the narration.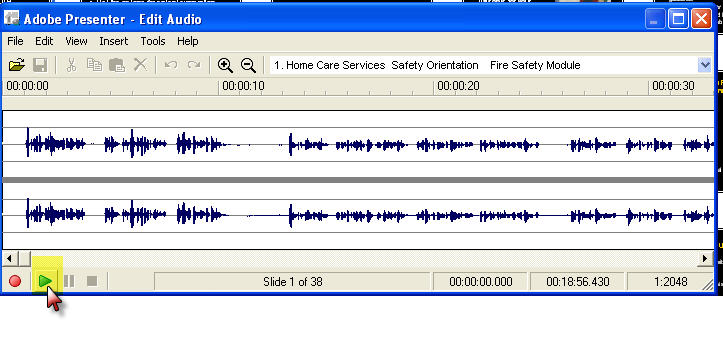
When you get to the position where the next slide should appear, click the PAUSE button (not the square STOP button).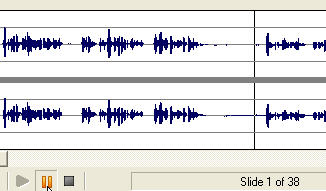
Type Control-M. This moves the marker for the beginning of the next slide to that point in the timeline. Don't worry, if you chose the wrong position you can just drag the marker. The nice thing about using the timeline for syncing is that you can see the breaks in the narration, which often correspond to breaks between slides.
After doing 5 or 6 markers, click the Save icon!

You don't have to do all the syncing at once. You can just save your work, close the Edit window and come back later. It's probably a good idea to stop in the middle of a long presentation and save a new version, then continue.When you have completed the entire presentation, check your work either by playing it in the Sync Audio window (click the play button and watch the slide show), or by doing a test "Publish" to see how it's all fitting together.


