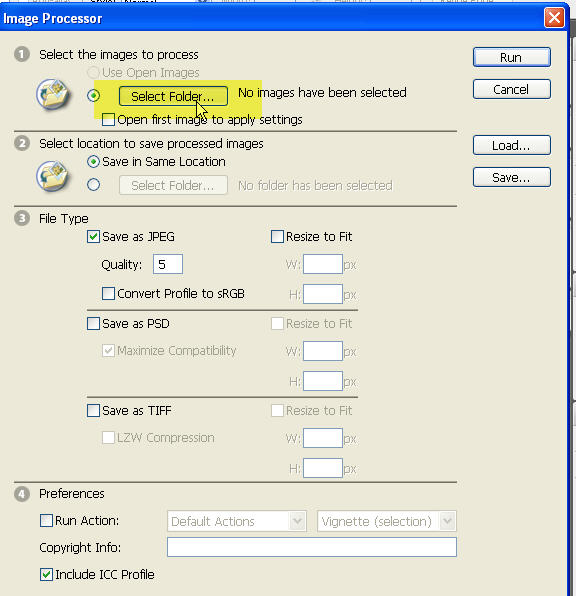
One important element that is often left out of beginner Dreamweaver courses is how to make your photos web-ready. Today's cameras turn out multi-megapixel images that are several feet wide when dropped into a web page at web resolution. Here's how to take a folder of high-resolution images and turn them into smaller files that will display at about 5-6" wide at 72dpi using Photoshop.
- Select Scripts > Image Processor from the File menu

Ads by Google
Posted by ellen at December 24, 2008 01:55 PM - Click Select Folder in the Image Processor window.
- Choose the folder that contains the pictures you want to resize.

- Choose a location for the resized photos.

- You may want to make a folder for the newly resized images to keep them separate from your other images.
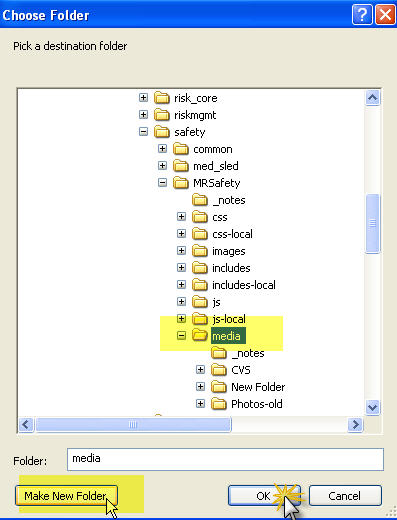
- Select the new folder.


- In the main Image Processor window, choose "Save as JPEG", and "Resize to Fit." Enter maximum width and height in the boxes as shown. Click "Run". After a minute or so, the images will start being resized.
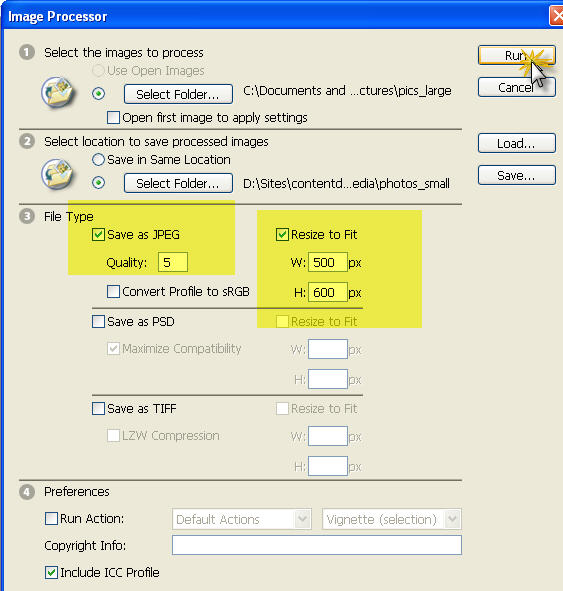
- Check the new folder to see that your resized images have appeared.

![Reblog this post [with Zemanta]](http://img.zemanta.com/reblog_a.png?x-id=2e49bc0c-e060-4603-8772-10e7a700f9a2)
Ads by Google
