August 30, 2008
Creating simple animations in Powerpoint 2002
How to make a shape move across the screen
Note: this tutorial is written for older versions of powerpoint. The menus and toolbars will be in different locations for the newer versions, but the instructions are basically the same. Powerpoint for the PC is required for this type of motion-path animations, but the steps are similar for using other types of custom animations.- Make sure the Drawing toolbar is displayed. (View > Toolbars > Drawing)
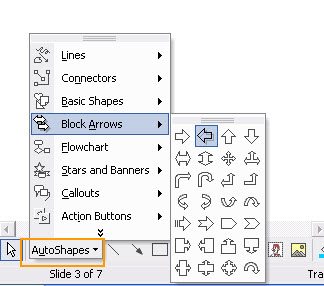
Select Autoshapes > Block Arrows from the Drawing toolbar.
Choose a left-facing arrow as shown.
-
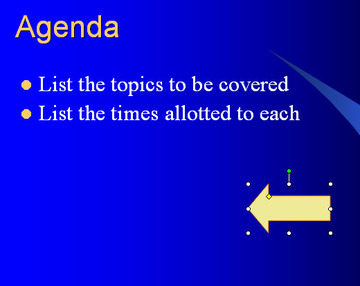
Dragging your cursor from left to right across the lower part of your slide, draw an arrow similar to the one shown.
-
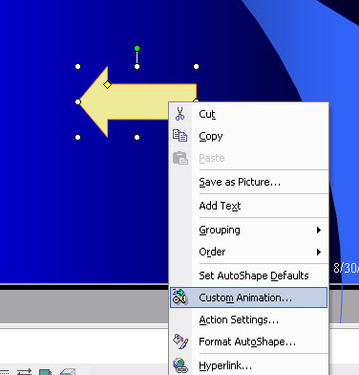
Right click in the middle of your arrow and select "Custom Animation" from the popup menu. The Custom Animation palette will appear.
-
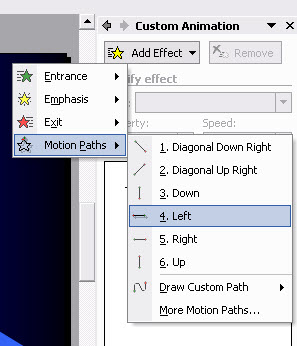
In the Custom Animation palette, select Motion Paths > Leftfrom the Add Effect menu. A motion path dotted line will appear on top of the arrow shape.
-
In the Custom Animation palette, select After Previous From the "Start" drop-down menu.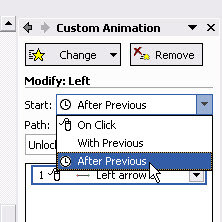
-
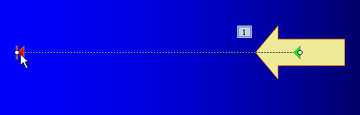
Click on the red arrow on the left side of the motion path. Be careful to just select the red arrow, or the entire line will move when you drag your cursor.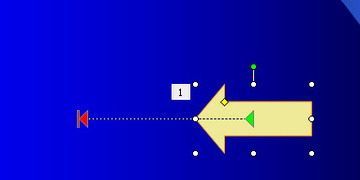
-
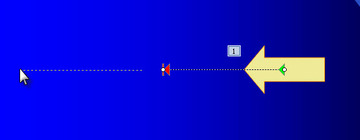
Drag the red arrow to the left side of the slide. Preview the slide to see your animation!
-
Download example powerpoint slide [motionpath.ppt.zip]
August 17, 2008
A workaround for the lack of trigger animations in Keynote
One Powerpoint feature that Keynote does not yet have is animation triggers. In Powerpoint, you can set an animation to be triggered when a particular object elsewhere on the slide is clicked. This can be used to create interactivity for web-based elearning, or perhaps for presentations where there is some interaction from the audience and the exact sequence of clicks is not figured out in advance.
A workaround to create a trigger effect is to make the triggers into hyperlinks that link to slides that look identical to the slide containing the trigger, but which contain the response animation. For each trigger, there will be a corresponding animation slide. The animations are set to begin "after transition" or in other words, right after the slide loads.
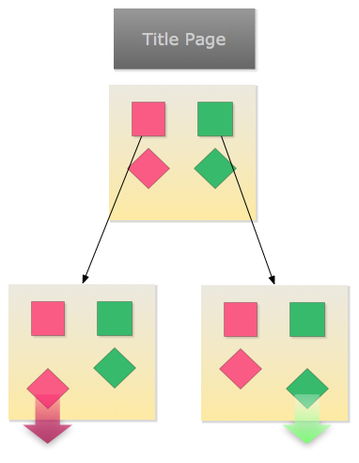
In the example shown here, the two round jewels serve as the triggers. Clicking either round jewel appears to trigger the corresponding square jewel's animation. What really happens, though, is that the presentation jumps to the slide containing the correct animation, which is triggered by that slide's loading.
Click here to view a flash version exported from the Keynote file
Click here to download the example keynote file (zip archive)
August 13, 2008
Getting the WYSIWYG module to work in Drupal 6
I had a lot of trouble getting TinyMCE text editor to work consistently in Drupal 5.9, so when I installed Drupal 6 and was scanning through the available modules, I was very glad to see that the WYSIWYG editor module could function as a replacement.
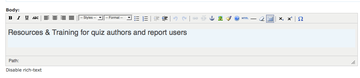
Although the easy-to-use WYSIWYG editor is popular with our site's users, sometimes I find it gets in the way, and want to turn it off.
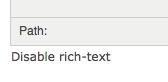
However after installing it, I found there was no way to turn it off on a case by case basis, because the "Disable rich-text" link was not working. The javascript error shown was "tinyMCE.getEditorId is not a function"
Some tips on the Drupal forums which led to the solution. First, I had not noticed that the current version of WYSIWYG editor is only compatible with version 2.1.x of TinyMCE. I had installed a later version. So I removed the later version and replaced it with the older one. When I looked at the readme.txt file that comes with the module, it indeed has a note that it is compatible with 2.1x, but of course I hadn't read it while installing!
Error: tinyMCE.getEditorId is not a function
Once the downgrade was in place, there was a NEW javascript error: "editorTemplate is undefined."
Another message on the drupal forums contained a patch which helped fix this issue.
Editor Base Path is being set incorrectly
Go into WYSIWYG-editor.module and patch it:
Index: wysiwyg_editor.module
===================================================================
RCS file: /cvs/drupal-contrib/contributions/modules/wysiwyg/wysiwyg_editor.module,v
retrieving revision 1.16
diff -u -p -r1.16 wysiwyg_editor.module
--- wysiwyg_editor.module 8 Jul 2008 02:54:21 -0000 1.16
+++ wysiwyg_editor.module 29 Jul 2008 15:23:03 -0000
@@ -139,7 +139,7 @@ function wysiwyg_editor_load() {
       'status' => $status,
       // If JS compression is enabled, at least TinyMCE is unable to determine
       // its own base path and exec mode since it can't find the script name.
-      'editorBasePath' => $GLOBALS['base_url'] . base_path() . $path_editor,
+      'editorBasePath' => base_path() . $path_editor,
       'execMode' => $exec_mode,
     )), 'setting');
     // Add our stylesheet to stack editor buttons into one row.
In other words, open wysiwyg_editor.module, and search for 'editorBasePath'
Replace the lines from 'editorBasePath' down to "//Add our stylesheet" as shown below:
'editorBasePath' => base_path() . $path_editor,
'execMode' => $exec_mode,
)), 'setting');
// Add our stylesheet to stack editor buttons into one row.
Save and upload.